How to add subtitles in DaVinci Resolve
To add subtitles in DaVinci Resolve, either let DaVinci Resolve Studio generate them with Timeline > AI Tools > Create Subtitles from Audio, or import an SRT file through the Media Pool and place it on a subtitle track, which works in the free version too. The free version cannot transcribe speech, so if you use it, make the SRT in Auto Subtitle Generator, correct it there, and import it.
Which way should you add subtitles in DaVinci Resolve?
| Route | Edition | Choose it when | You end up with |
|---|---|---|---|
| Create Subtitles from Audio | Studio only | You own Studio and its transcription copes with your audio | A subtitle track made on the timeline, styled and delivered from Resolve |
| Type subtitles by hand | Free or Studio | The video is short or has little speech | A subtitle track, one subtitle at a time |
| Our editor, then import the SRT | Free or Studio | You use the free edition, or someone without Resolve checks the words | The same subtitle track, built from a corrected SRT |
| Our editor, burned-in MP4 | Either, or none | The edit is locked and you need a captioned video to post | A finished MP4 with styled captions in the picture |
Underneath every route is one question: should viewers be able to turn the subtitles off? A subtitle file or embedded track can be; burned-in text cannot, but it survives reposting.
Can DaVinci Resolve create subtitles automatically?
Only in DaVinci Resolve Studio, the paid edition. The manual's chapter on subtitles and closed captioning heads the feature Create Subtitles from Audio (Studio Version Only), and the audio transcription it relies on carries the same label. The free download has no speech-to-text, so a free-version user either types every subtitle by hand or imports a file made elsewhere. Blackmagic's Studio page says its DaVinci Neural Engine powers many Studio-only features.
In Studio, the manual (pages 1234 and 1235) gives these steps:
- On the Edit page, open the timeline you want subtitled.
- Set an In and Out range if you only want part of it, or leave the range empty to subtitle the whole timeline.
- Choose Timeline > AI Tools > Create Subtitles from Audio.
- Pick the Language (or Auto), a Caption Preset, Max Characters per Line, one or two Lines, and the Gap Between Subtitles in frames (0 by default).
- Click Create. Resolve writes the subtitles to the highest subtitle track, and adds one if the timeline has none.
The manual admits the tool still commonly fails when dialogue overlaps on several audio tracks; mute the tracks you do not want analysed. It lists 14 languages built in (Simplified Mandarin Chinese, Danish, Dutch, English, French, German, Italian, Japanese, Korean, Norwegian, Portuguese, Russian, Spanish and Swedish) and dozens more through the Extended AI Transcription Support Package. For cleanup, the Subtitle Inspector has a search icon that opens find and replace across the whole track, the quick fix for a name misspelled throughout.
How do you import an SRT file into DaVinci Resolve?
This works in both editions. According to the manual's import pages, Resolve reads .srt, .srtx, .vtt, .xml and .ttml subtitle files. To bring one in:
- Open the Media Pool, right-click a bin or the empty browser area, and choose Import Subtitle.
- Put it on the timeline in one of two ways. Right-click the subtitle clip and choose Insert Selected Subtitles to Timeline Using Timecode, which places every subtitle by its time. Or drag the clip into the empty grey area above the video tracks, where Resolve makes a subtitle track for it, or onto a subtitle track you already have.
- Rename the track for its language (double-click the name). The manual warns that track names are used when subtitles are exported or encoded.
The two methods time the file differently. Dragging anchors the file to its first subtitle: each subtitle keeps its offset from the first one, and the first lands wherever you let go. An SRT made from a whole video starts its first subtitle when the first word is spoken, not at zero, so drop it on that frame. Inserting by timecode reads the times in the file as timeline timecode. A new Resolve timeline starts at 01:00:00:00 by default (page 678), while an SRT counts from 00:00:00, so for this method set the timeline's start to zero first: right-click it in the Media Pool and choose Timelines > Starting Timecode (page 839). Misplaced subtitles can be selected together and slid like any clips.
Resolve imports WebVTT directly, so a .vtt file needs no converting; the SRT vs VTT guide explains how the two differ.
How do you style subtitles in DaVinci Resolve?
Styling lives on the track, not in the file. An SRT carries only words and times, so imported subtitles arrive in the track's current look. The manual's styling pages work like this: click the subtitle track's header, open the Inspector, and choose its Track panel. That panel sets the default for every subtitle on the track: font and face, colour, size, line spacing, kerning, alignment, X and Y position, zoom, opacity and text anchoring, with Drop Shadow, Stroke and Background groups at the bottom.
- One subtitle different from the rest: select it and tick Customize Caption; highlight words to restyle only those.
- Reuse the look: the three-dot menu at the top right of the Subtitle Inspector has Save Track as Preset, and later Load Preset, plus export and import of `.preset` files to share a style between machines.
- Something more designed: drag a Fusion title template onto the subtitle track header. The manual says it overrides the track and per-caption styling. The Animated templates that highlight each word as it is spoken are marked Studio only.
Check that the text reads on your brightest and darkest shots: the subtitle contrast checker scores your text colour, its stroke or background, and your footage's lightest and darkest colours with WCAG contrast ratios, and the subtitle font guide compares faces at small sizes. Resolve can also warn about pacing: the Subtitles panel of the Project Settings flags subtitles past a characters-per-line limit, under a minimum duration, or above a characters-per-second rate (Blackmagic's defaults are 60, 3 seconds and 30). Broadcasters publish stricter limits, collected in the subtitle line length guide.
How do you export subtitles from DaVinci Resolve?
For the file alone, choose File > Export Subtitle, or right-click the subtitle track header and choose Export Subtitle. Either way the manual says you can save .srt or .vtt. To deliver subtitles with the video, use the Deliver page: at the bottom of the Video panel of the Render Settings is a group of subtitle settings, described in the rendering chapter. Tick Export Subtitle, then pick a Format:
- As a separate file: each subtitle track you tick is written beside the video, in the format chosen under Export As: IMSC1, DFXP, SRT or WebVTT.
- Burn into video: the currently selected subtitle track is rendered into every frame. Only one subtitle track can be visible at a time in Resolve, so enable the right language before you render.
- As embedded captions: the selected track travels inside the file as a metadata layer. The manual names CEA-608 closed captions in MXF OP1A and QuickTime files, with a Codec choice of Text or CEA-608, and says QuickTime and MXF renders can carry several subtitle tracks.
Blackmagic's Edit page overview sums up the same choice: subtitles rendered into the final video, or exported as separate TTML, SRT or VTT files. The burned-in vs closed captions guide weighs the two for each platform and for accessibility.
How do you make an SRT for Resolve without Studio?
This route does the transcription outside Resolve, so it works with the free edition, and brings back an SRT for the Media Pool. It is our SRT generator with a Resolve import at the end, and the same file imports into Premiere if the project moves there; the Premiere Pro subtitles walkthrough covers that side.
Render a reference copy of the whole timeline
In Resolve, clear any In and Out points and choose File > Quick Export, pick a preset and click Export. With no range set, the manual says the entire timeline is exported, so the subtitle times will match it. The copy only needs clear speech: up to 10 minutes and 500 MB on the free plan, or 120 minutes on Starter.
Upload it and check where the first caption starts
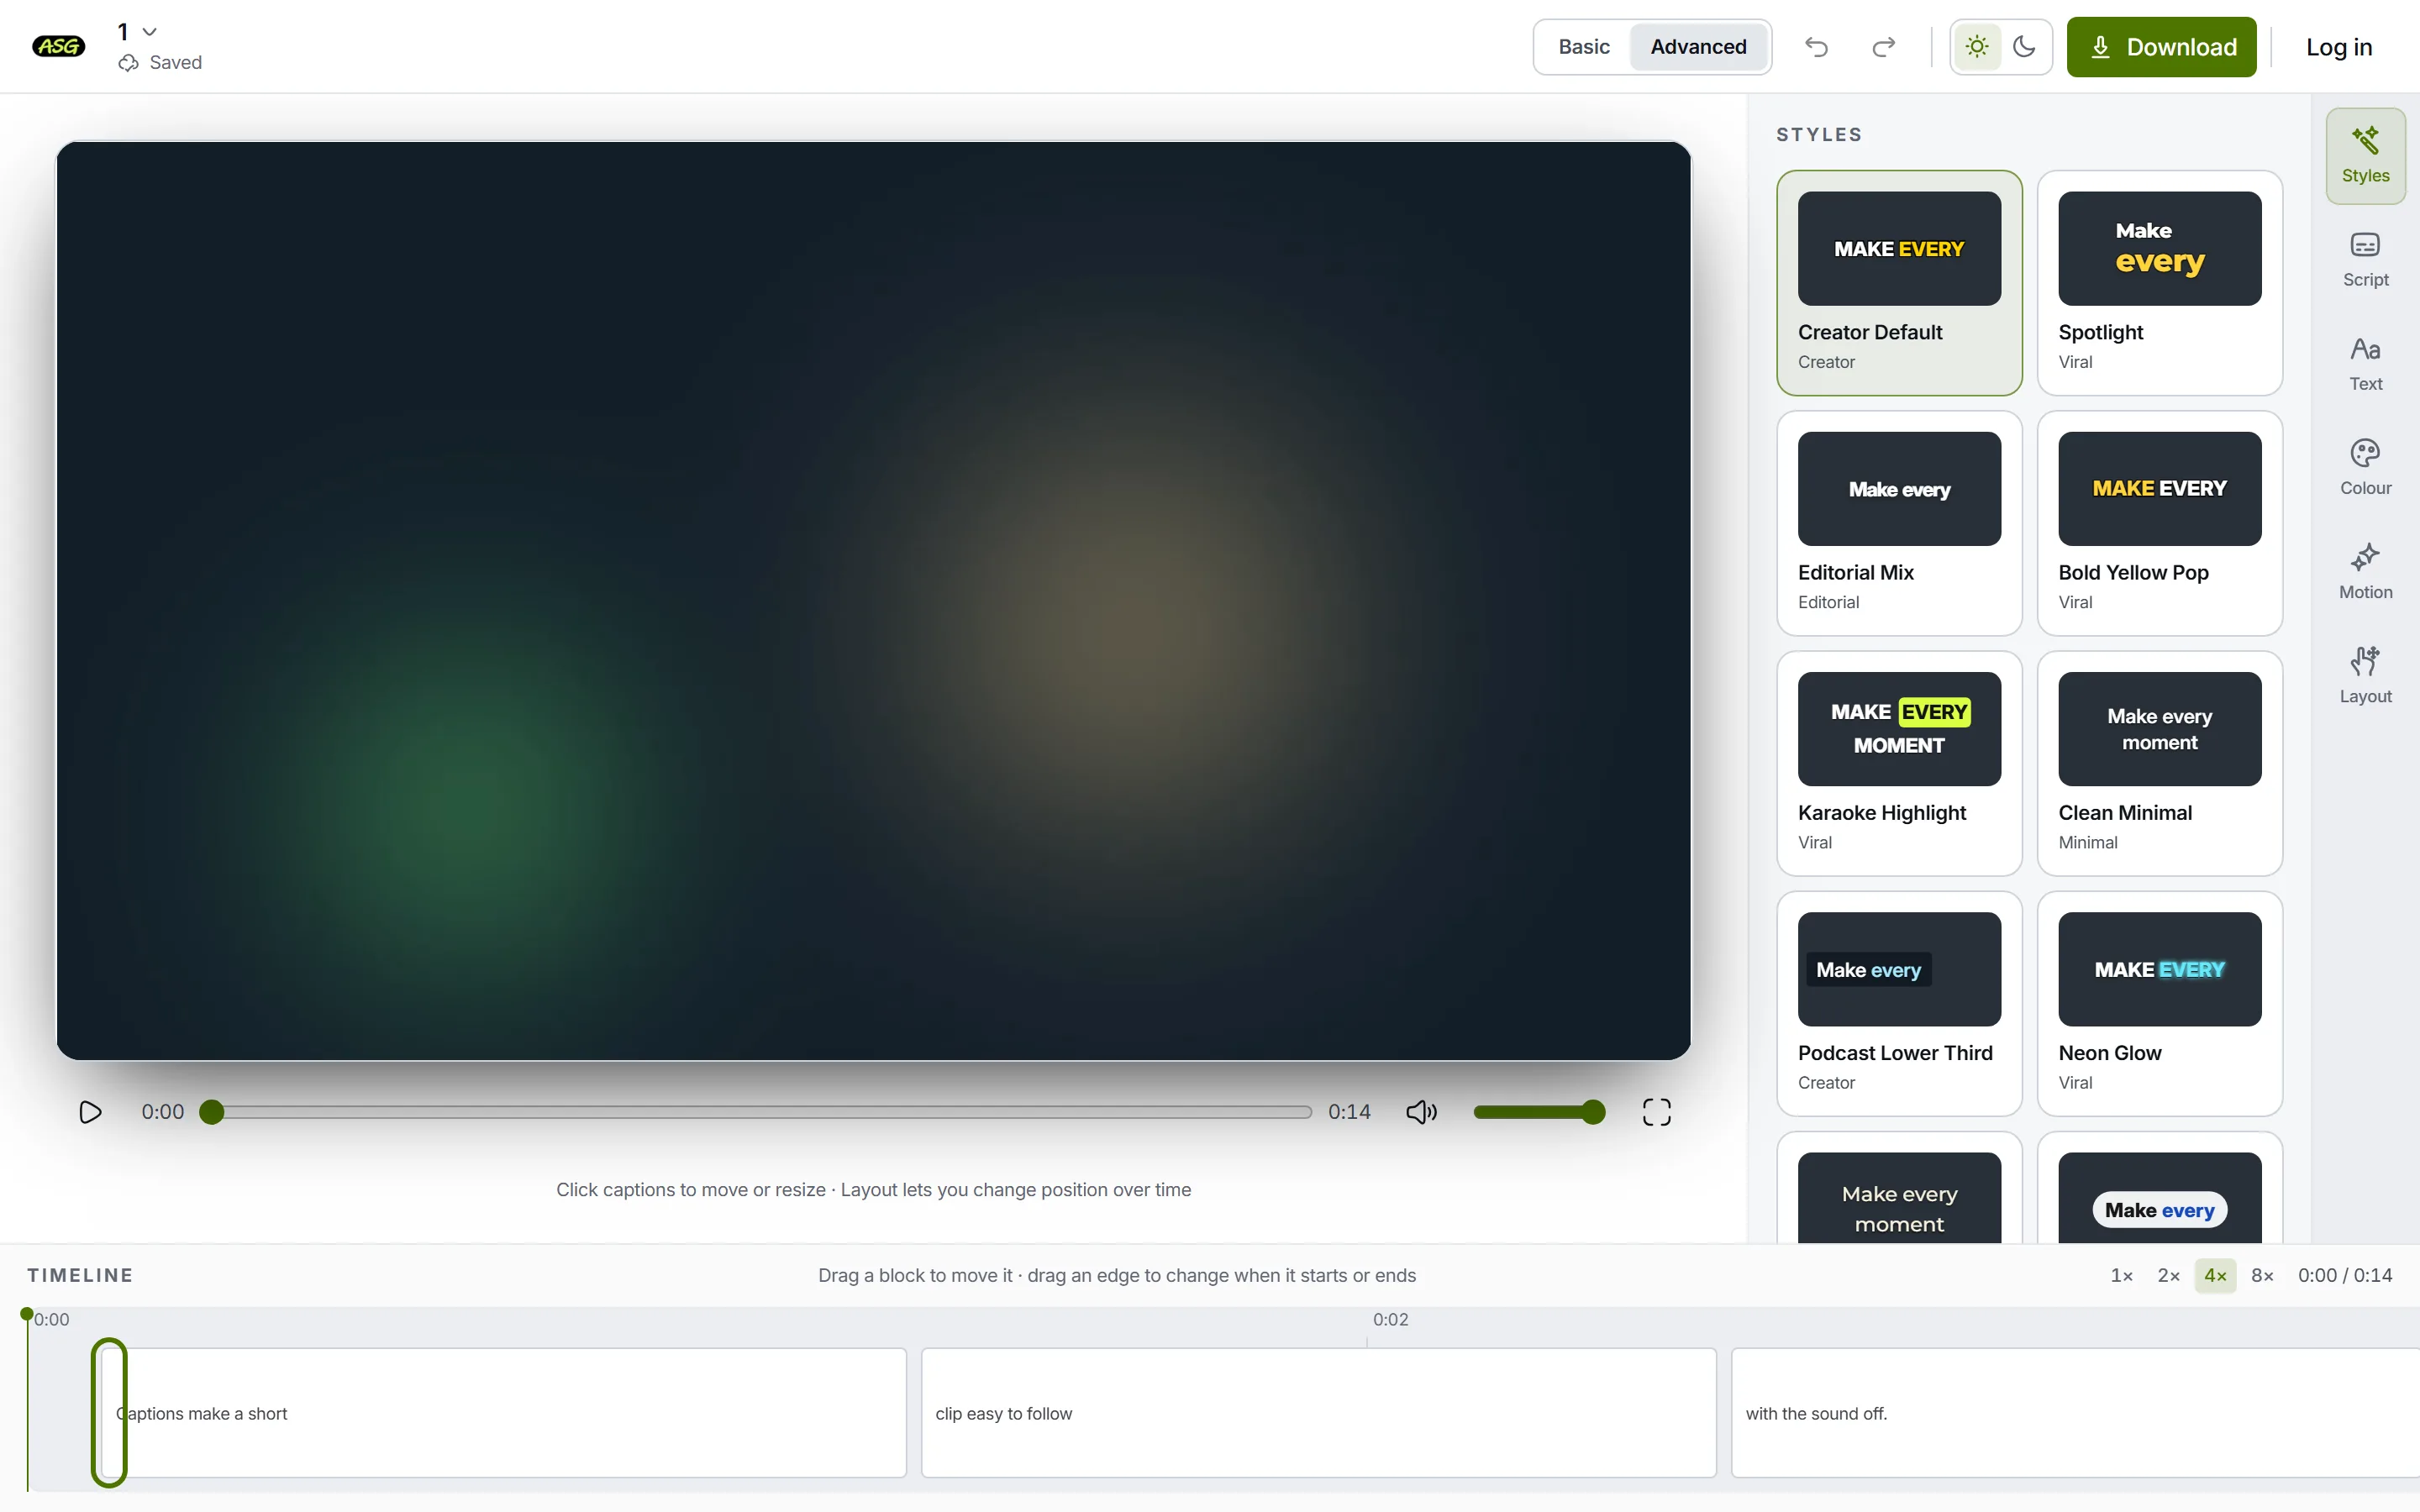
Drop the file on the uploader on the home page. You can start without an account. When transcription finishes, switch to Advanced: the timeline under the picture shows each caption as a block, and the left edge of the first block is the moment the first word is spoken. Remember it, because that is where the first subtitle goes if you drag the file into Resolve.
The first caption starts a moment after zero, when the first word is spoken. Correct the words in Script
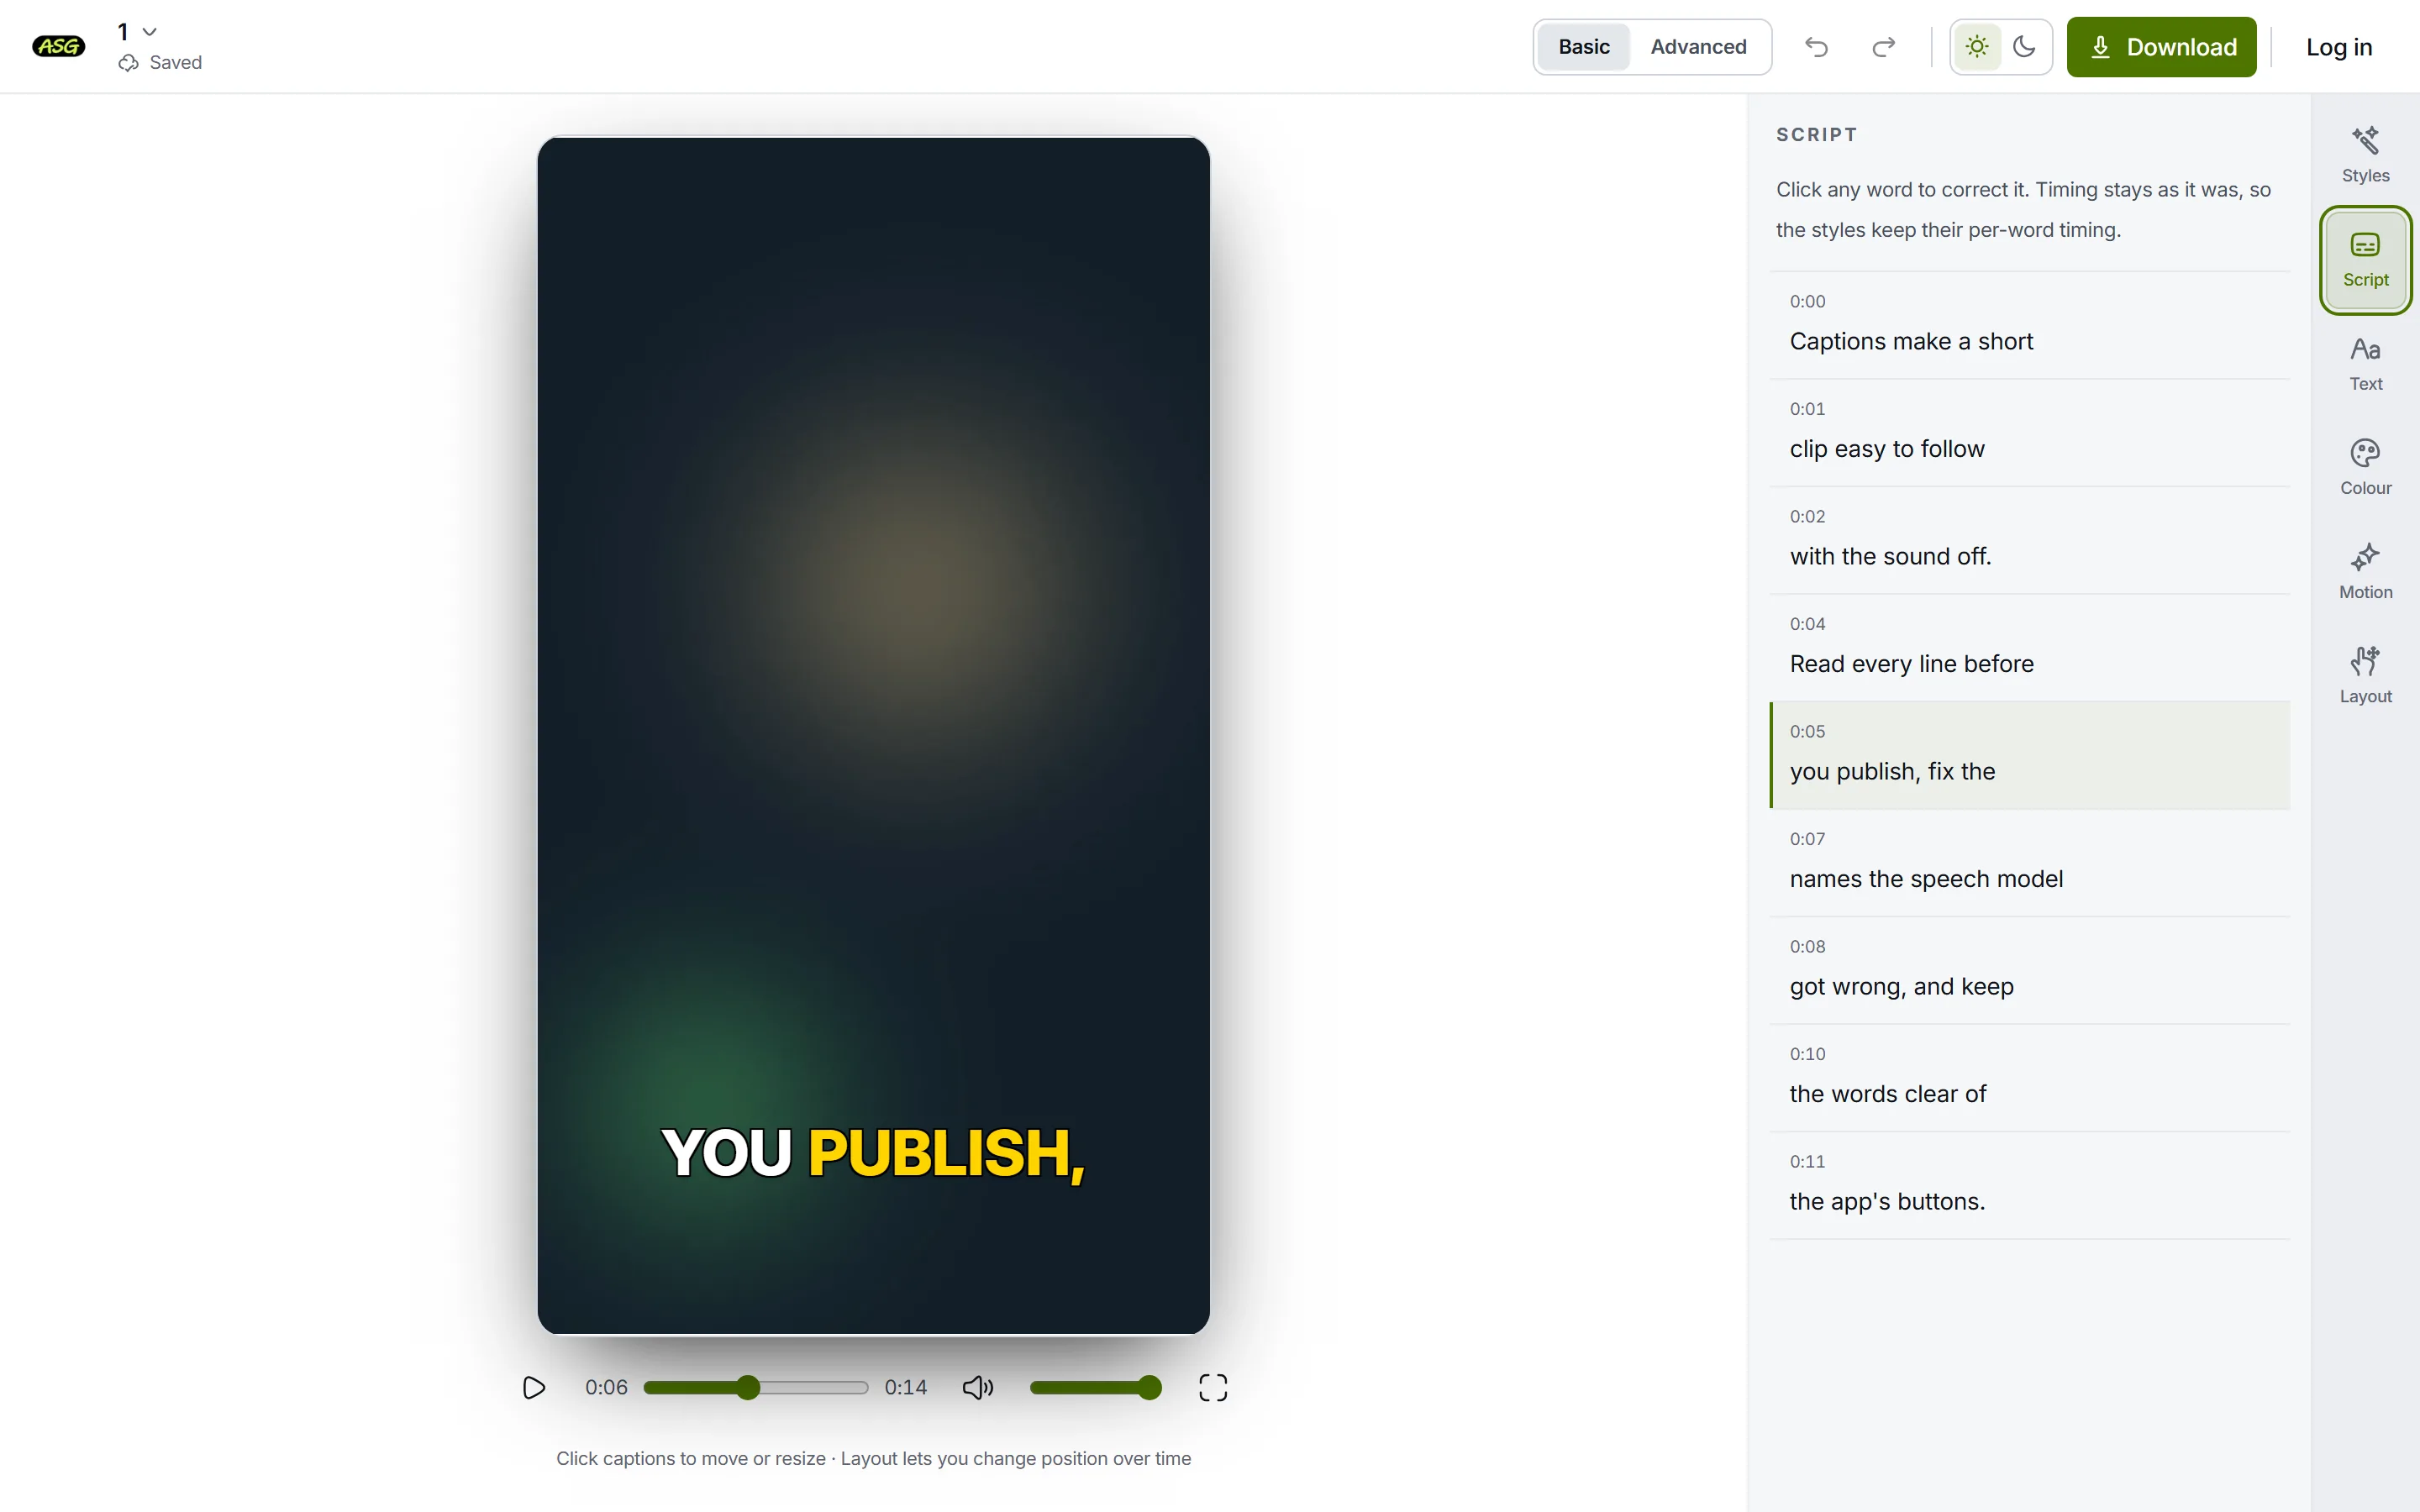
Open Script and read every line against the audio. Click a word, type the fix and press Enter, or press Escape to keep the original. The word keeps its timing, so the correction lands at the same moment in the SRT. Names and jargon are where speech recognition slips most.
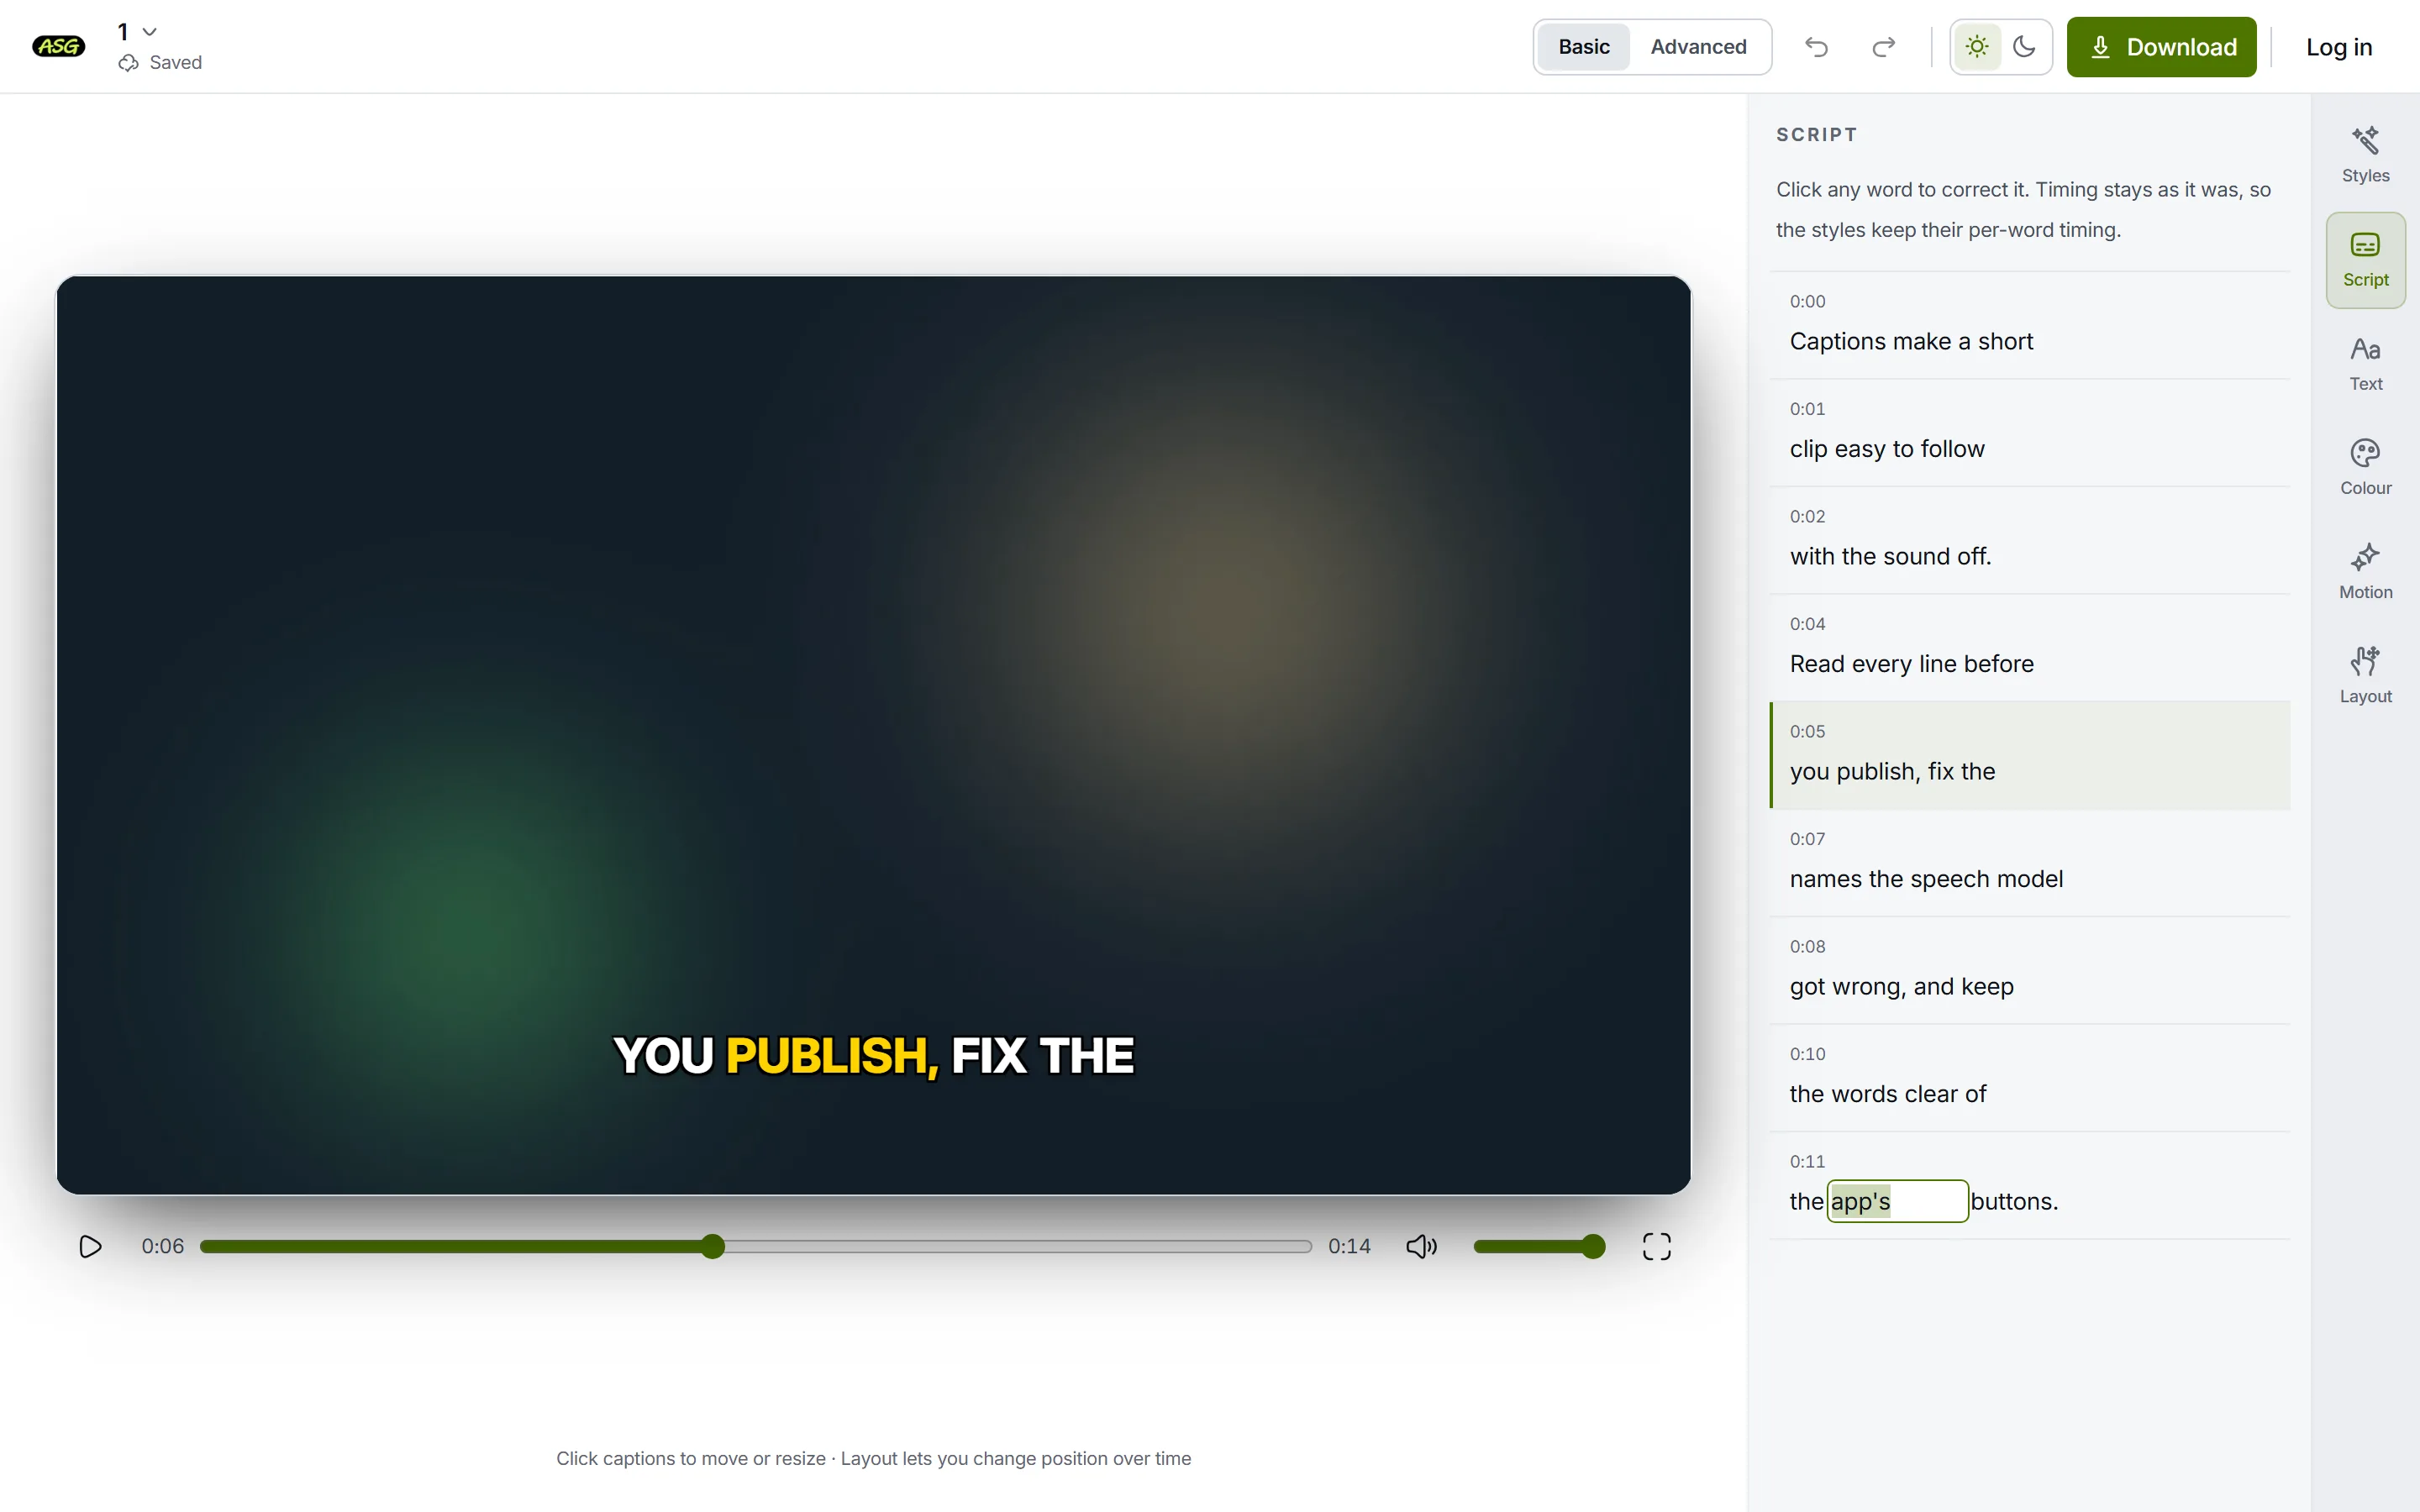
Script: each line is one subtitle in the SRT, and any word opens for correction. Download the SRT from Caption files only
Press Download, sign in free with Google or email if asked, open Caption files only (no video) and choose SRT. Caption files never touch the monthly video allowance, so you can fix another word and download again.
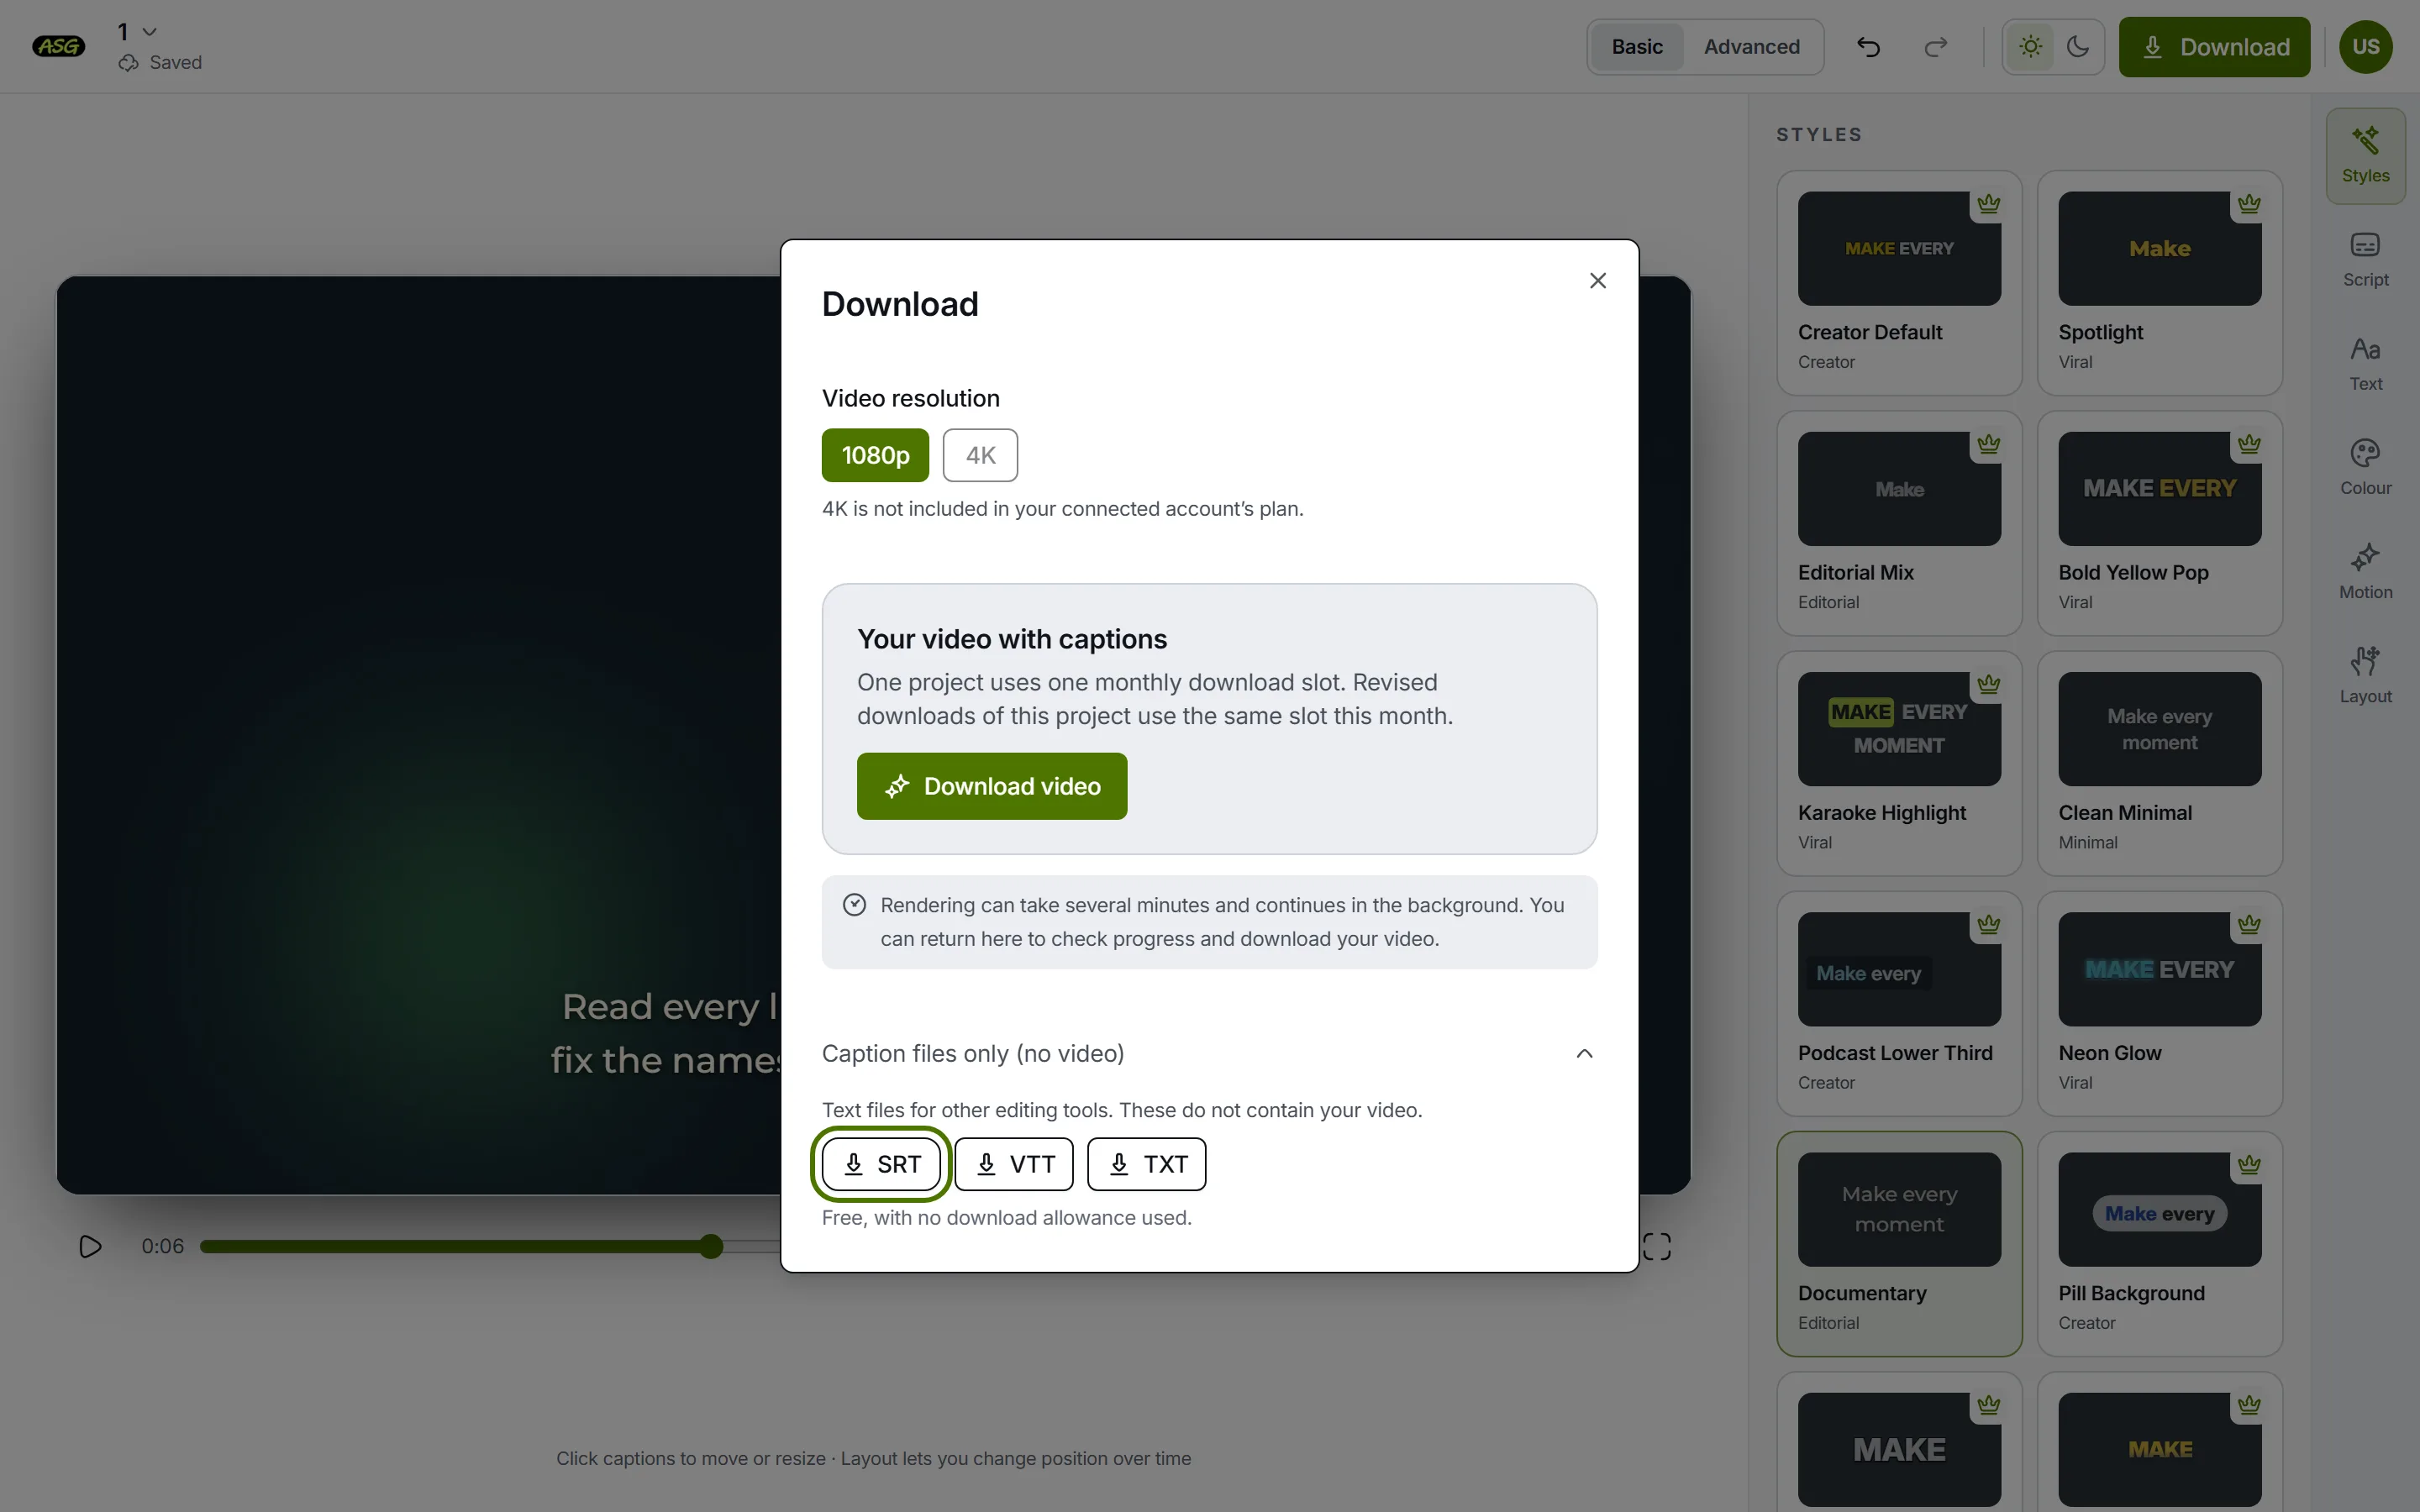
SRT, VTT and TXT are free downloads that use no allowance. Import it and place it by timecode or by its first word
Use Import Subtitle in the Media Pool and place it by timecode or by dragging, as described above. Opening the SRT in a text editor shows the exact start of subtitle 1. Play the first, a middle and the last subtitle to confirm the sync.
By default the file holds standard subtitles: up to 2 lines of 42 characters, broken at natural points and timed for reading, with no font, colour or position, because SubRip cannot carry them. That suits a documentary or a course. For fast social cuts, choose Match the editor’s lines in the download to get one short subtitle per Script line instead, up to four words by default.
Can you skip the subtitle track and download a burned-in MP4?
Yes, when the subtitles are the last thing the video needs. Render the finished timeline from the Deliver page at full quality, upload that, correct the Script, and let our editor draw the captions into the picture. The MP4 has no watermark on any plan, and exports at up to 1080p free or 4K on Starter. For the same steps on any video, not only a Resolve render, see adding subtitles to a video.
Choose a caption style
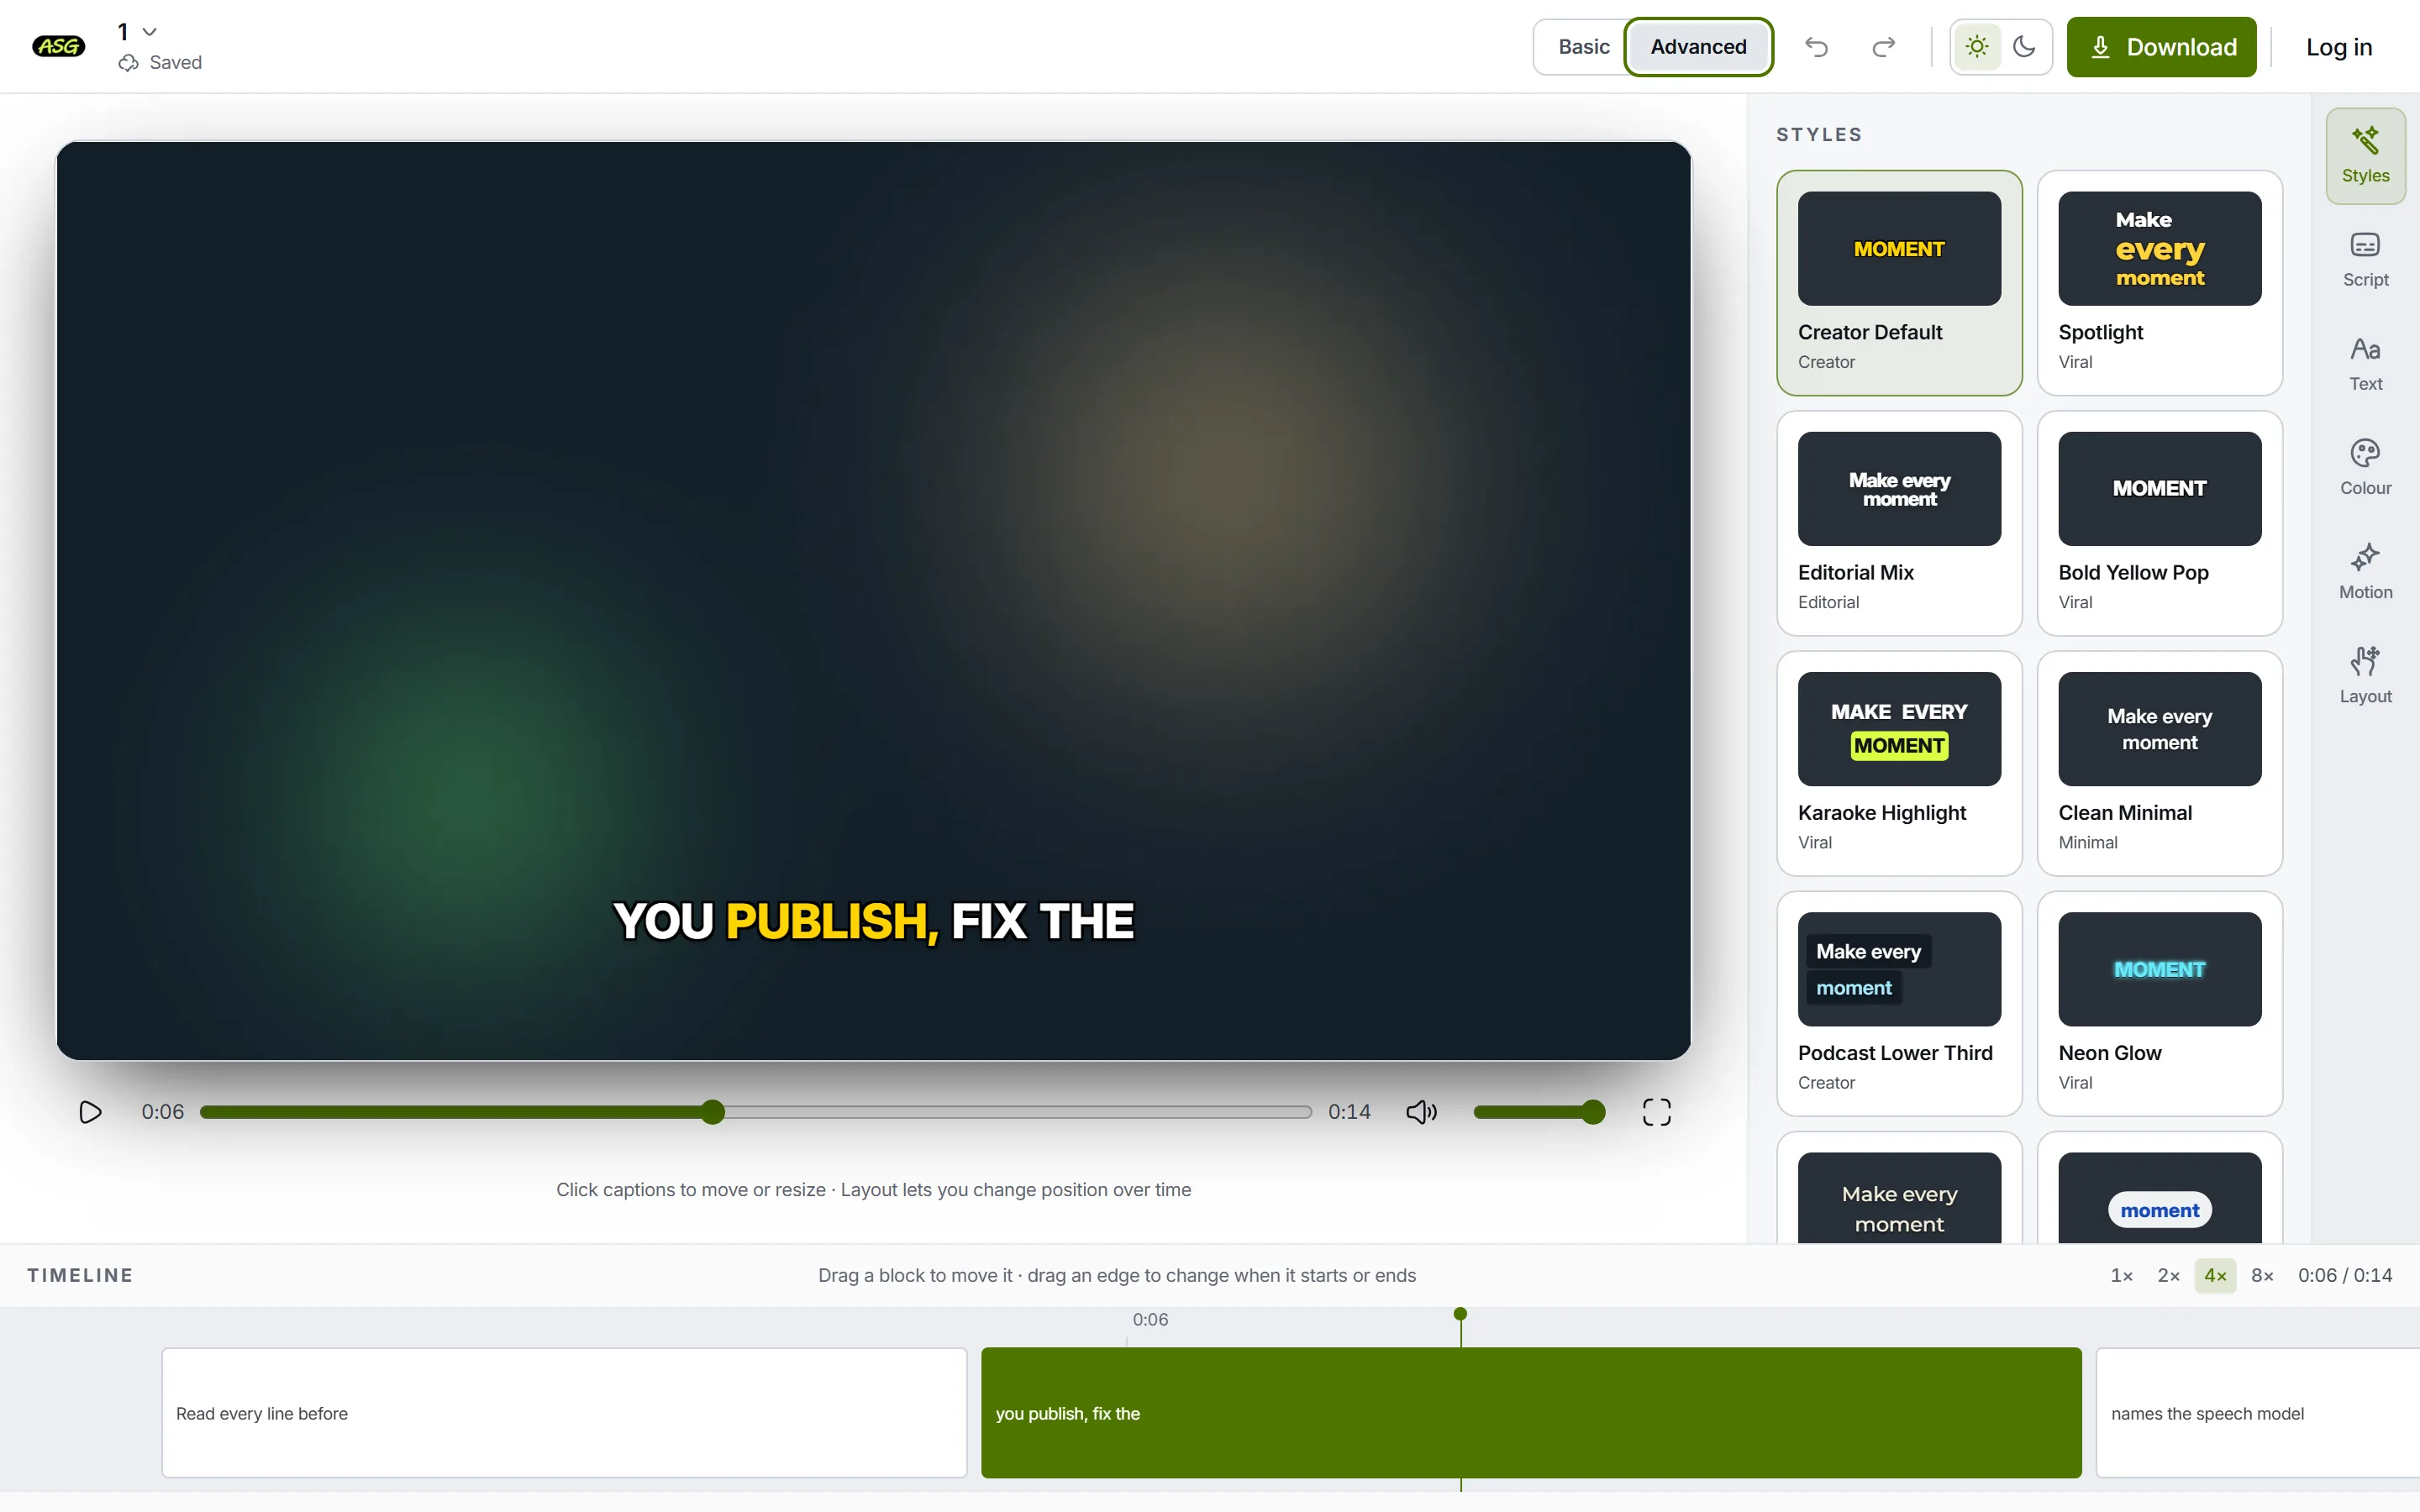
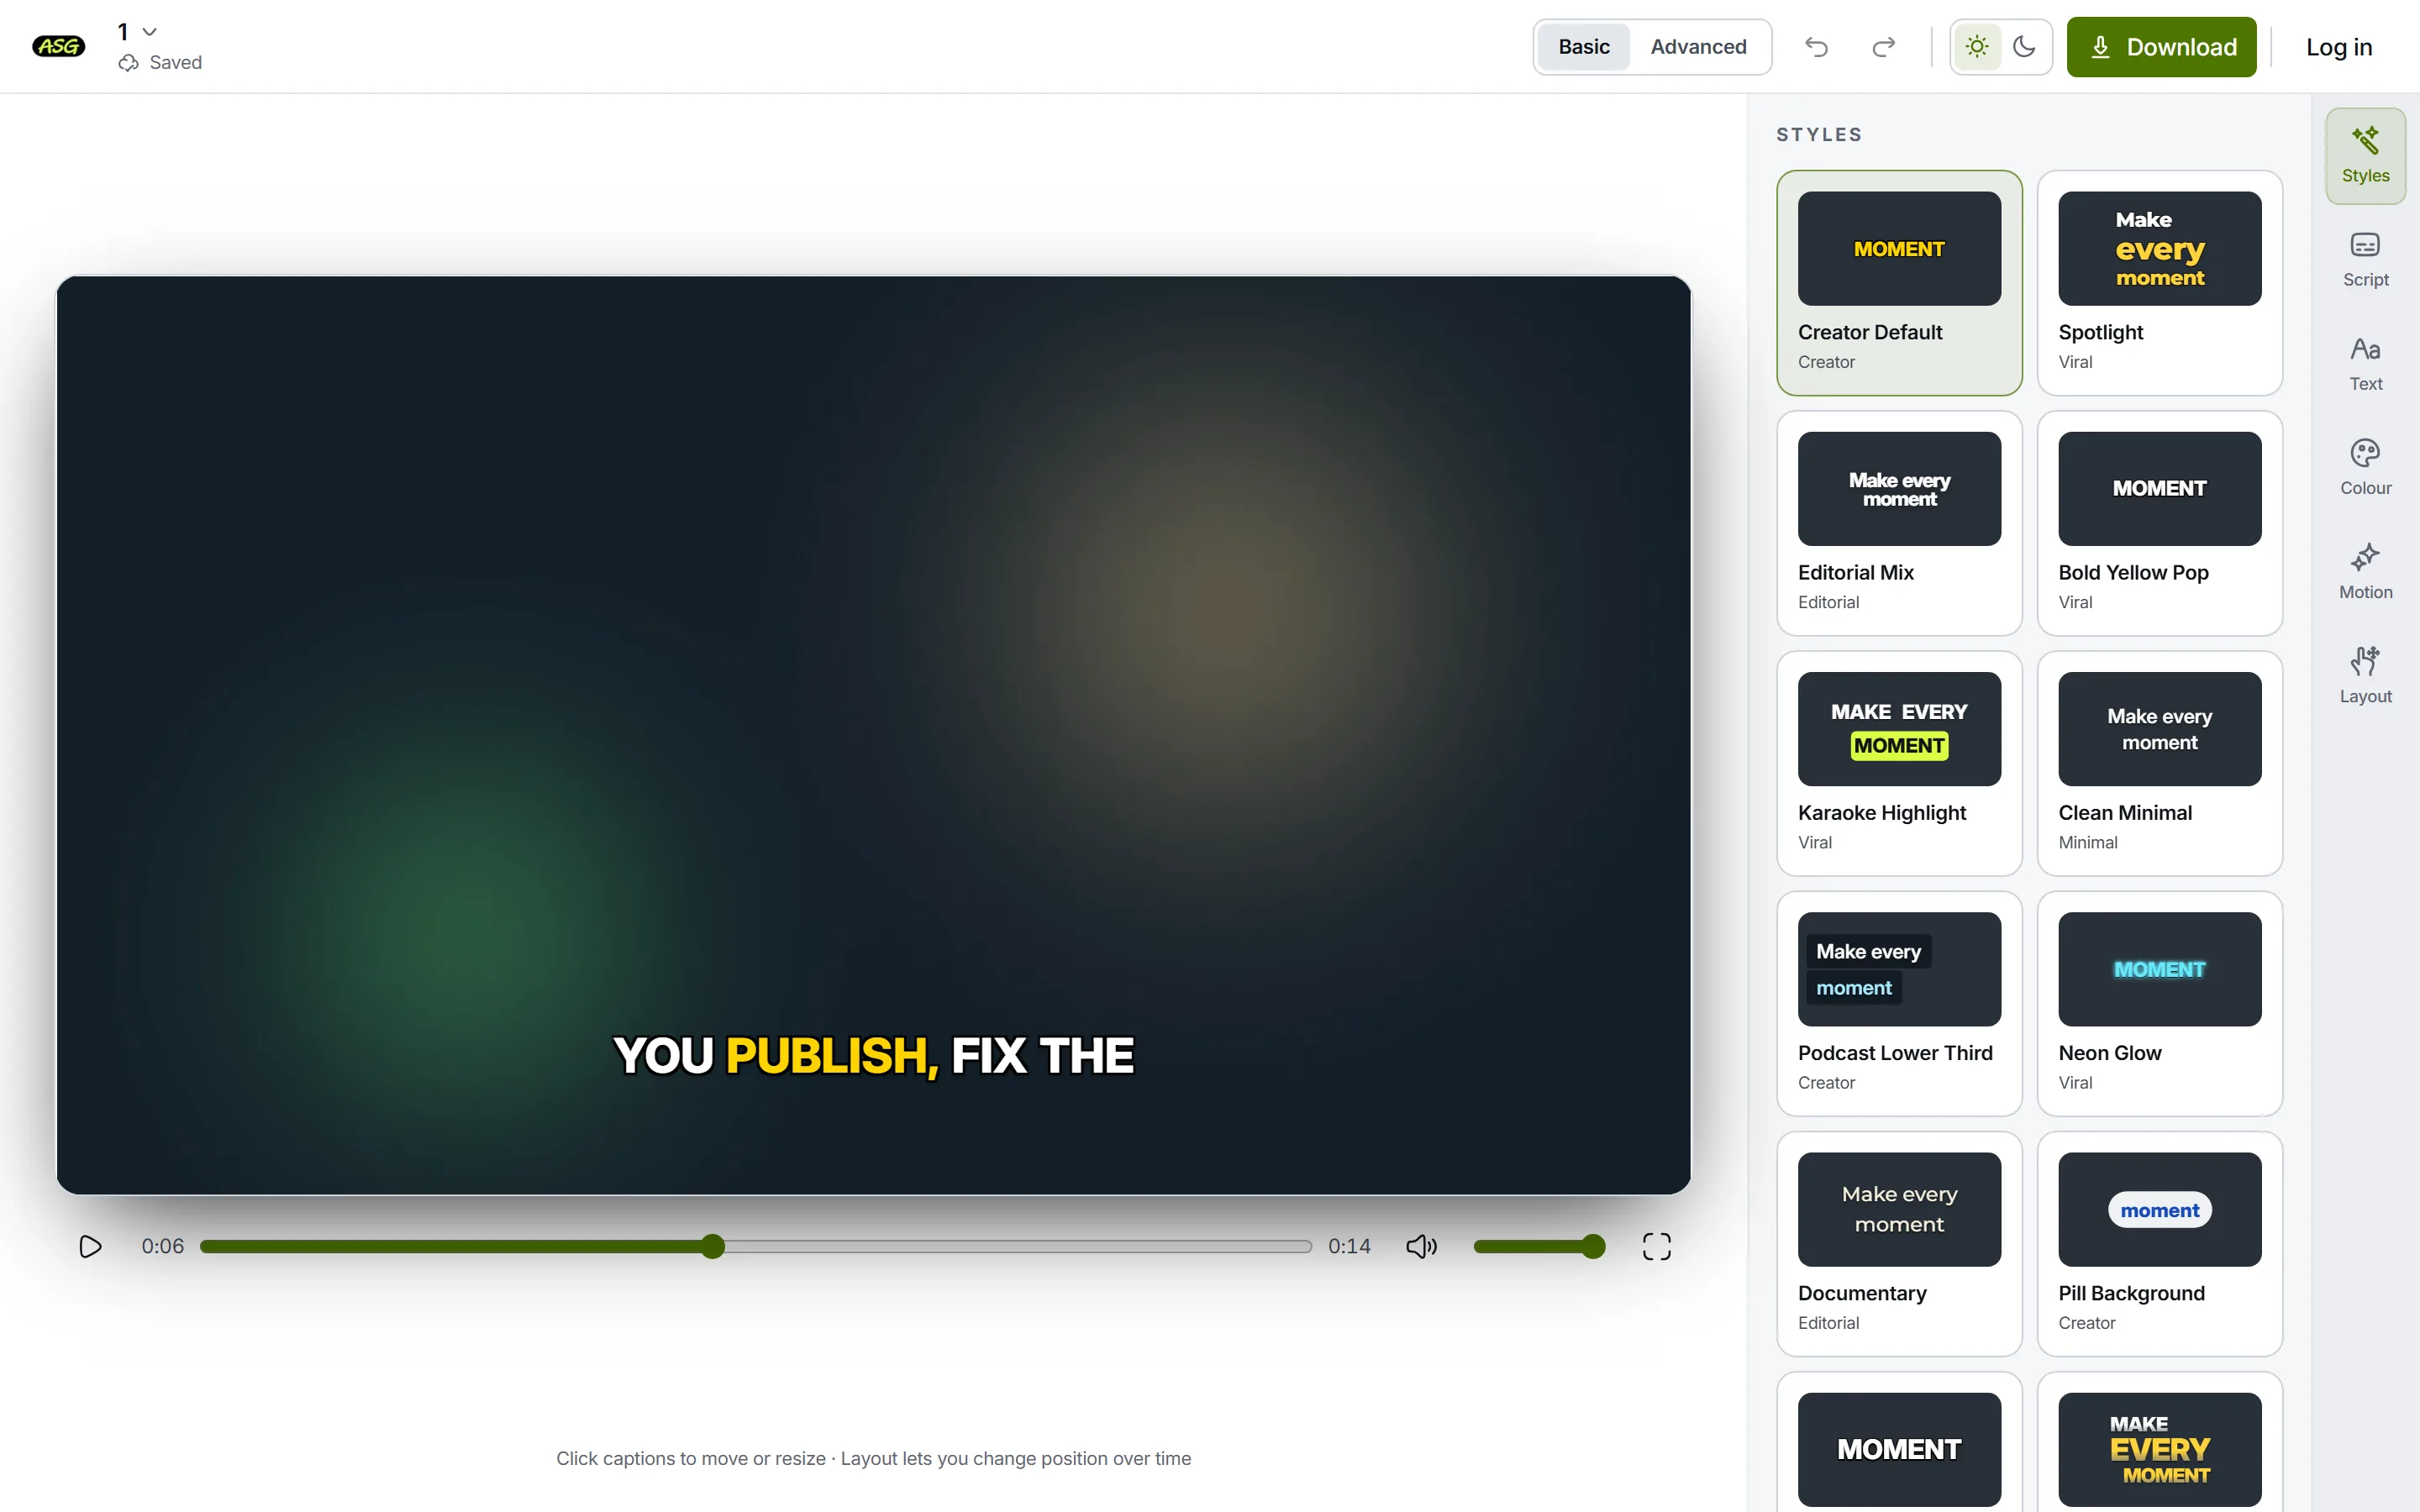
Open Styles and click a preset. The free plan exports Podcast Lower Third and Documentary; the rest, including word-by-word captions, export on Starter. Accounts created before 4 October 2026 keep Clean Minimal and Documentary instead. The style decides how many words appear on screen at once, so the preview can show longer lines than the timeline's blocks, which stay as the SRT's subtitles.
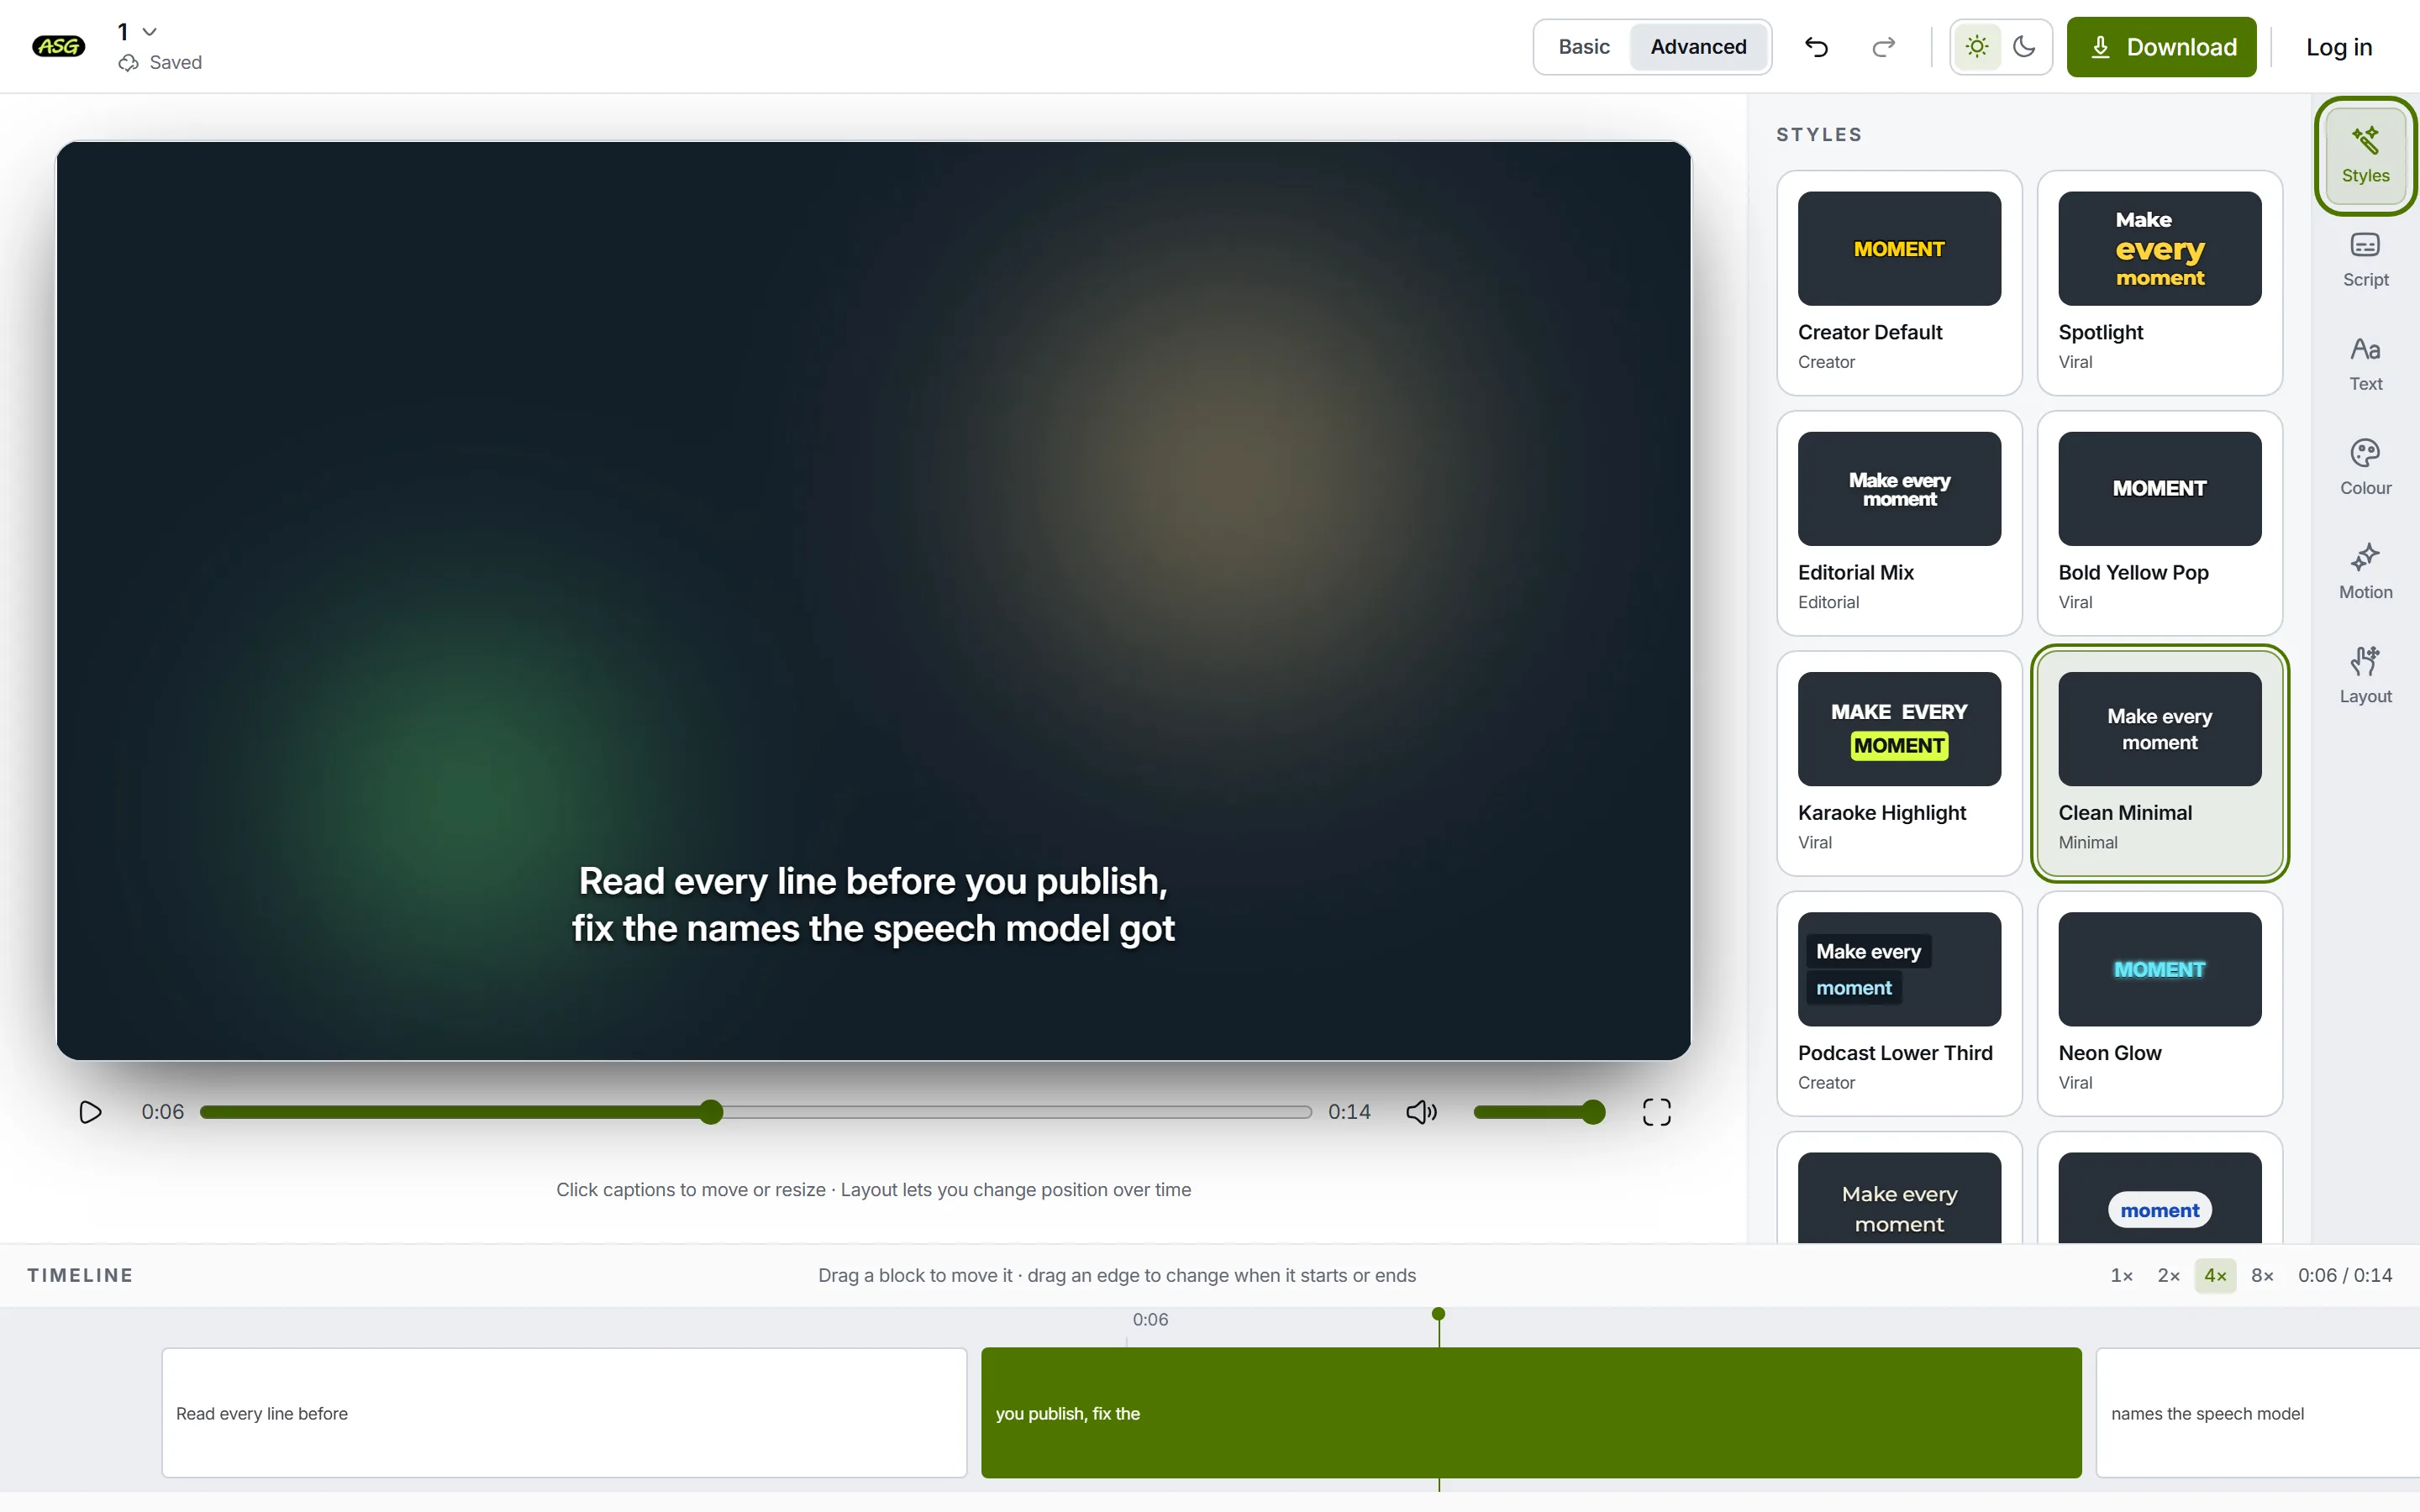
The preview is what the MP4 shows; the blocks below are what the SRT holds. Download the video
Press Download, keep or change the resolution, and select Download video. On the free plan that uses one of 3 video projects a month, and downloading a revised version of the same project reuses that slot.
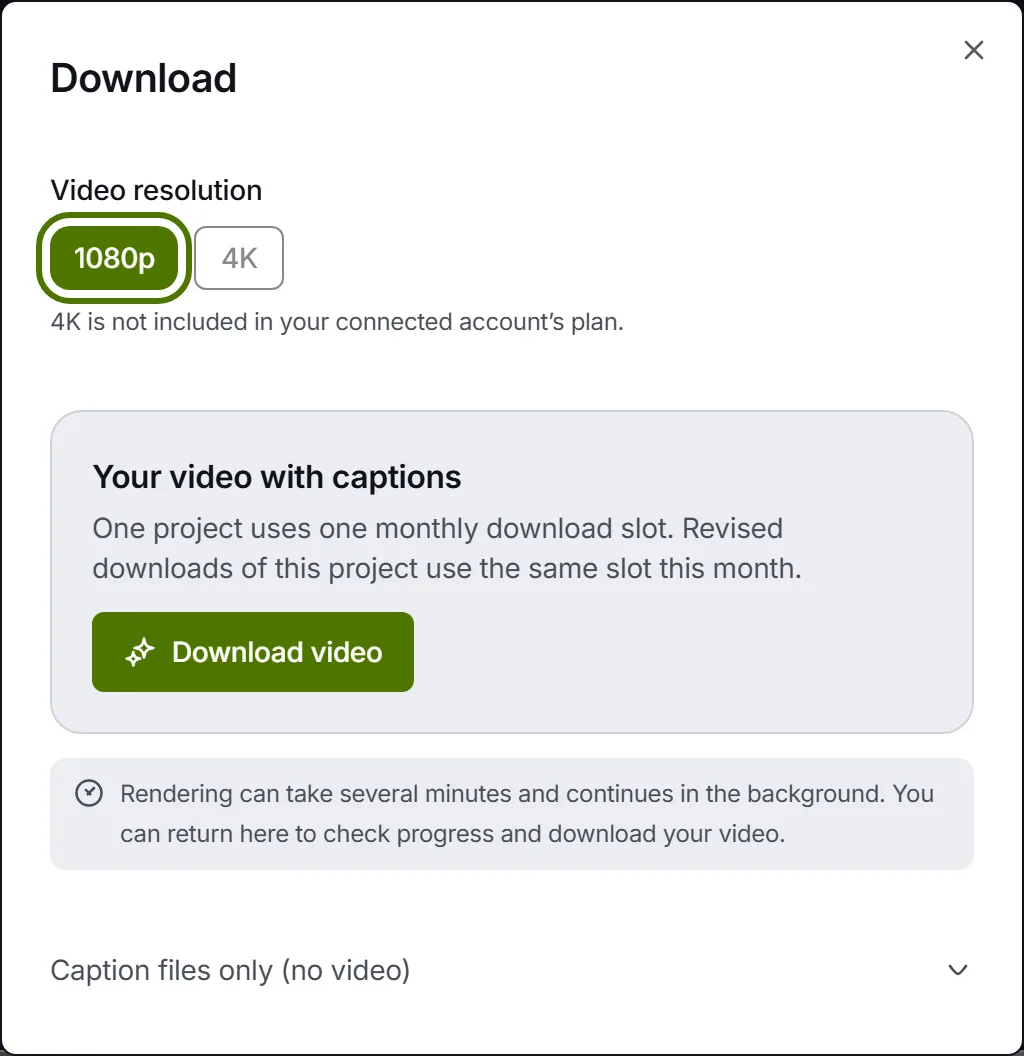
Pick the resolution, then Download video renders the captions into the MP4.
When is Resolve on its own enough?
If you own Studio, usually. Create Subtitles from Audio writes timed subtitles straight onto the timeline you are cutting, its dialog sets characters per line and one or two lines, find and replace cleans up the whole track, and the Animated title templates can highlight each word as it is spoken. For a long interview, a course or a film, stay in Studio.
Our route earns its place in three cases. You use the free edition, which has no transcription, and typing hundreds of subtitles by hand is the alternative. The person checking the words does not have Resolve: a client or a speaker checking their own name can correct the Script in a browser without touching your project. Or you want a styled, burned-in social cut without building the look from a Fusion template.
Why are imported subtitles out of sync in DaVinci Resolve?
Nearly always because the file and the timeline disagree about where time starts. Check these in order:
- Every subtitle is early or late by the same amount: a dragged file was dropped on the wrong frame, or the reference copy did not start at the timeline's first frame. Select all the subtitle clips and slide them, or shift the whole file with the subtitle timing shifter and import it again.
- Inserting by timecode puts nothing where you expect: the timeline probably still starts at 01:00:00:00 while the SRT starts at zero. Set its starting timecode to 00:00:00:00, or drag the file instead.
- The gap grows as the video plays: the edit changed after the SRT was made. Render the current timeline and make a fresh SRT; the out-of-sync subtitles guide shows how to tell drift from a fixed offset.
- The render has the wrong subtitles, or none: only one subtitle track can be enabled at a time, and burn-in uses the one that is. Enable the right track, and check Export Subtitle is ticked on the Deliver page.
- The file will not import: the subtitle validator lists broken timing lines and overlaps by line number. If accented letters look wrong, save the file again as UTF-8.
Frequently asked questions
Can the free version of DaVinci Resolve auto-generate subtitles?+
No. Blackmagic's manual labels Create Subtitles from Audio Studio Version Only. The free version can still import, style and export subtitles, so an SRT made elsewhere gets you the same track.
How do I import an SRT file into DaVinci Resolve?+
Right-click in the Media Pool and choose Import Subtitle, then drag the subtitle clip above the video tracks or right-click it and choose Insert Selected Subtitles to Timeline Using Timecode.
Why do my imported subtitles start in the wrong place?+
A dragged SRT puts its first subtitle where you let go, so drop it where the first word is spoken. Inserted by timecode, it needs a timeline starting at 00:00:00:00, not the default 01:00:00:00.
How do I burn subtitles into a video in DaVinci Resolve?+
On the Deliver page, in the Video panel of the Render Settings, tick Export Subtitle and set Format to Burn into video. The enabled subtitle track is the one burned in.
Can DaVinci Resolve export an SRT file?+
Yes: File > Export Subtitle saves .srt or .vtt, and the Deliver page can write SRT, WebVTT, DFXP or IMSC1 beside the render.
Is the SRT from Auto Subtitle Generator free?+
Yes. SRT, VTT and TXT downloads never use one of the free plan's 3 monthly video downloads. Start without an account; sign in free with Google or email to download.
Make the SRT for your next Resolve timeline
Upload a render of your timeline, correct what the speech model misheard, and download the SRT free, or the captioned MP4 if the edit is done. Start without an account; sign in free to download. No watermark on any plan.
Upload your video