How to add subtitles in Premiere Pro
To add subtitles in Premiere Pro, transcribe the sequence with Speech to Text in the Text panel, then choose Create captions from transcript; or import an SRT file and drag it into the sequence. If someone without Premiere needs to correct the words, transcribe and fix them in Auto Subtitle Generator and import the SRT it gives you.
Every Premiere step here is taken from Adobe's own help pages, linked where they are used and read on 2026-11-05; Adobe's current help calls the desktop app Adobe Premiere. The screenshots are of our editor, captured at each step of our route.
Which way should you add subtitles in Premiere Pro?
| Route | Best when | What you end up with |
|---|---|---|
| Premiere's Speech to Text | You edit in Premiere and its transcription handles your audio well | A caption track in the sequence, styled and exported from Premiere |
| Our editor, then import the SRT | Someone else proofreads the words, or you want the corrections done outside the timeline | The same caption track in Premiere, built from a corrected SRT |
| Our editor, burned-in MP4 | The edit is locked and you only need a captioned video to post | A finished MP4 with styled captions in the picture, no Premiere export of captions |
Whichever you choose, the decision underneath is whether viewers should be able to turn the subtitles off. A separate SRT or an embedded track can be switched off and restyled by the player; burned-in text cannot, but it survives reposting and muted autoplay.
How do you auto-generate subtitles with Premiere's Speech to Text?
Premiere's built-in route has two stages: transcribe the sequence, then turn the transcript into a caption track. Adobe's captions overview describes the same order, and advises adding captions when the edit is finished or nearly so, because deleting caption segments means recreating them by hand if that part of the edit comes back. The steps below follow Adobe's Speech to Text page and its Create captions page.
- Open the sequence and choose Window > Text to show the Text panel. Switching to Window > Workspaces > Captions and Graphics gives you the Text panel, Program Monitor, Properties and Timeline together.
- On the Transcript tab, open the transcription options (Adobe's page calls the choice Generate static transcript; its single-word captions page calls the same step Transcribe sequence).
- Set the Language, downloading its language pack if Premiere asks, and choose whether to separate speakers. You can also limit transcription to the range between your In and Out points.
- Select Transcribe and wait for the transcript.
- Read the transcript and fix what it misheard. The Text panel has a search field with Replace and Replace all, documented on Adobe's find and replace page, which is the quick way to correct a name spelled wrong every time.
- Choose Create captions from transcript on the Captions tab. In the dialog, pick a caption preset (Subtitle default suits most videos), the format, a saved style, the maximum length and duration of each caption, the gap between captions, and one or two lines.
- Select Create captions. Premiere adds a caption track to the timeline, timed to the dialogue.
Two options in that dialog matter for social video. Under Captioning Preferences > Layout, Single Word makes a track with one word per caption, according to Adobe's single-word captions page. And the length and line settings decide how much text sits on screen at once; the subtitle line length guide sets out the limits broadcasters publish, if you want a number to type in.
Adobe's Speech to Text product page says the feature is included in a Premiere subscription with no set limit for fair individual use, works offline from version 22.2 once a language pack is installed, and ships with English. Adobe's language list names 18 languages and variants, including English, English (UK), Spanish, French, German, Japanese, Korean, Hindi, Mandarin and Cantonese.
How do you import an SRT file into Premiere Pro?
If the subtitles come from somewhere else, such as a transcription service or the route later in this article, Premiere treats the file as media. Adobe's page on importing a caption file gives three steps:
- Import the SRT into your project the way you import any clip.
- Drag it from the Project panel into the sequence.
- Premiere creates a new caption track and places the captions on it, where you can edit them in the Text panel.
Adobe says you can drop the file anywhere in the sequence. Where you drop it decides the timing, though: an SRT counts its times from the start of the video it was made from, so a file made from the whole finished sequence belongs at the very start of the timeline. Premiere also reads SCC, MCC, STL, DFXP and XML caption files, according to its supported caption formats page. For a WebVTT file, the VTT to SRT converter turns it into SubRip in the browser first, and the SRT vs VTT guide explains what differs between the two.
How do you style captions in Premiere Pro?
An SRT carries words and times, not a look, so imported captions arrive in Premiere's default style and are styled there like generated ones. Adobe's page on caption styles describes the workflow: select caption text in the Timeline, then use the Properties panel for font, Fill, Stroke, Shadow and alignment. To reuse the look, select the plus icon beside the Track style menu and choose Create style, saving it to the project or to your local styles for other projects.
Two things to check while you style: that the text stays clear of whatever the platform draws over the frame (the subtitle safe areas guide maps those zones), and that the font still reads at phone size. The subtitle font guide compares faces for exactly that.
How do you export subtitles from Premiere Pro?
Adobe's caption track export page starts from Export in the header bar, which opens the Export workspace, where the captions settings offer three outcomes:
- Burn in: the active caption tracks are rendered into the picture, whatever their format. Every player shows them and nobody can turn them off.
- Sidecar file: a separate caption file beside the video. SRT takes one caption stream per file; SCC, MCC, XML and STL each accept only certain broadcast caption types.
- Embed: the captions travel inside the export file. Adobe lists CEA-608, CEA-708 and OP-47 streams for this, and its captions overview names QuickTime and MXF as the containers.
If you only need the file, Adobe's export selected captions page gives a shortcut that renders nothing: on the Text panel's Captions tab, open the ellipsis menu, choose Export, and pick Export to SRT file (plain text and CSV are offered too). Which to choose depends on where the video goes; the burned-in vs closed captions guide weighs the two for accessibility and for each platform.
How do you make the SRT in Auto Subtitle Generator and bring it into Premiere?
This route moves the transcription and the proofreading out of Premiere and brings back only the finished file. It is the same caption workflow as our SRT generator, with the Premiere import at the end.
Export a reference copy of the finished sequence
In Premiere, use Quick Export in the upper-right corner to save an H.264 file of the whole sequence, as Adobe's quick export page describes. Export from the first frame, so the subtitle times will line up with the timeline later. The copy only needs to carry clear speech; on the free plan it can run to 10 minutes and 500 MB, and Starter takes up to 120 minutes.
Upload it and let the editor transcribe it
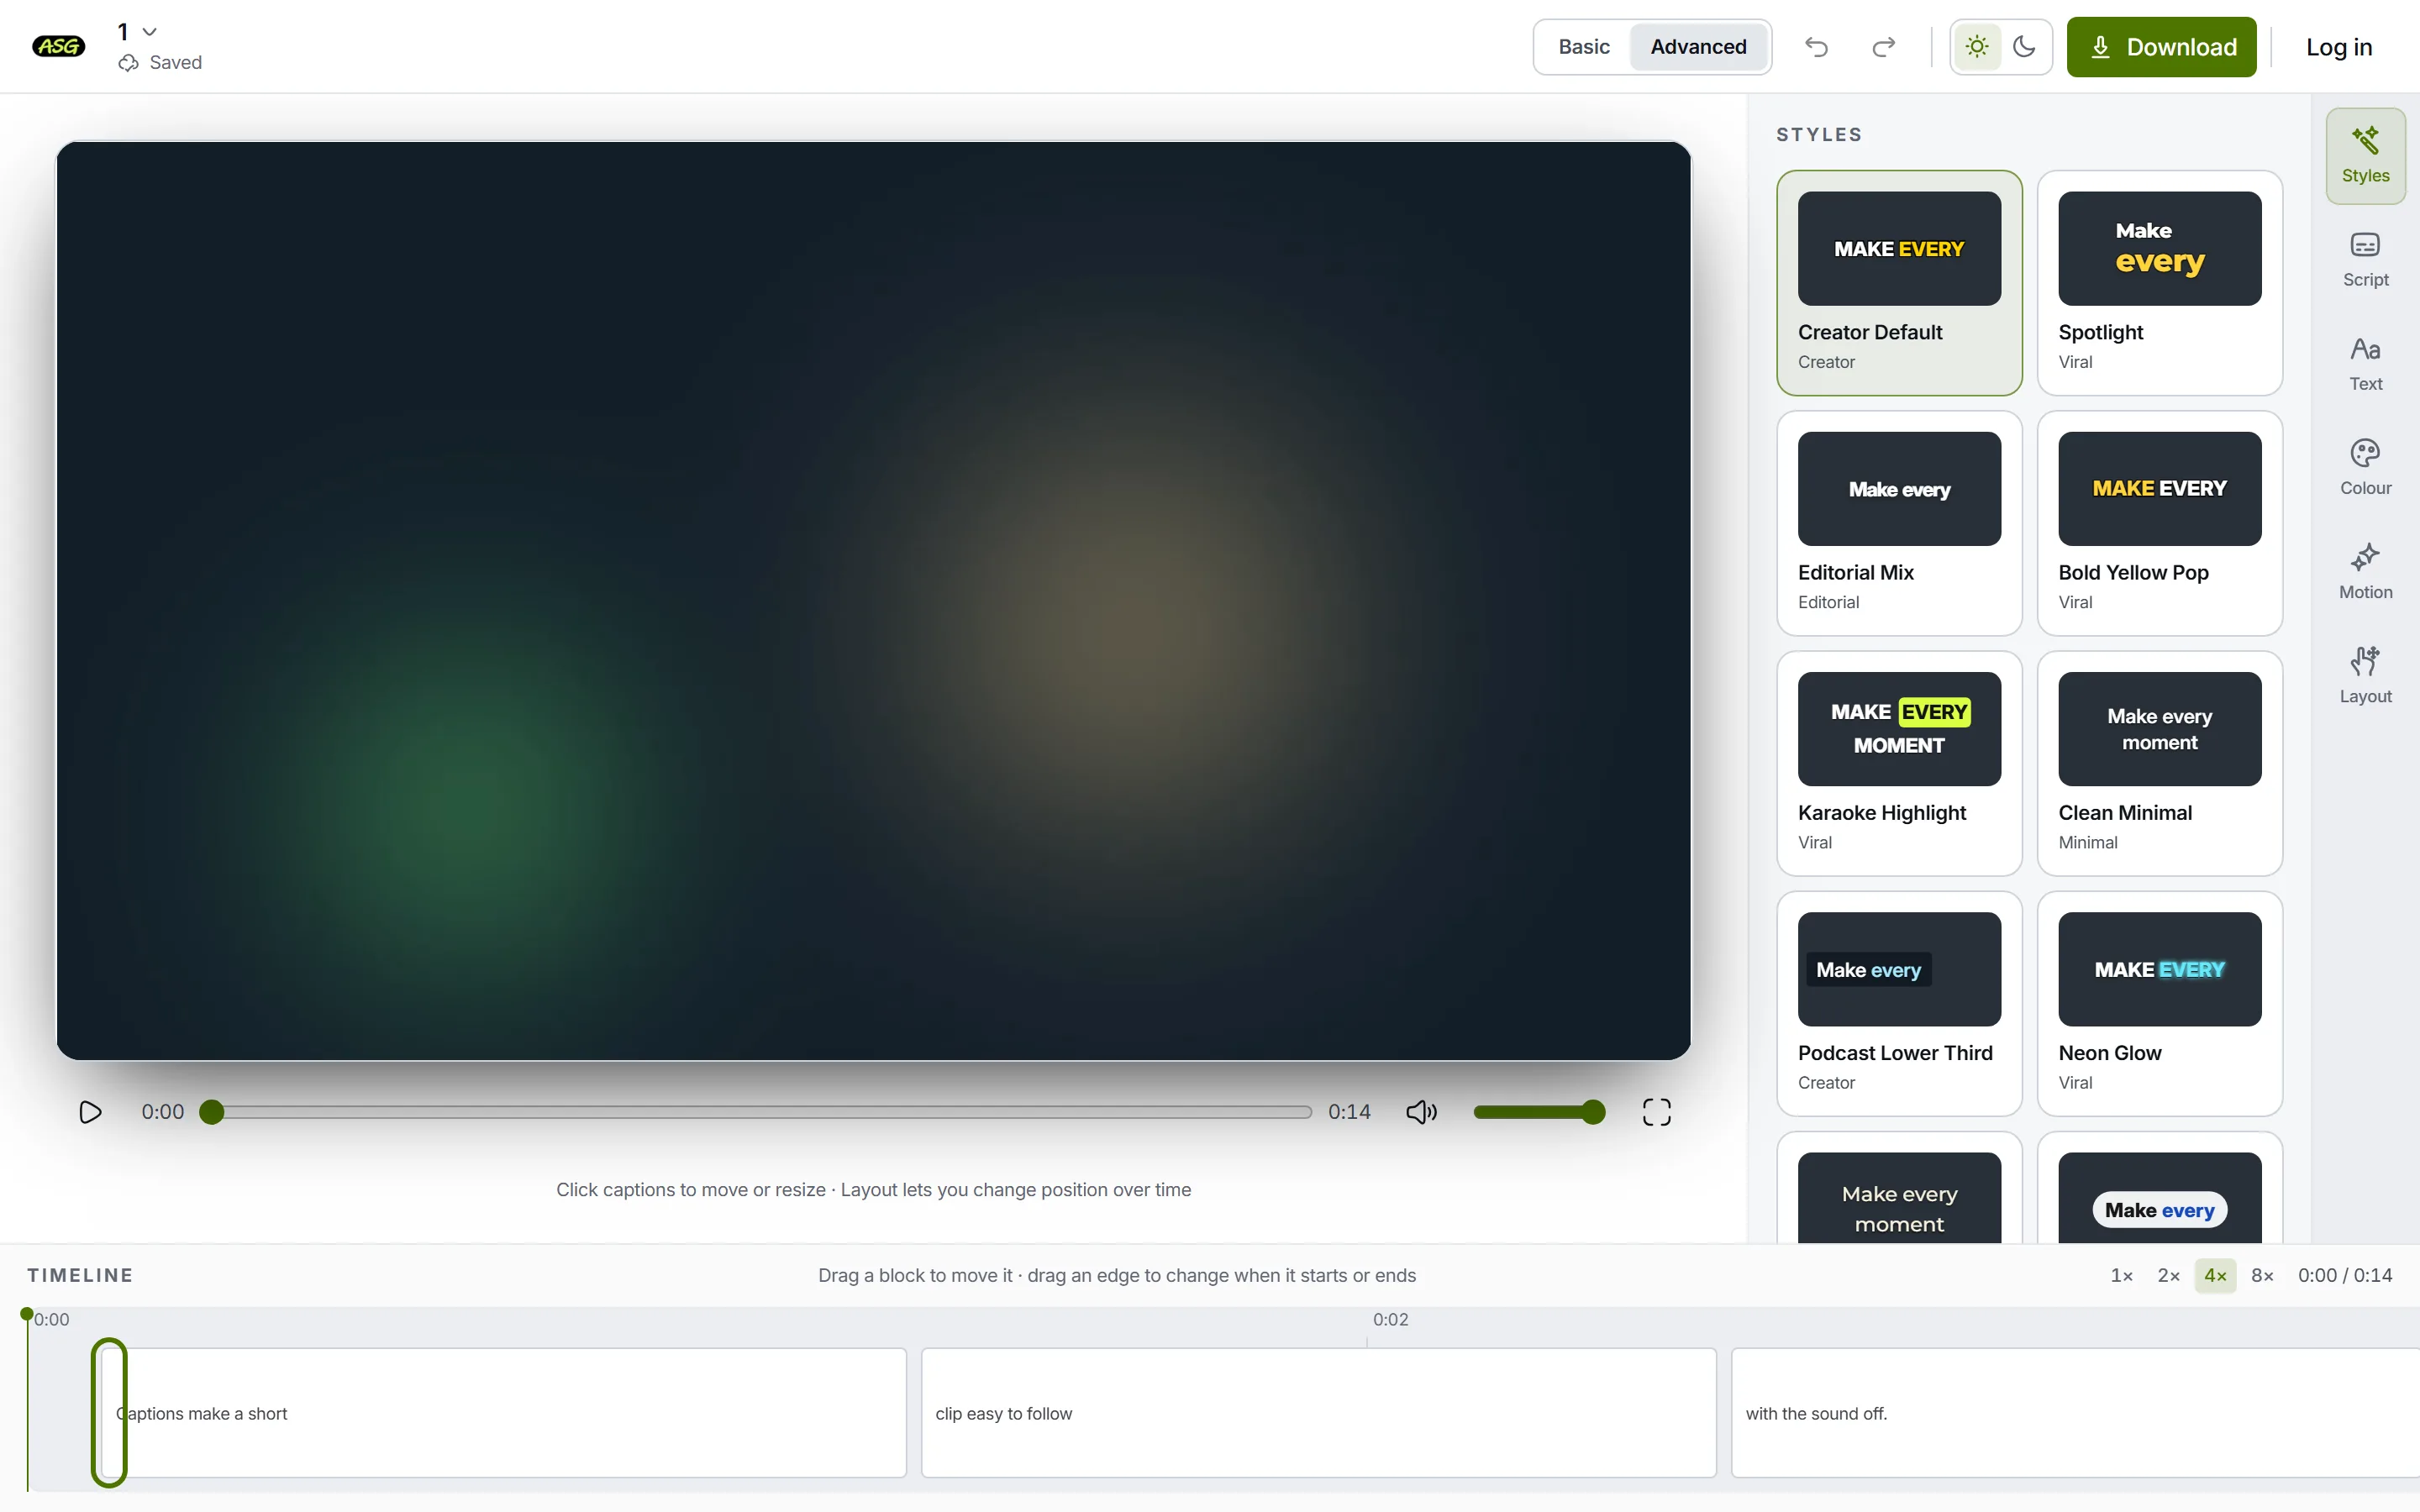
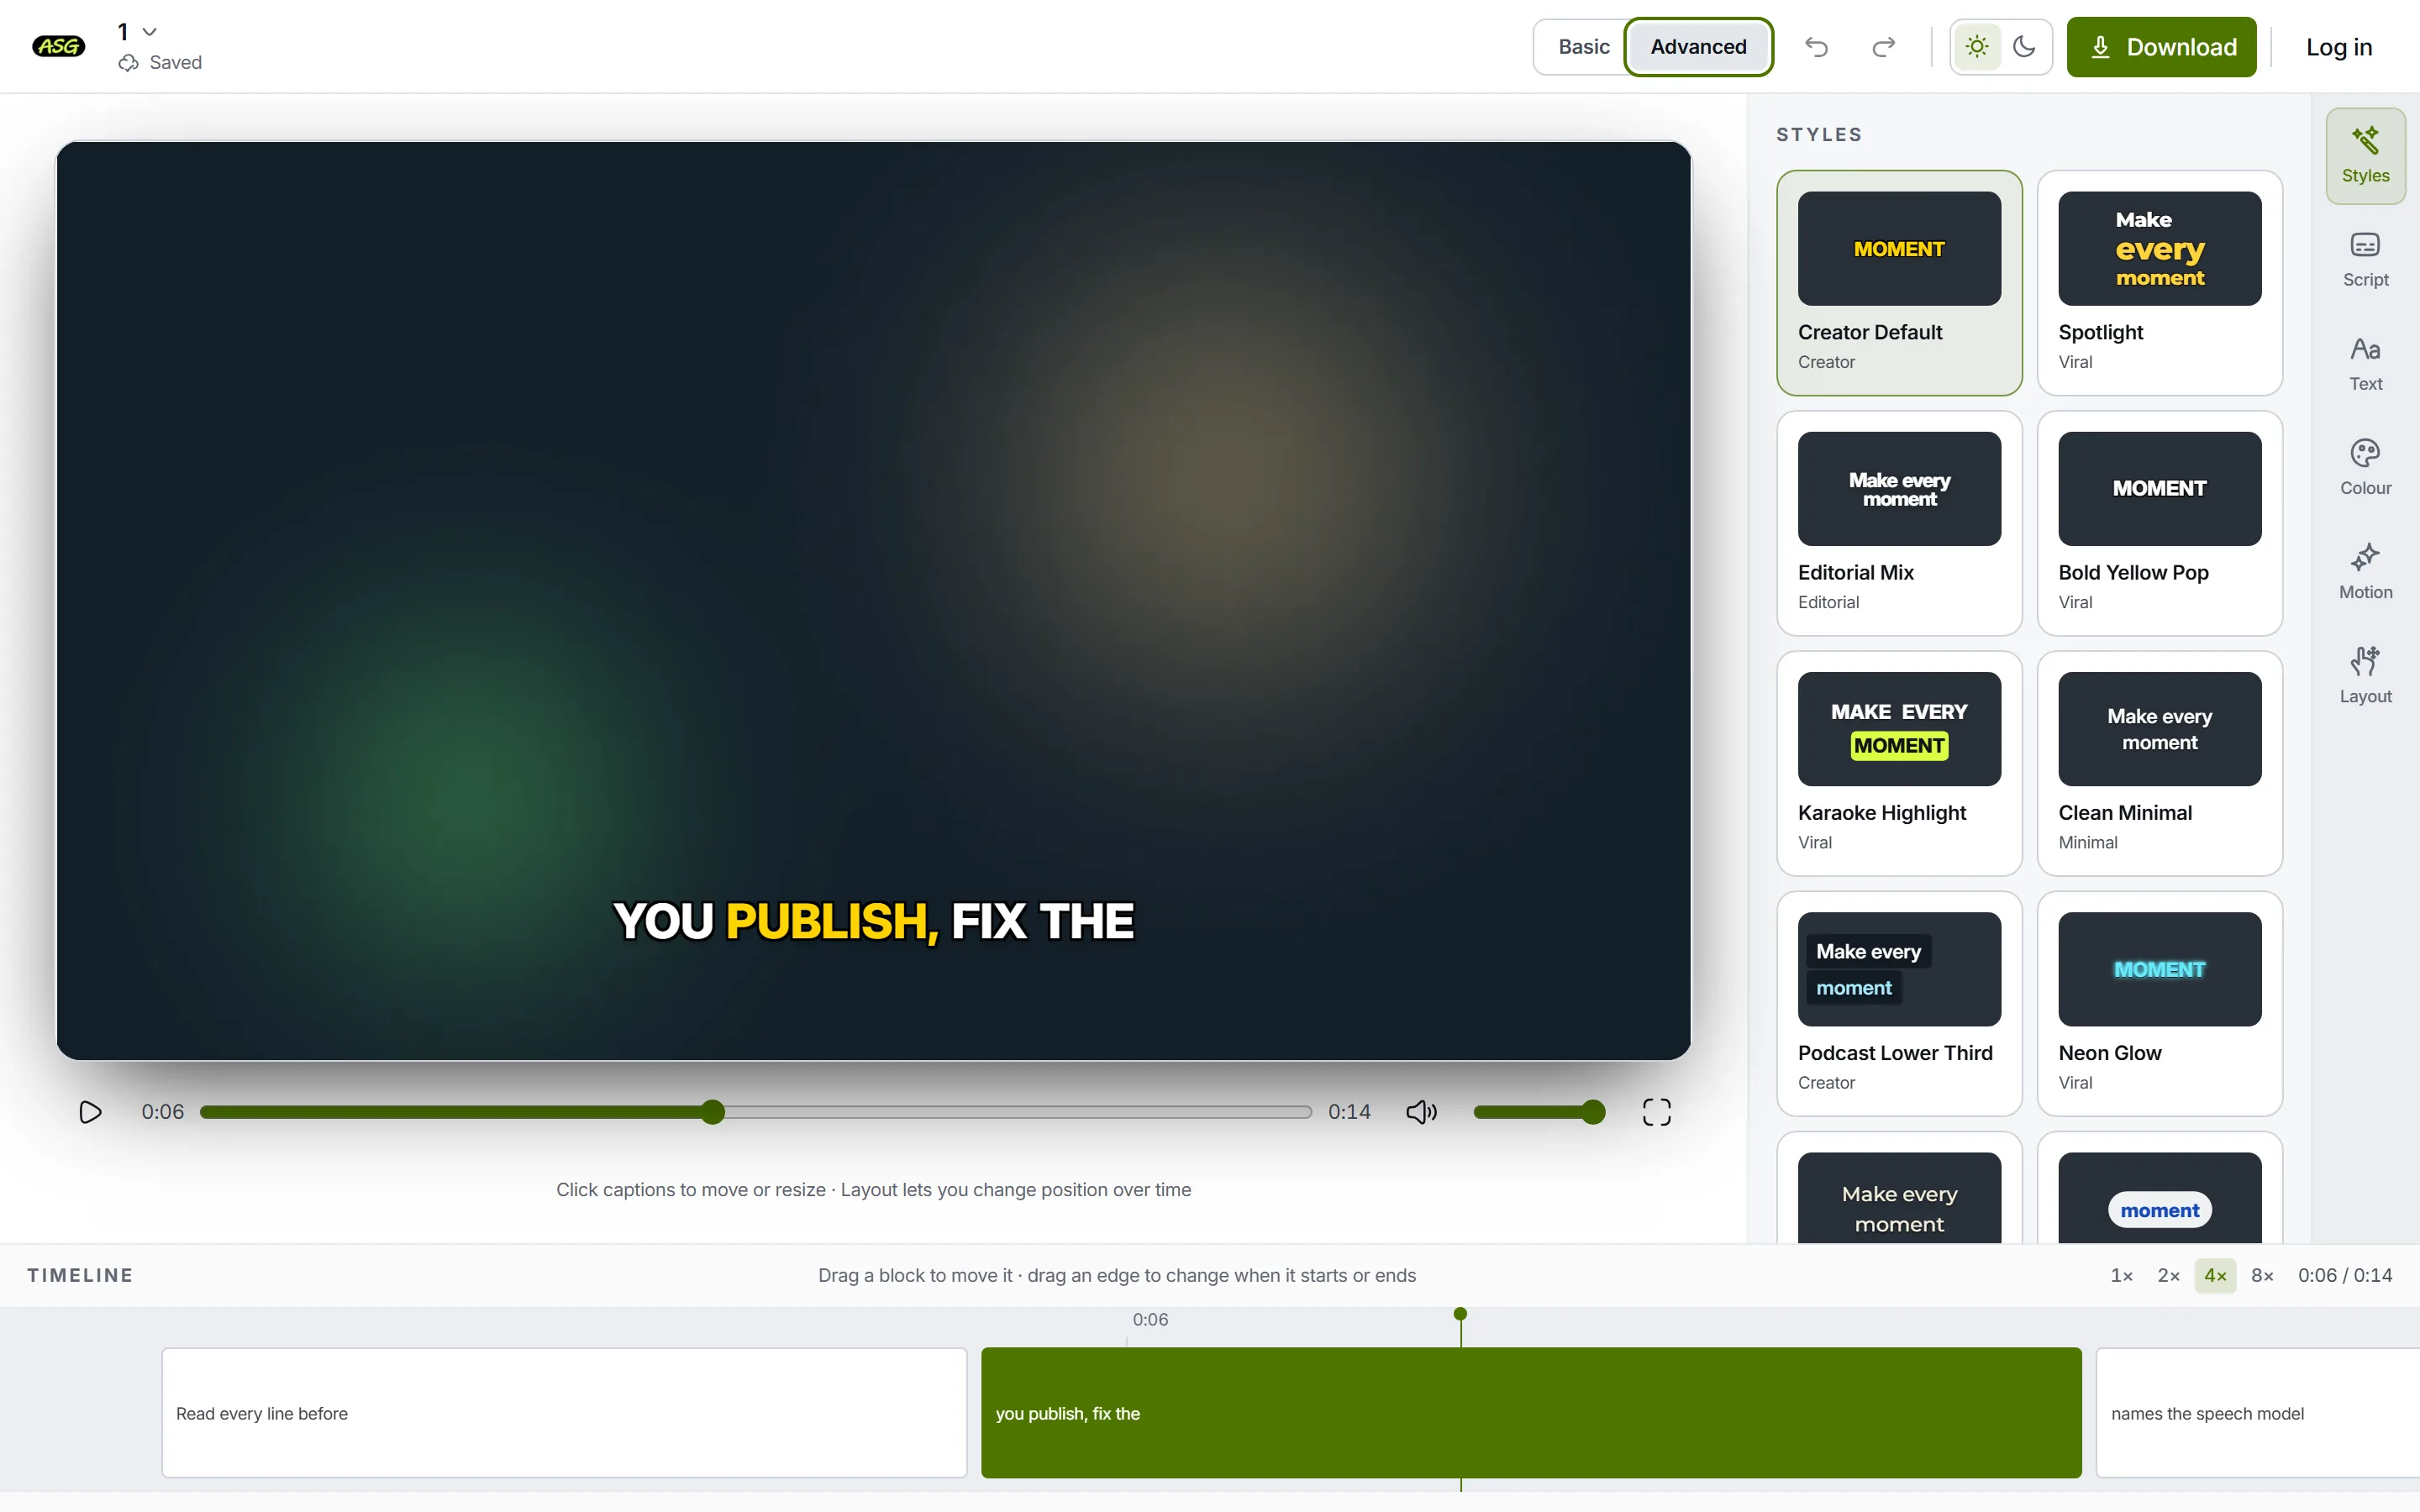
Drop the file onto the uploader on the home page. You can start without an account. When transcription finishes, the editor opens with every caption timed to the speech. Advanced adds a timeline under the picture, with each caption as a block you can drag or trim, much like a caption track in Premiere.
After upload: captions generated, and in Advanced mode laid out as blocks on a timeline. Correct every word in Script
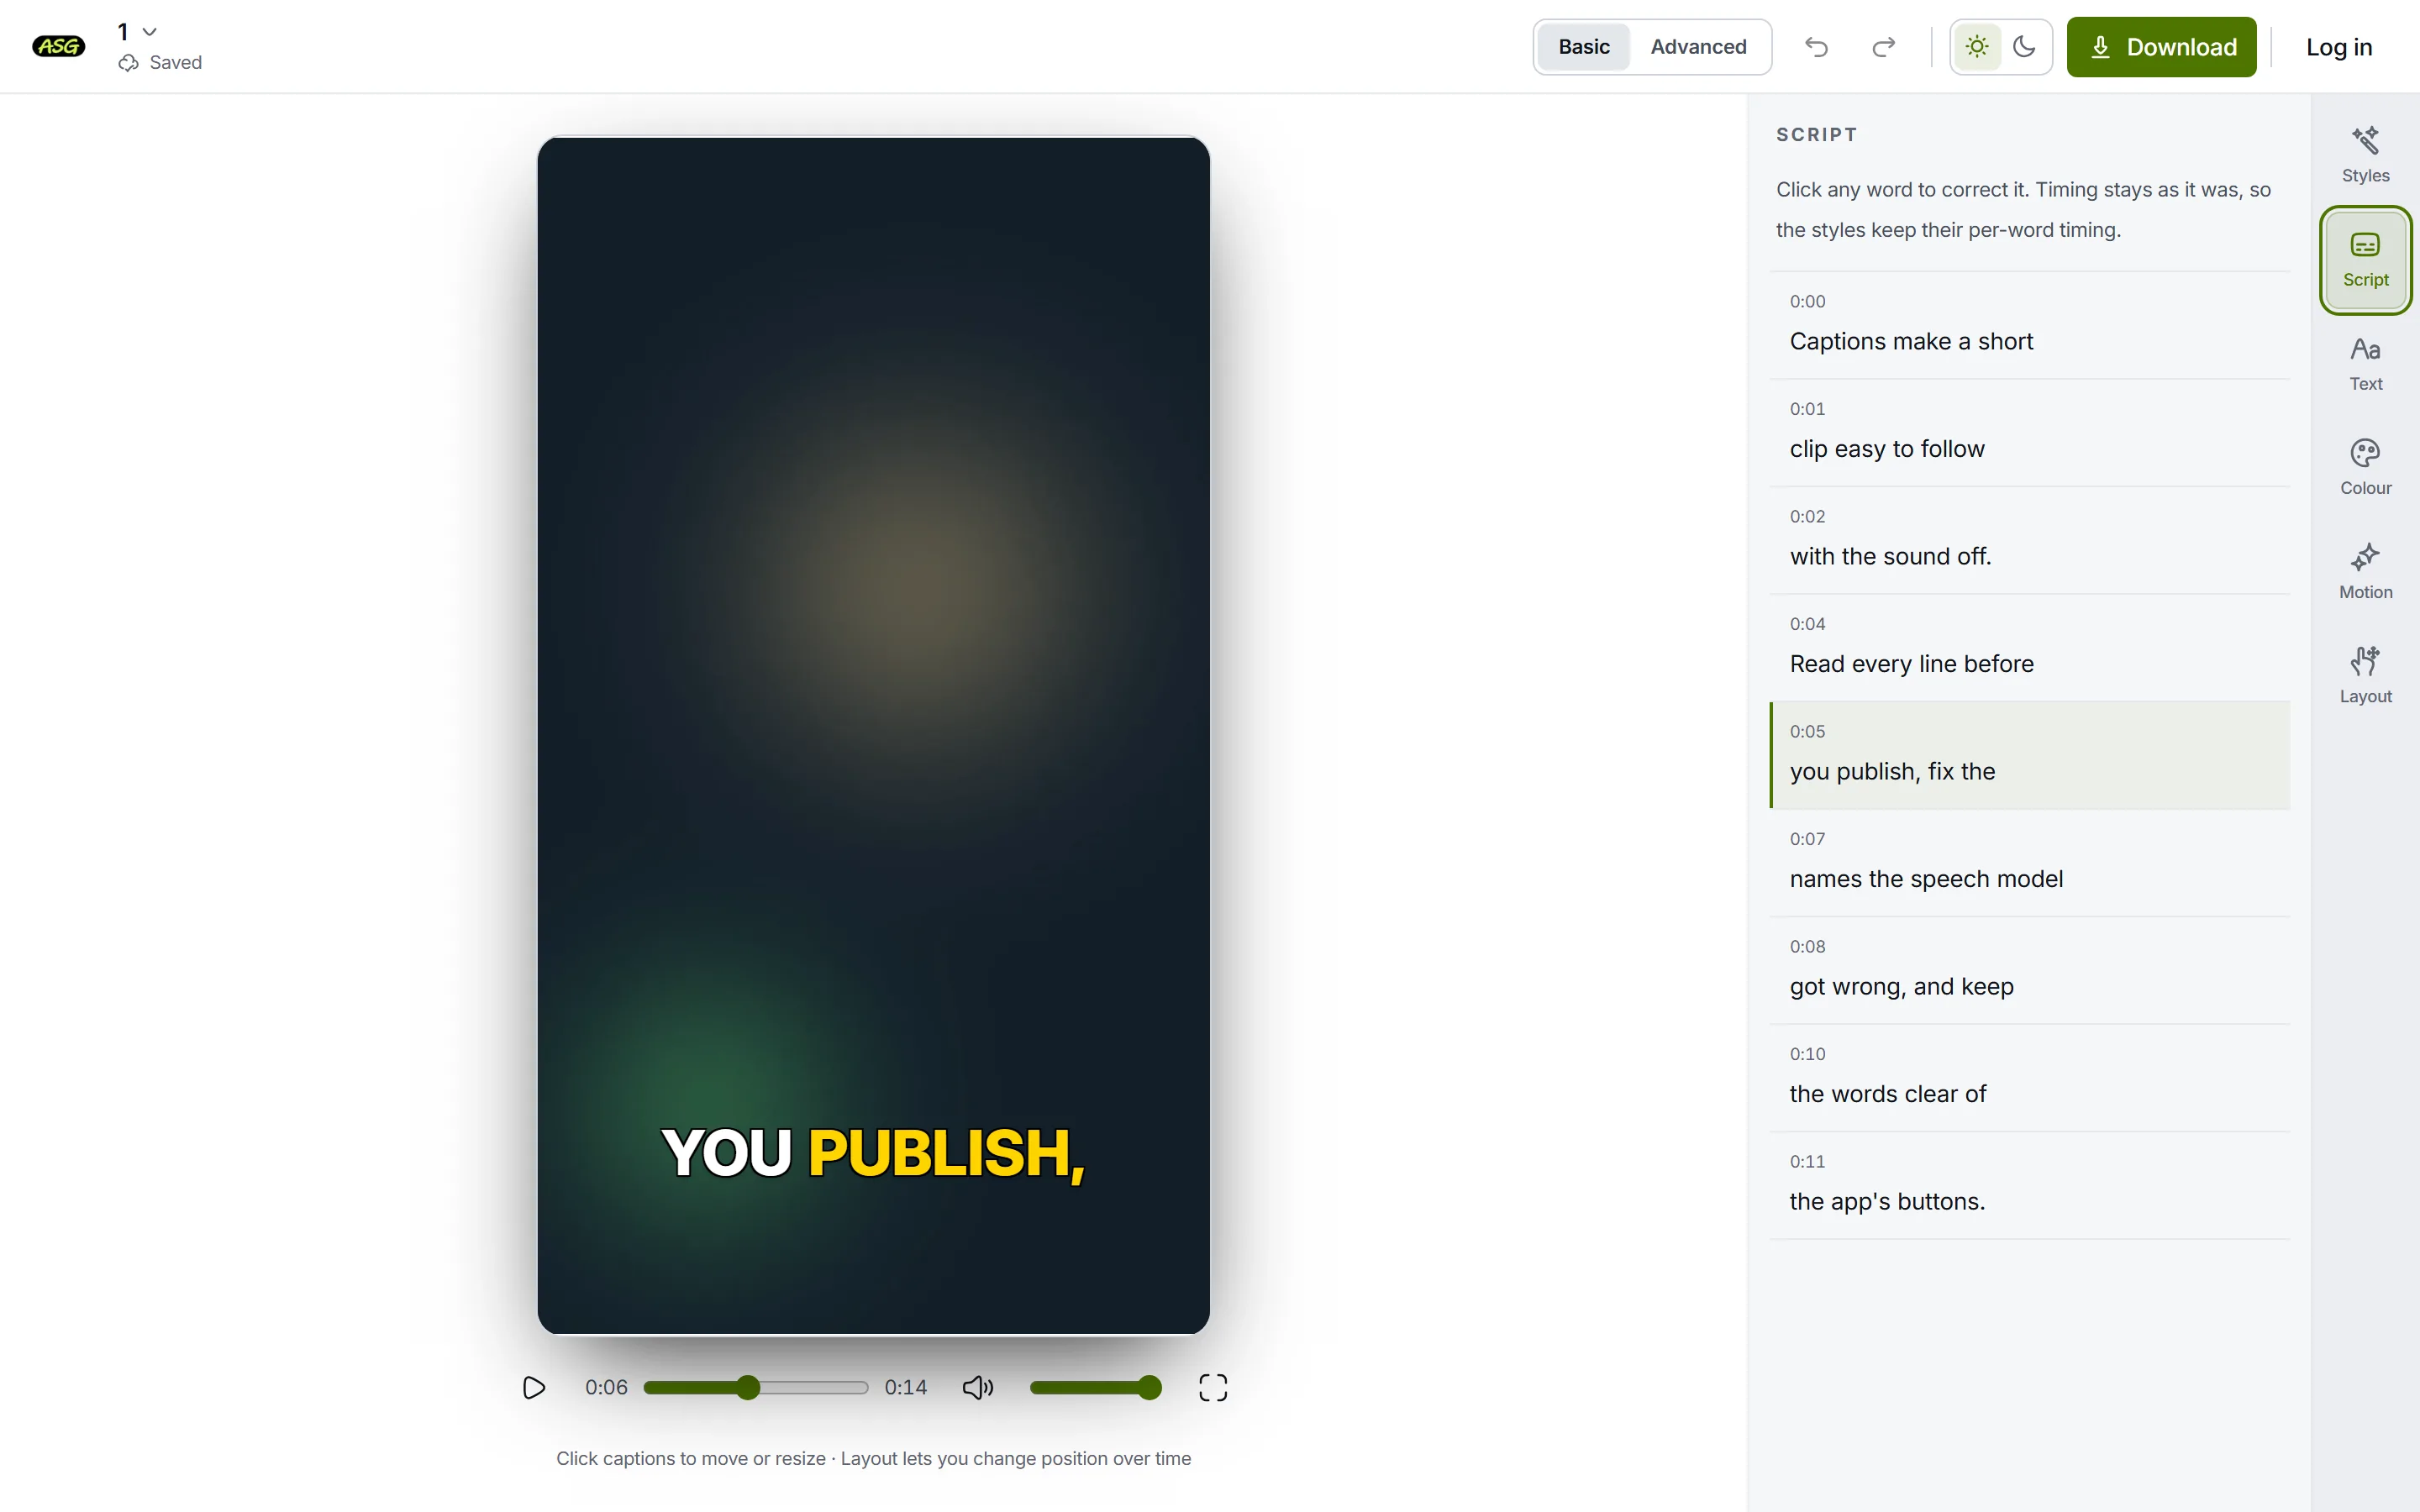
Open Script and read the lines against the audio. Click a word to correct it, then press Enter; Escape puts the old word back. The timing stays attached to the word, so a corrected name lands in the same place in the SRT. Names, brands and jargon are where automatic transcription fails most, and fixing them here saves doing it caption by caption in Premiere's Text panel.
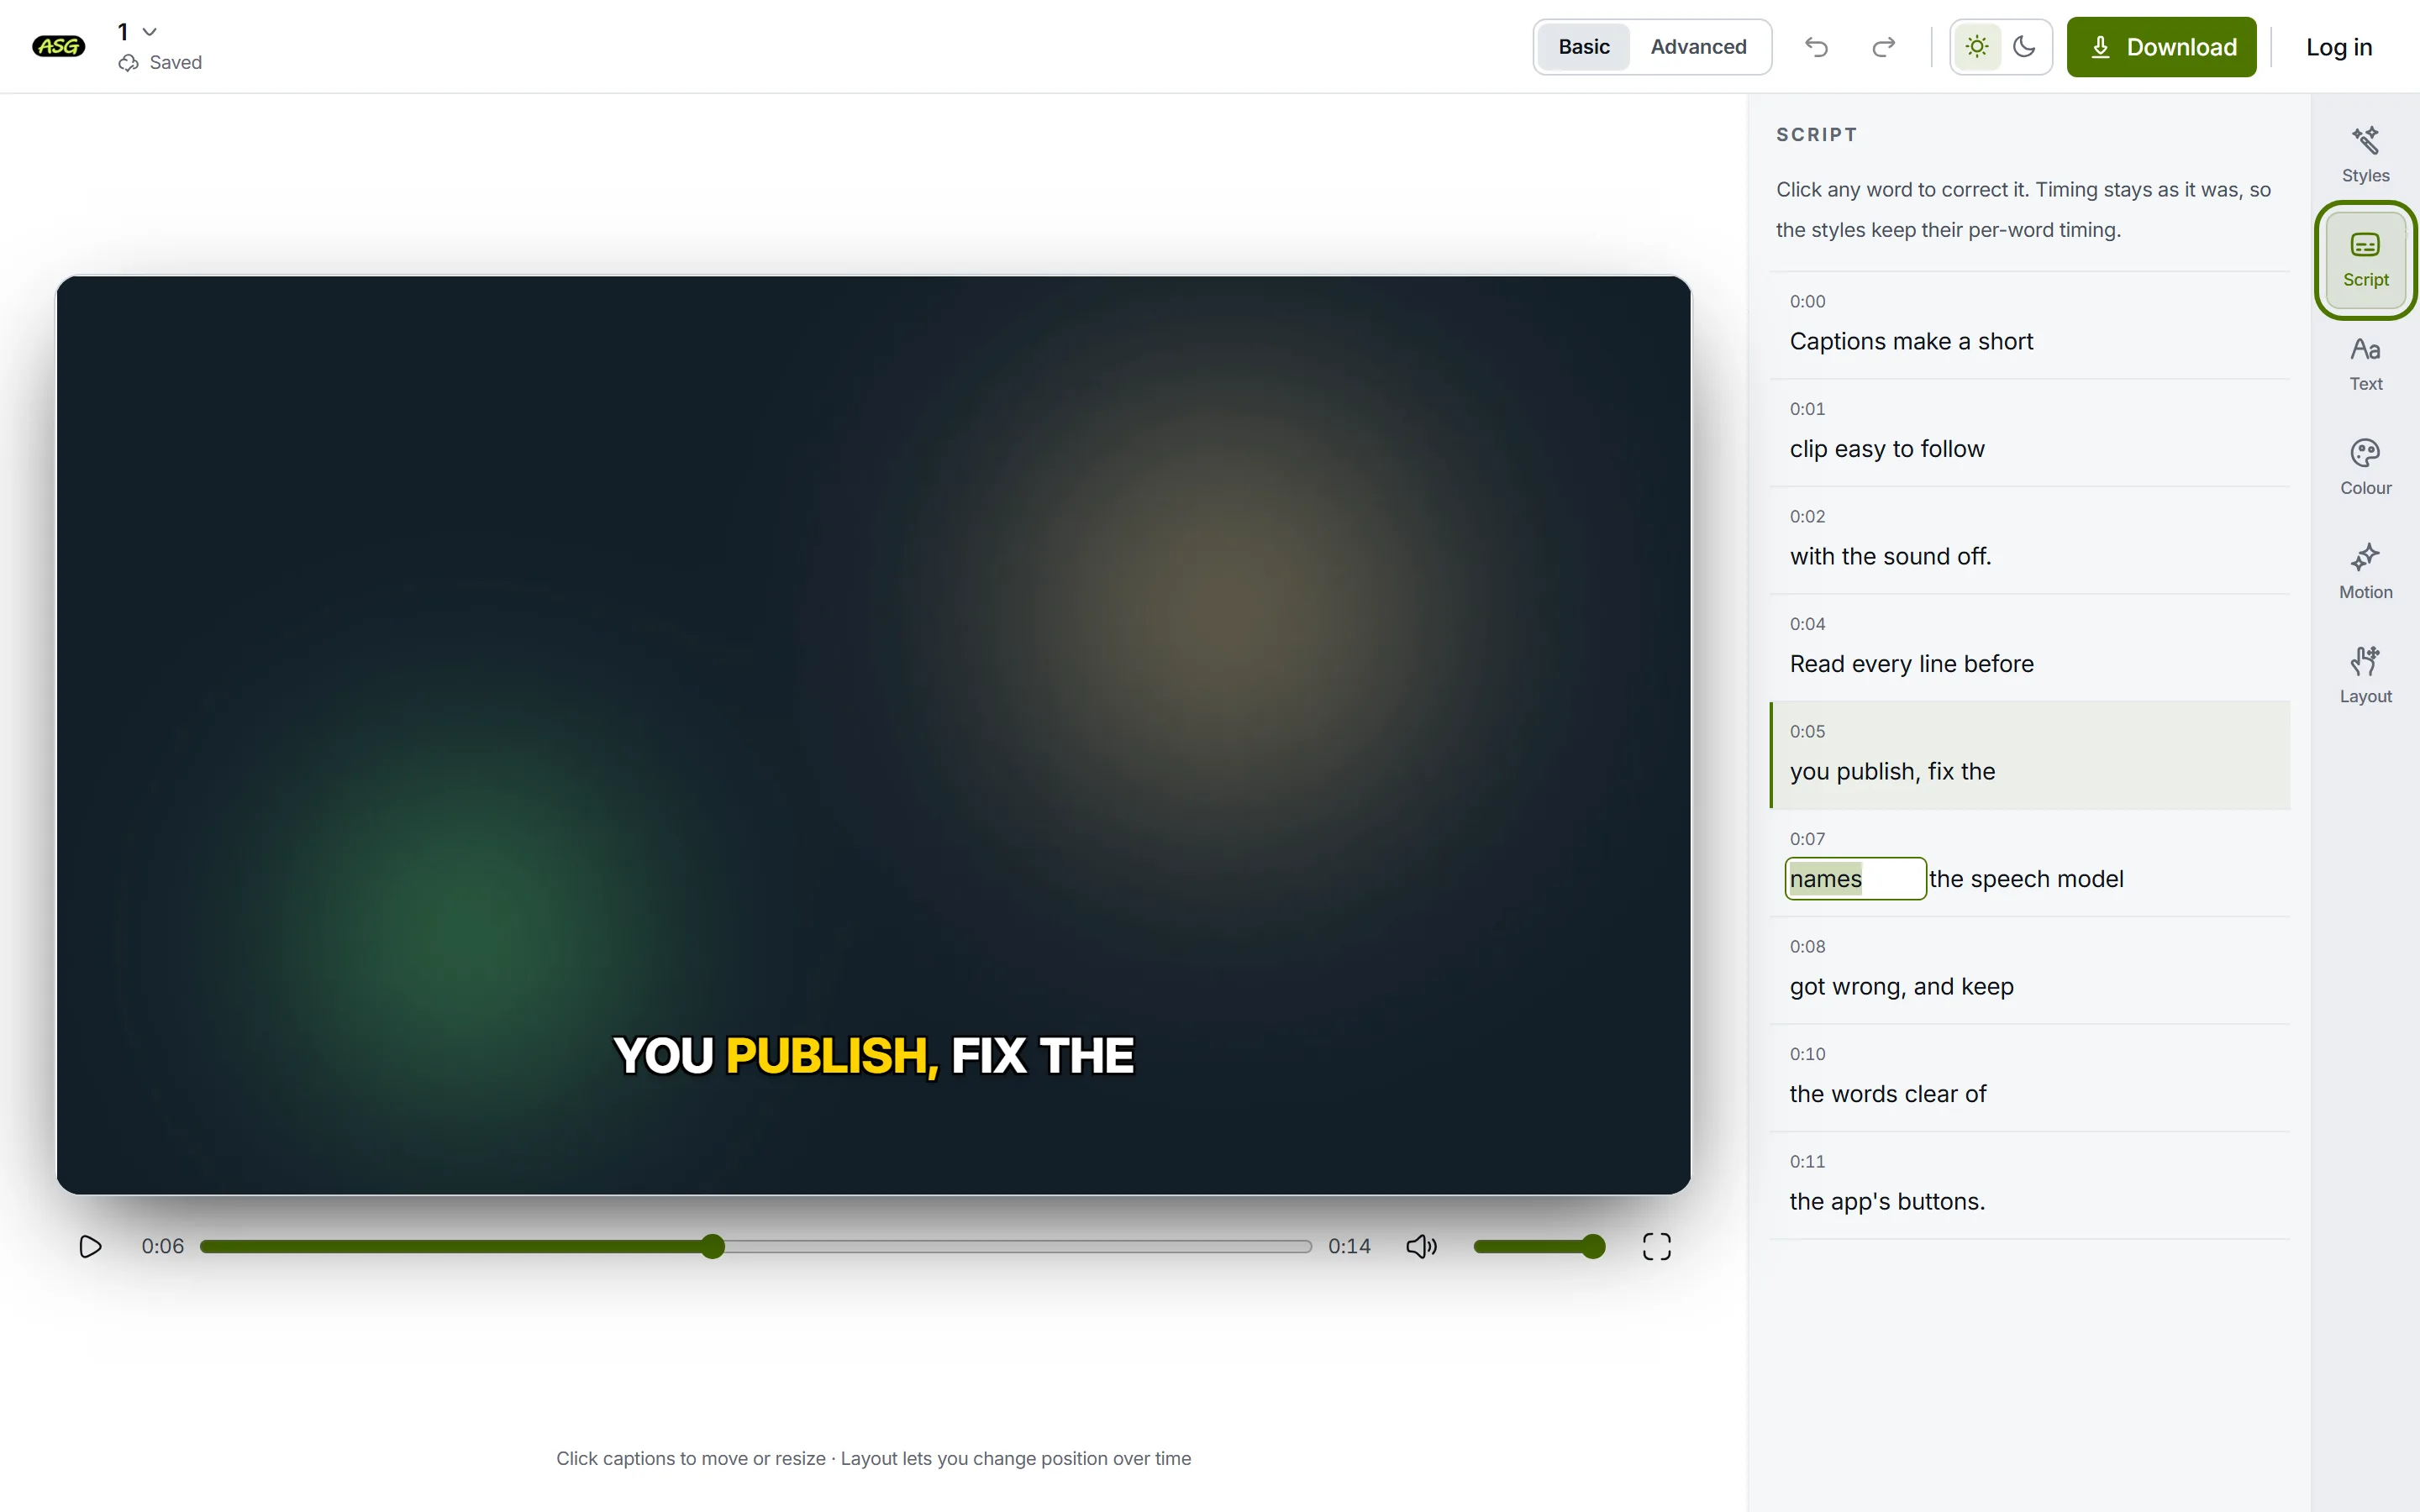
Script: click a word, type the correction, press Enter. The timing does not change. Download the SRT under Caption files only
Press Download, sign in free with Google or email if you have not already, and open Caption files only (no video). Choose SRT. Caption files are free and never use one of the monthly video downloads, so you can come back, fix another word and download again.
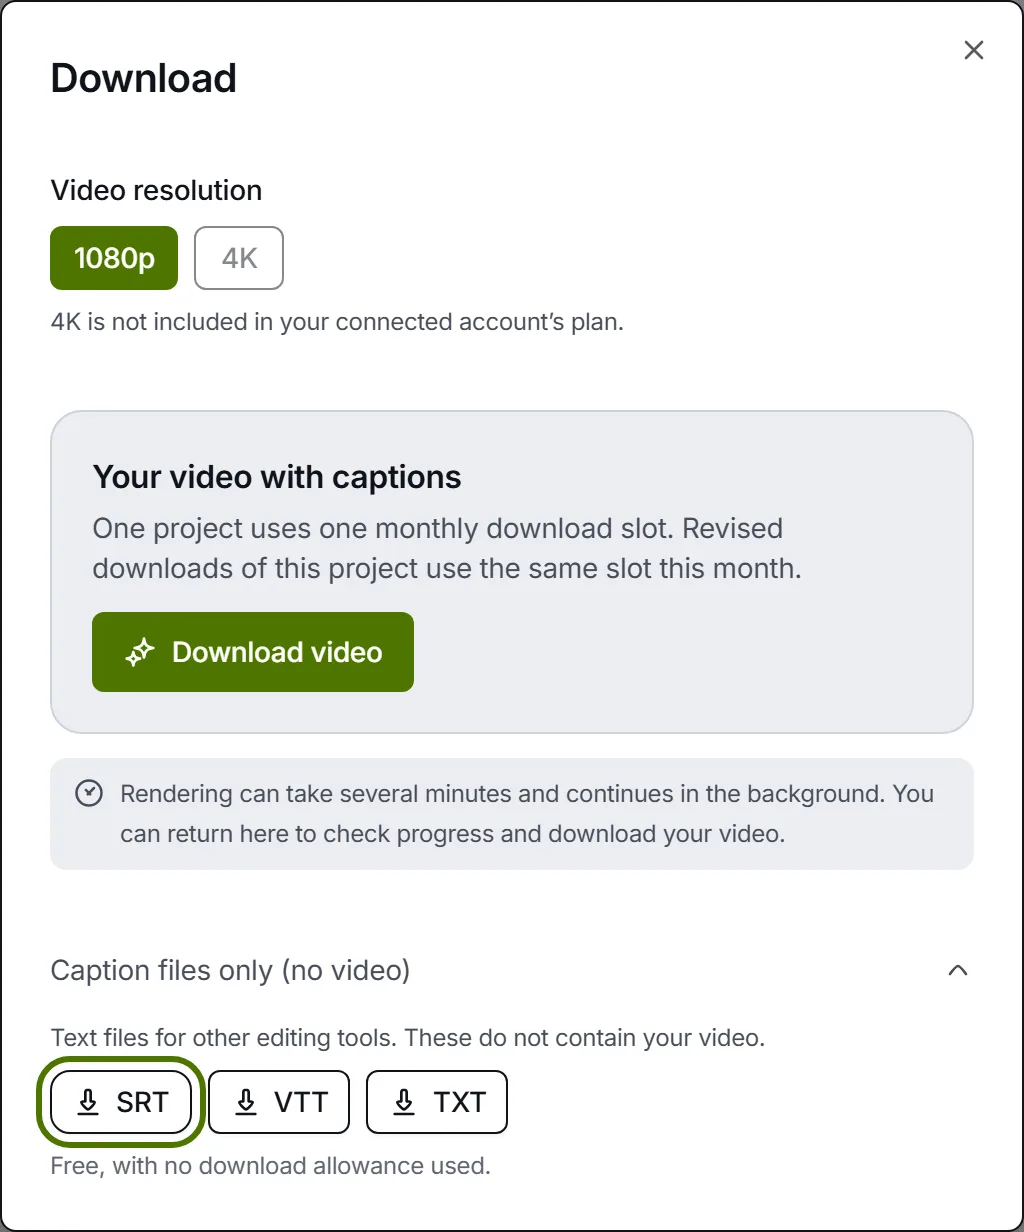
Caption files only: SRT, VTT or TXT, free, with no download allowance used. Import the SRT and drop it at the start of the sequence
Back in Premiere, import the SRT like any media and drag it from the Project panel onto the sequence, starting at the first frame. Premiere builds a caption track from it. Play the first, a middle and the last caption to confirm the sync, then style and export as described above.
What arrives in Premiere is the words and times and nothing else: no font, colour or position, because SubRip has no way to carry them. By default the captions are standard subtitles, up to 2 lines of 42 characters, broken at natural points and timed for reading, which suits a documentary or a course. For short-form video, choose Match the editor’s lines in the download to get one short caption per Script line instead, up to four words by default.
Can you skip Premiere's captions and download the video with subtitles burned in?
Yes, if the captions are the last thing the video needs. Export the finished sequence from Premiere at full quality, upload it, correct the Script as above, and let our editor render the captions into the picture. You get a styled MP4 with no watermark on any plan, at up to 1080p on the free plan and 4K on Starter. The same workflow for any video, not only a Premiere export, is set out on the page about adding subtitles to a video.
Pick a caption style
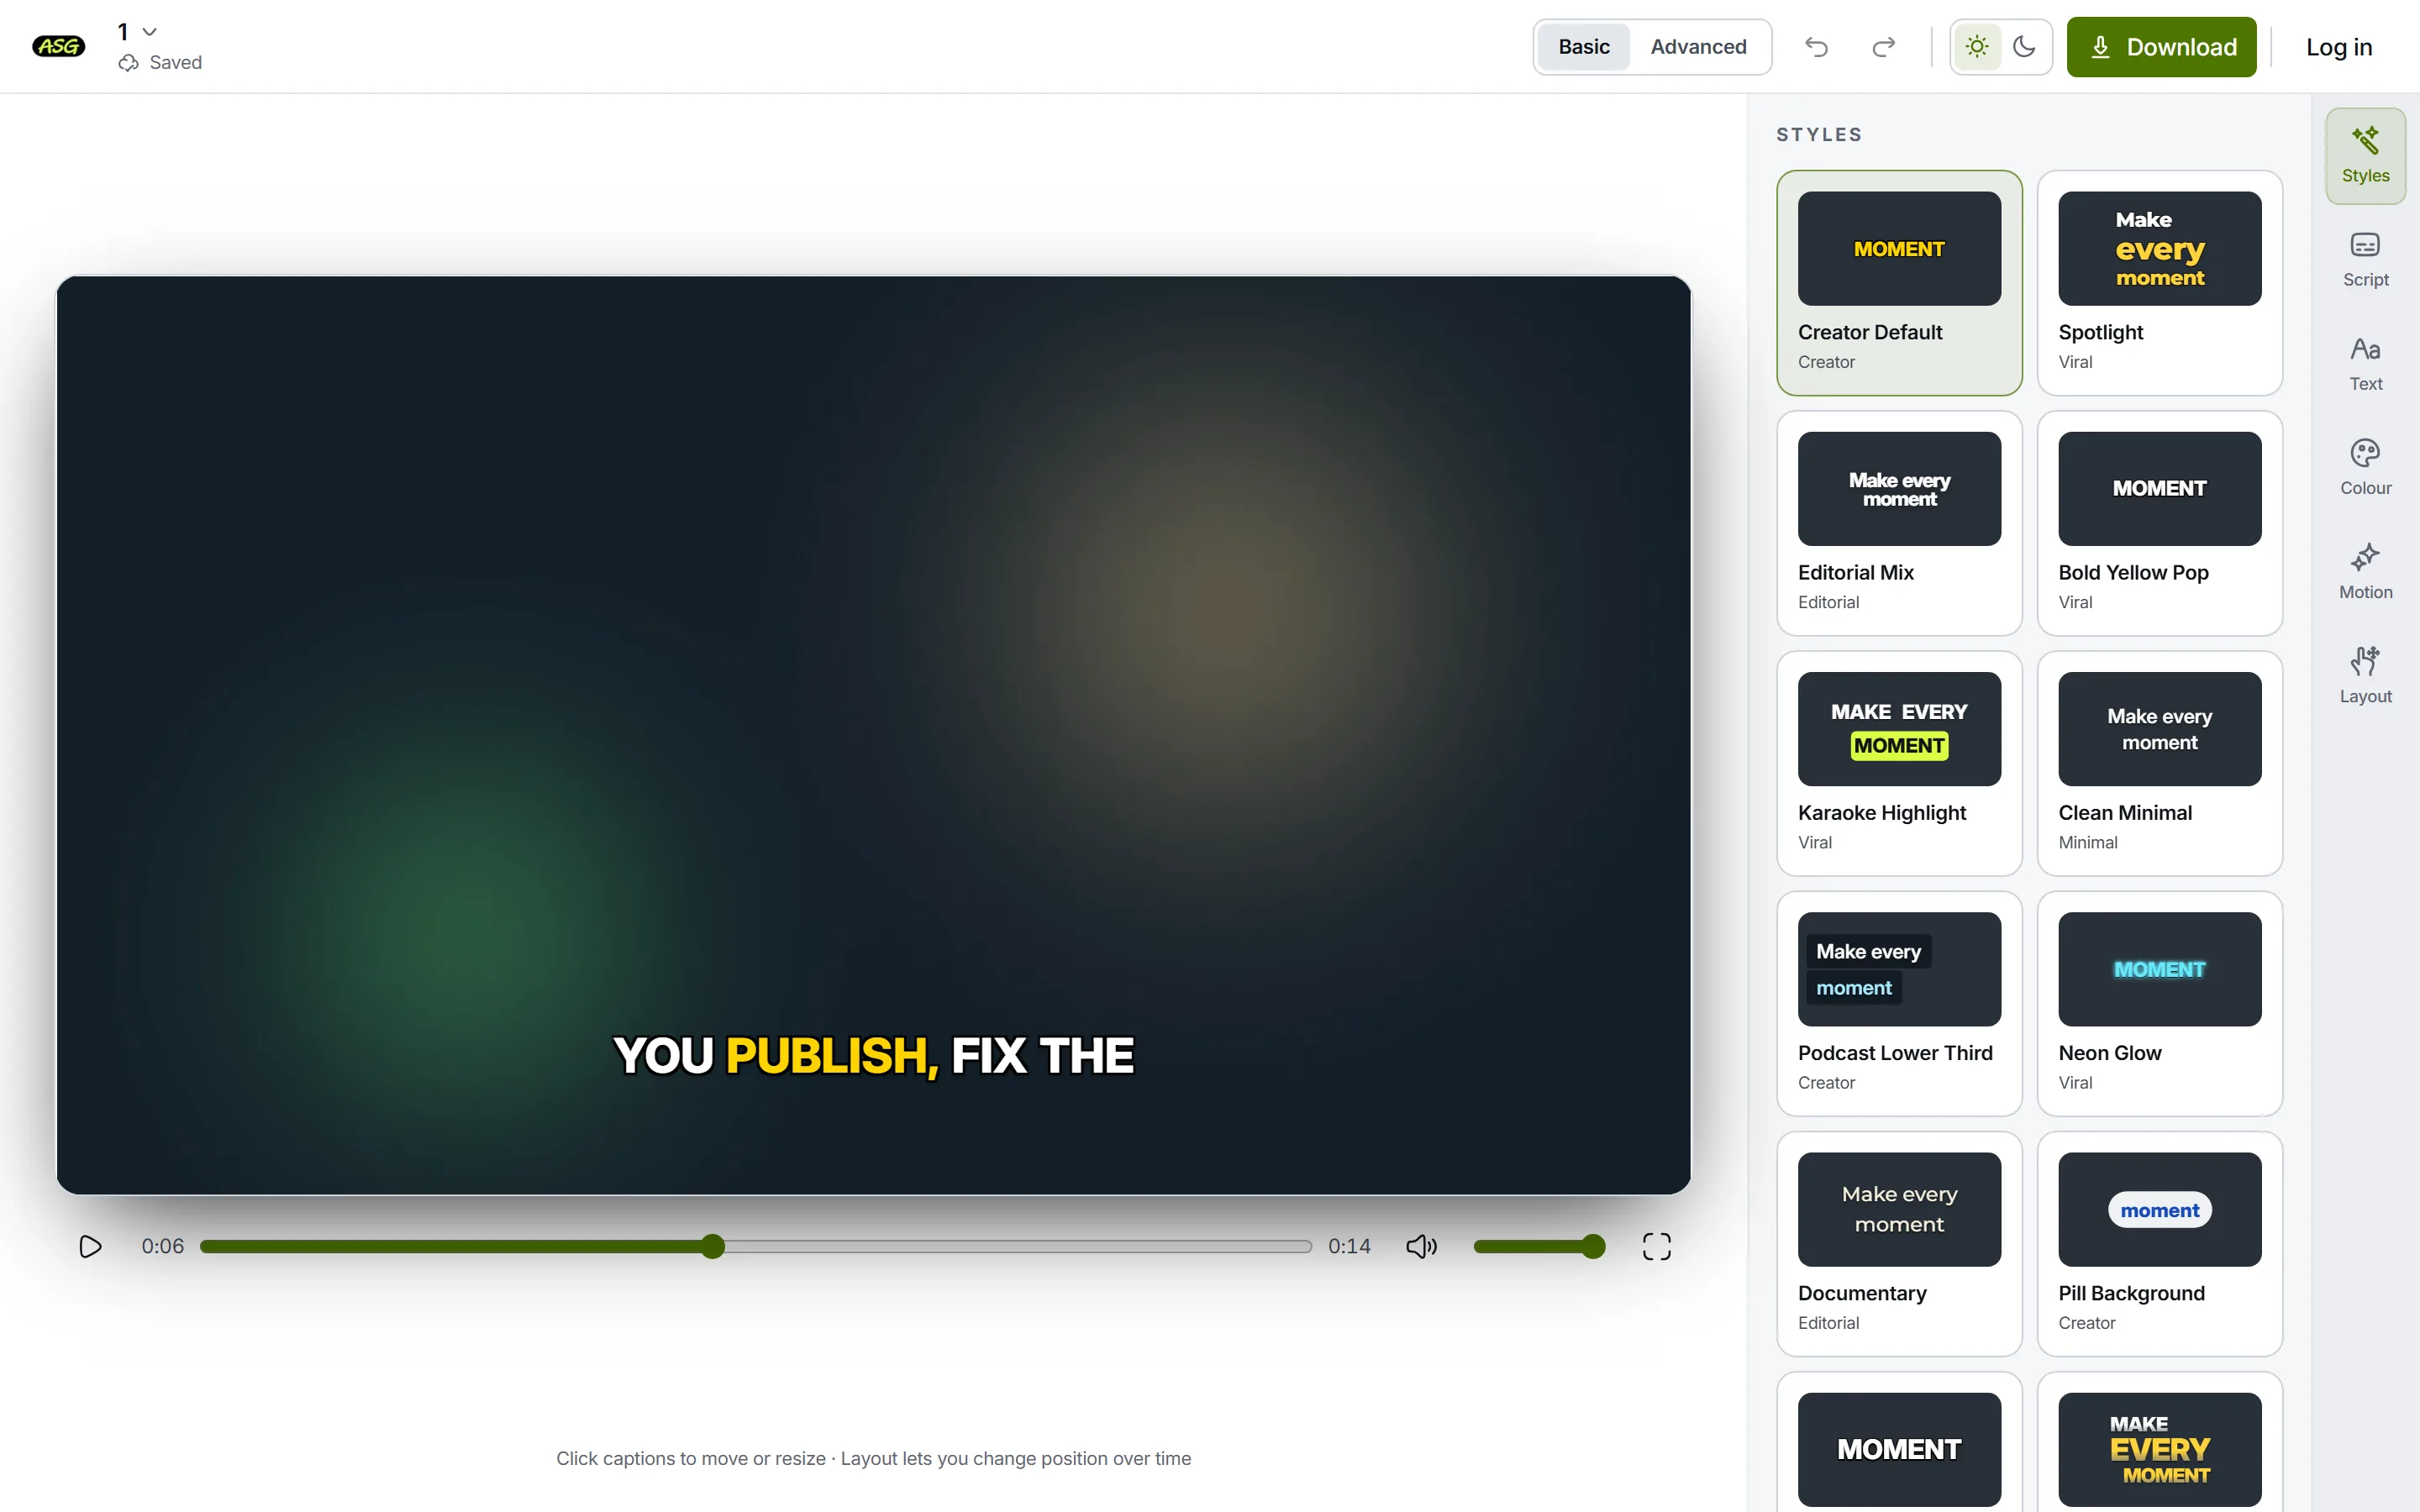
Open Styles and choose a preset. The free plan exports Podcast Lower Third and Documentary; the rest of the catalogue, including word-by-word captions, exports on Starter. Accounts created before 4 October 2026 keep Clean Minimal and Documentary instead. The preview is exactly what gets rendered.
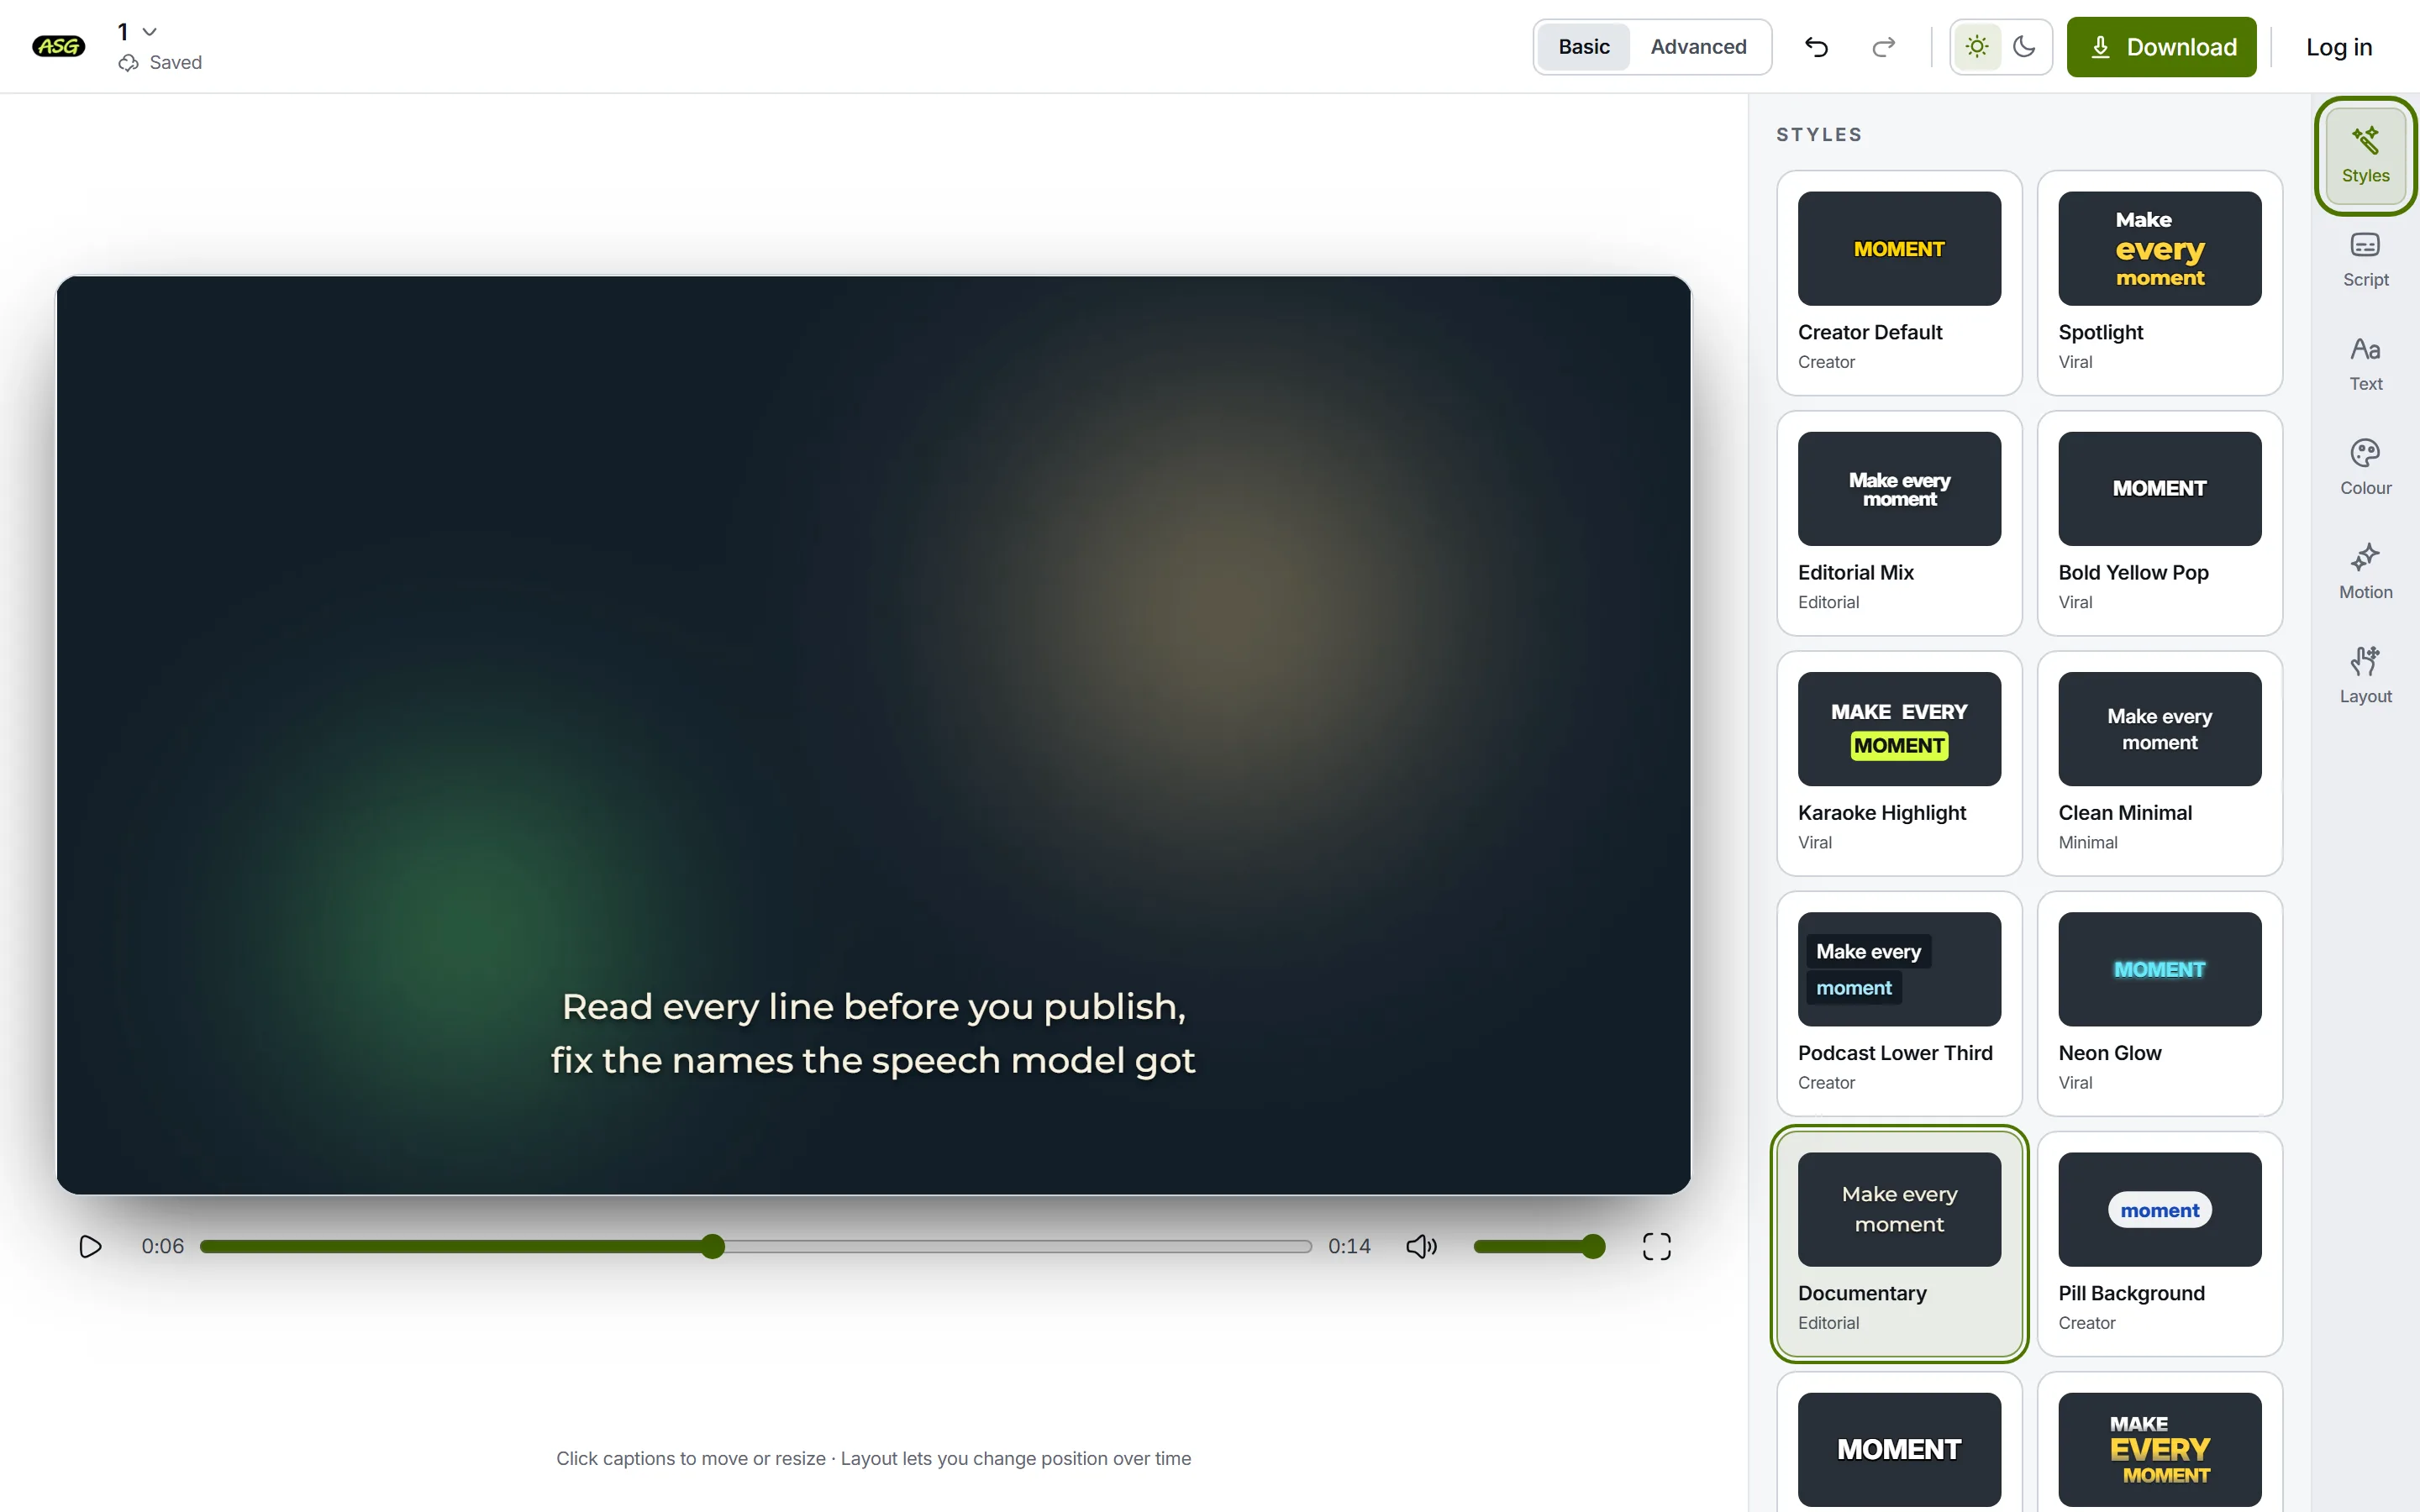
A preset applied in Styles. What the preview shows is what the MP4 will show. Download the video
Press Download, choose the resolution, and select Download video. On the free plan that uses one of 3 video projects a month, and a revised download of the same project uses the same slot.
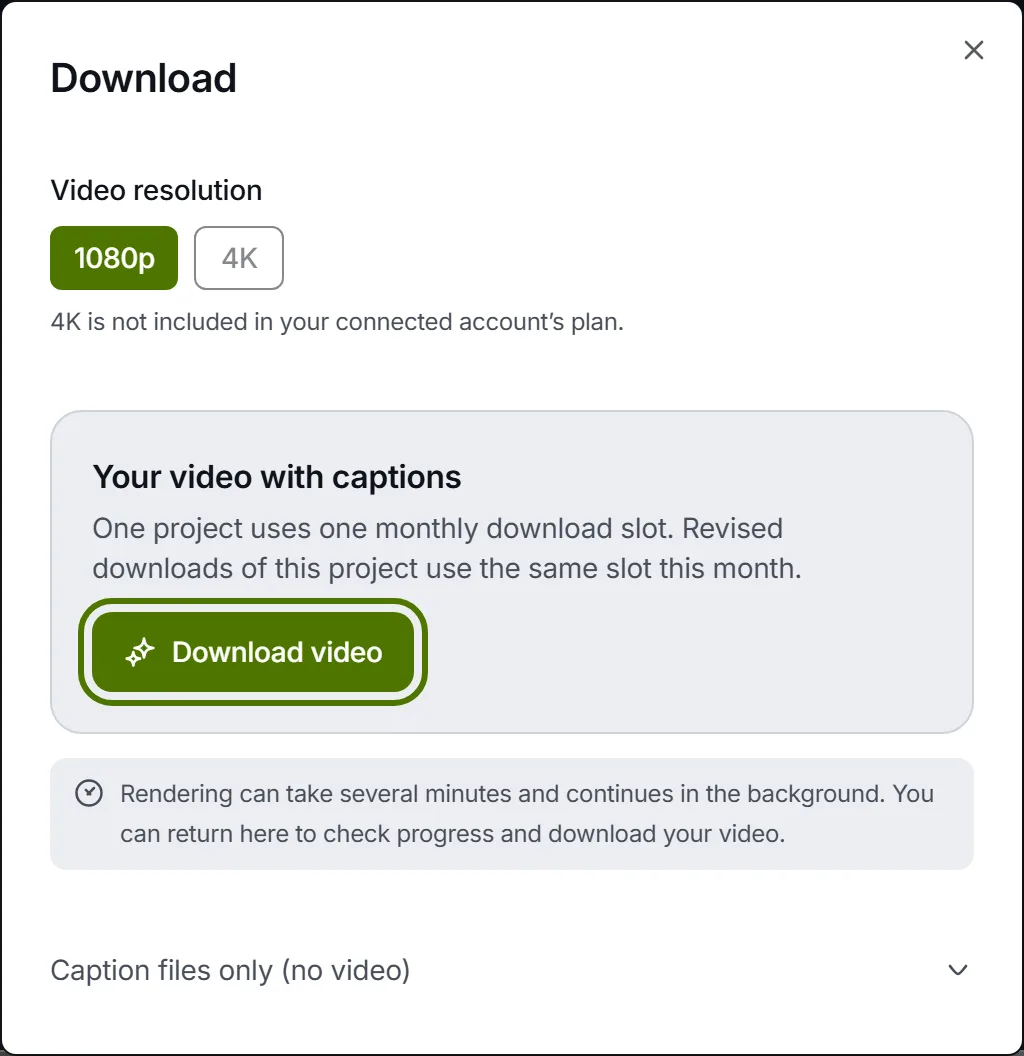
Download video renders the captions into every frame of an MP4.
When is Premiere's own transcription enough?
More often than not, if you already pay for Premiere. Adobe says Speech to Text costs nothing extra on a subscription, works offline once the language pack is installed, and writes captions straight onto the timeline you are editing. Its caption dialog sets the length, duration, gaps and line count of every caption, where our SRT keeps the line breaks made at transcription, and Adobe's translate captions page adds a translated track through Google Translate and Microsoft Translator. For a long interview, a course or a film, staying in Premiere is the sensible default.
Our route earns its place in narrower cases. The person correcting the words may not have Premiere: a client, a subject checking their own name, or an assistant on another computer, who can open a browser editor and fix the Script without touching your project. You may want a styled, burned-in social cut without building the look in the Properties panel. Or the video may be short enough to fit the free plan's 10 minutes, and you want the transcript checked against the picture before it reaches the timeline. If none of those apply, use Premiere's tools and skip ours.
Why are imported subtitles out of sync in Premiere?
Almost always because the SRT and the sequence do not share a starting point. Work through these in order:
- Every caption is early or late by the same amount: the file was dropped somewhere other than the first frame, or was made from a copy with a different start. Move the caption track, or shift the whole file with the subtitle timing shifter before importing it again.
- The gap grows through the video: the edit changed after the SRT was made, so the speech moved and the file did not. Export the current sequence and make a new SRT; the out-of-sync subtitles guide explains how to tell this from a constant offset.
- Premiere will not import the file at all: check it with the subtitle validator, which lists missing timing lines, overlaps and cues that end before they start, each with its line number.
- Accented letters look wrong: a file from an older tool may not be UTF-8. Open it in a text editor and save it again as UTF-8 before importing it.
Frequently asked questions
Does Premiere Pro generate subtitles automatically?+
Yes. Speech to Text transcribes the sequence in the Text panel, and Create captions from transcript turns the transcript into a caption track timed to the dialogue. Adobe says it is included in a Premiere subscription at no extra cost.
How do I import an SRT file into Premiere Pro?+
Import it like any media file, then drag it from the Project panel into the sequence. Premiere creates a new caption track. Drop it at the point its times were measured from, usually the first frame, or every caption will be offset.
Can I style subtitles that came from an SRT?+
Yes, in Premiere's Properties panel, the same as generated captions: font, fill, stroke, shadow and alignment, saved as a track style. The SRT itself carries only words and times, so any styling you did in another tool does not come across.
How do I burn subtitles into a video in Premiere Pro?+
In the Export workspace, choose to burn in captions. Adobe's export page says the active caption tracks are then rendered directly onto the video, whatever their format. Burned-in captions cannot be turned off, so keep a clean export as well.
Is the SRT from Auto Subtitle Generator free?+
Yes. SRT, VTT and TXT downloads are free and never use one of the free plan's 3 monthly video downloads. You can start without an account, but downloading needs a free sign-in with Google or email.
Why are my imported subtitles out of sync in Premiere?+
If every caption is off by the same amount, the file was placed at the wrong point or made from a copy with a different start. If the gap grows through the video, the edit changed after the SRT was made; make a new one from the current sequence.
Make the SRT for your next Premiere edit
Upload a copy of your sequence, correct what the speech model misheard, and download the SRT free, or the captioned MP4 if you are done with Premiere. Start without an account; sign in free to download. No watermark on any plan.
Upload your video