How to add subtitles in iMovie on Mac and iPhone
iMovie cannot import a subtitle file or generate subtitles, on Mac or iPhone, so you either type each line as a title or add the subtitles after you export. For anything longer than a few lines, export the movie, let Auto Subtitle Generator transcribe it, correct the words, and download an MP4 with the captions burned in, or an SRT to upload beside the video on YouTube.
Can iMovie import an SRT file or make subtitles automatically?
Neither. Apple's iMovie guides for Mac and iPhone have no page on captions, subtitles or caption files, and the Mac guide's import page covers video, photos and audio only. There is no speech-to-text either. What iMovie does have is titles: styled text you place over a clip, which you can bend into subtitles one line at a time. Everything else happens outside iMovie, after you export.
| Route | Where | Choose it when | You end up with |
|---|---|---|---|
| Type each line as a title | iMovie on Mac | The video has a few lines of speech | Titles drawn into the exported movie, timed by hand |
| Split the clip at each line and title it | iMovie on iPhone | A short clip with a handful of lines | The same, with one title per piece of clip |
| Export, then caption in our editor | Any browser, after iMovie | The video has continuous speech | An MP4 with styled captions burned in |
| Export, then upload an SRT beside it | YouTube, after iMovie | Viewers should be able to turn subtitles off | A video plus a subtitle track the platform shows |
| Send the project to Final Cut Pro | Final Cut Pro on Mac | You already own Final Cut Pro | A caption lane built from an imported SRT |
The first question is whether viewers should be able to switch the text off. Titles and our burned-in MP4 are part of the picture: they survive reposting and every player shows them, but nobody can hide them. A subtitle file uploaded beside the video can be turned off and translated. The burned-in vs closed captions guide weighs the two.
How do you add subtitles in iMovie on Mac?
With one title per subtitle line. These steps combine Apple's Add titles and Modify titles pages:
- Open the movie in the timeline and select Titles above the browser. Pick a plain style; Apple notes that some theme and animated titles do not let you change the font.
- Move the playhead to where the line is spoken and double-click the title in the browser, or drag it into the timeline above the clip. With Snapping on in the View menu, its edges align with clip edges.
- In the viewer, double-click the placeholder text and type the line.
- Set the look with the font controls above the viewer: the Font and Size pop-up menus, the alignment buttons, B, I or O for bold, italic or outline, and the colour well. Click Apply.
- Make the title last exactly as long as the line: drag either edge of the title bar, or select it, click the Clip Information button in the adjustments bar and type a value in the Duration field.
Drop a title onto the clip itself rather than above it and iMovie sizes it for you: in the first or last third of the clip it lasts that third, in the middle it lasts the whole clip. That suits a caption under a speaker's name, not dialogue, which never lines up with clip thirds.
How long does it take per line?
Apple gives no figure, and neither guide describes adding or timing titles in bulk. The Modify titles page says it plainly: "You set the duration of each title individually." So every line costs the same five steps: find where it is spoken, place a title, type, apply, then set the duration by ear. Our 14-second sample clip, a single speaker, breaks into nine lines of four words or fewer, so it would be nine separate titles. A ten-minute talk is that rhythm for ten minutes.
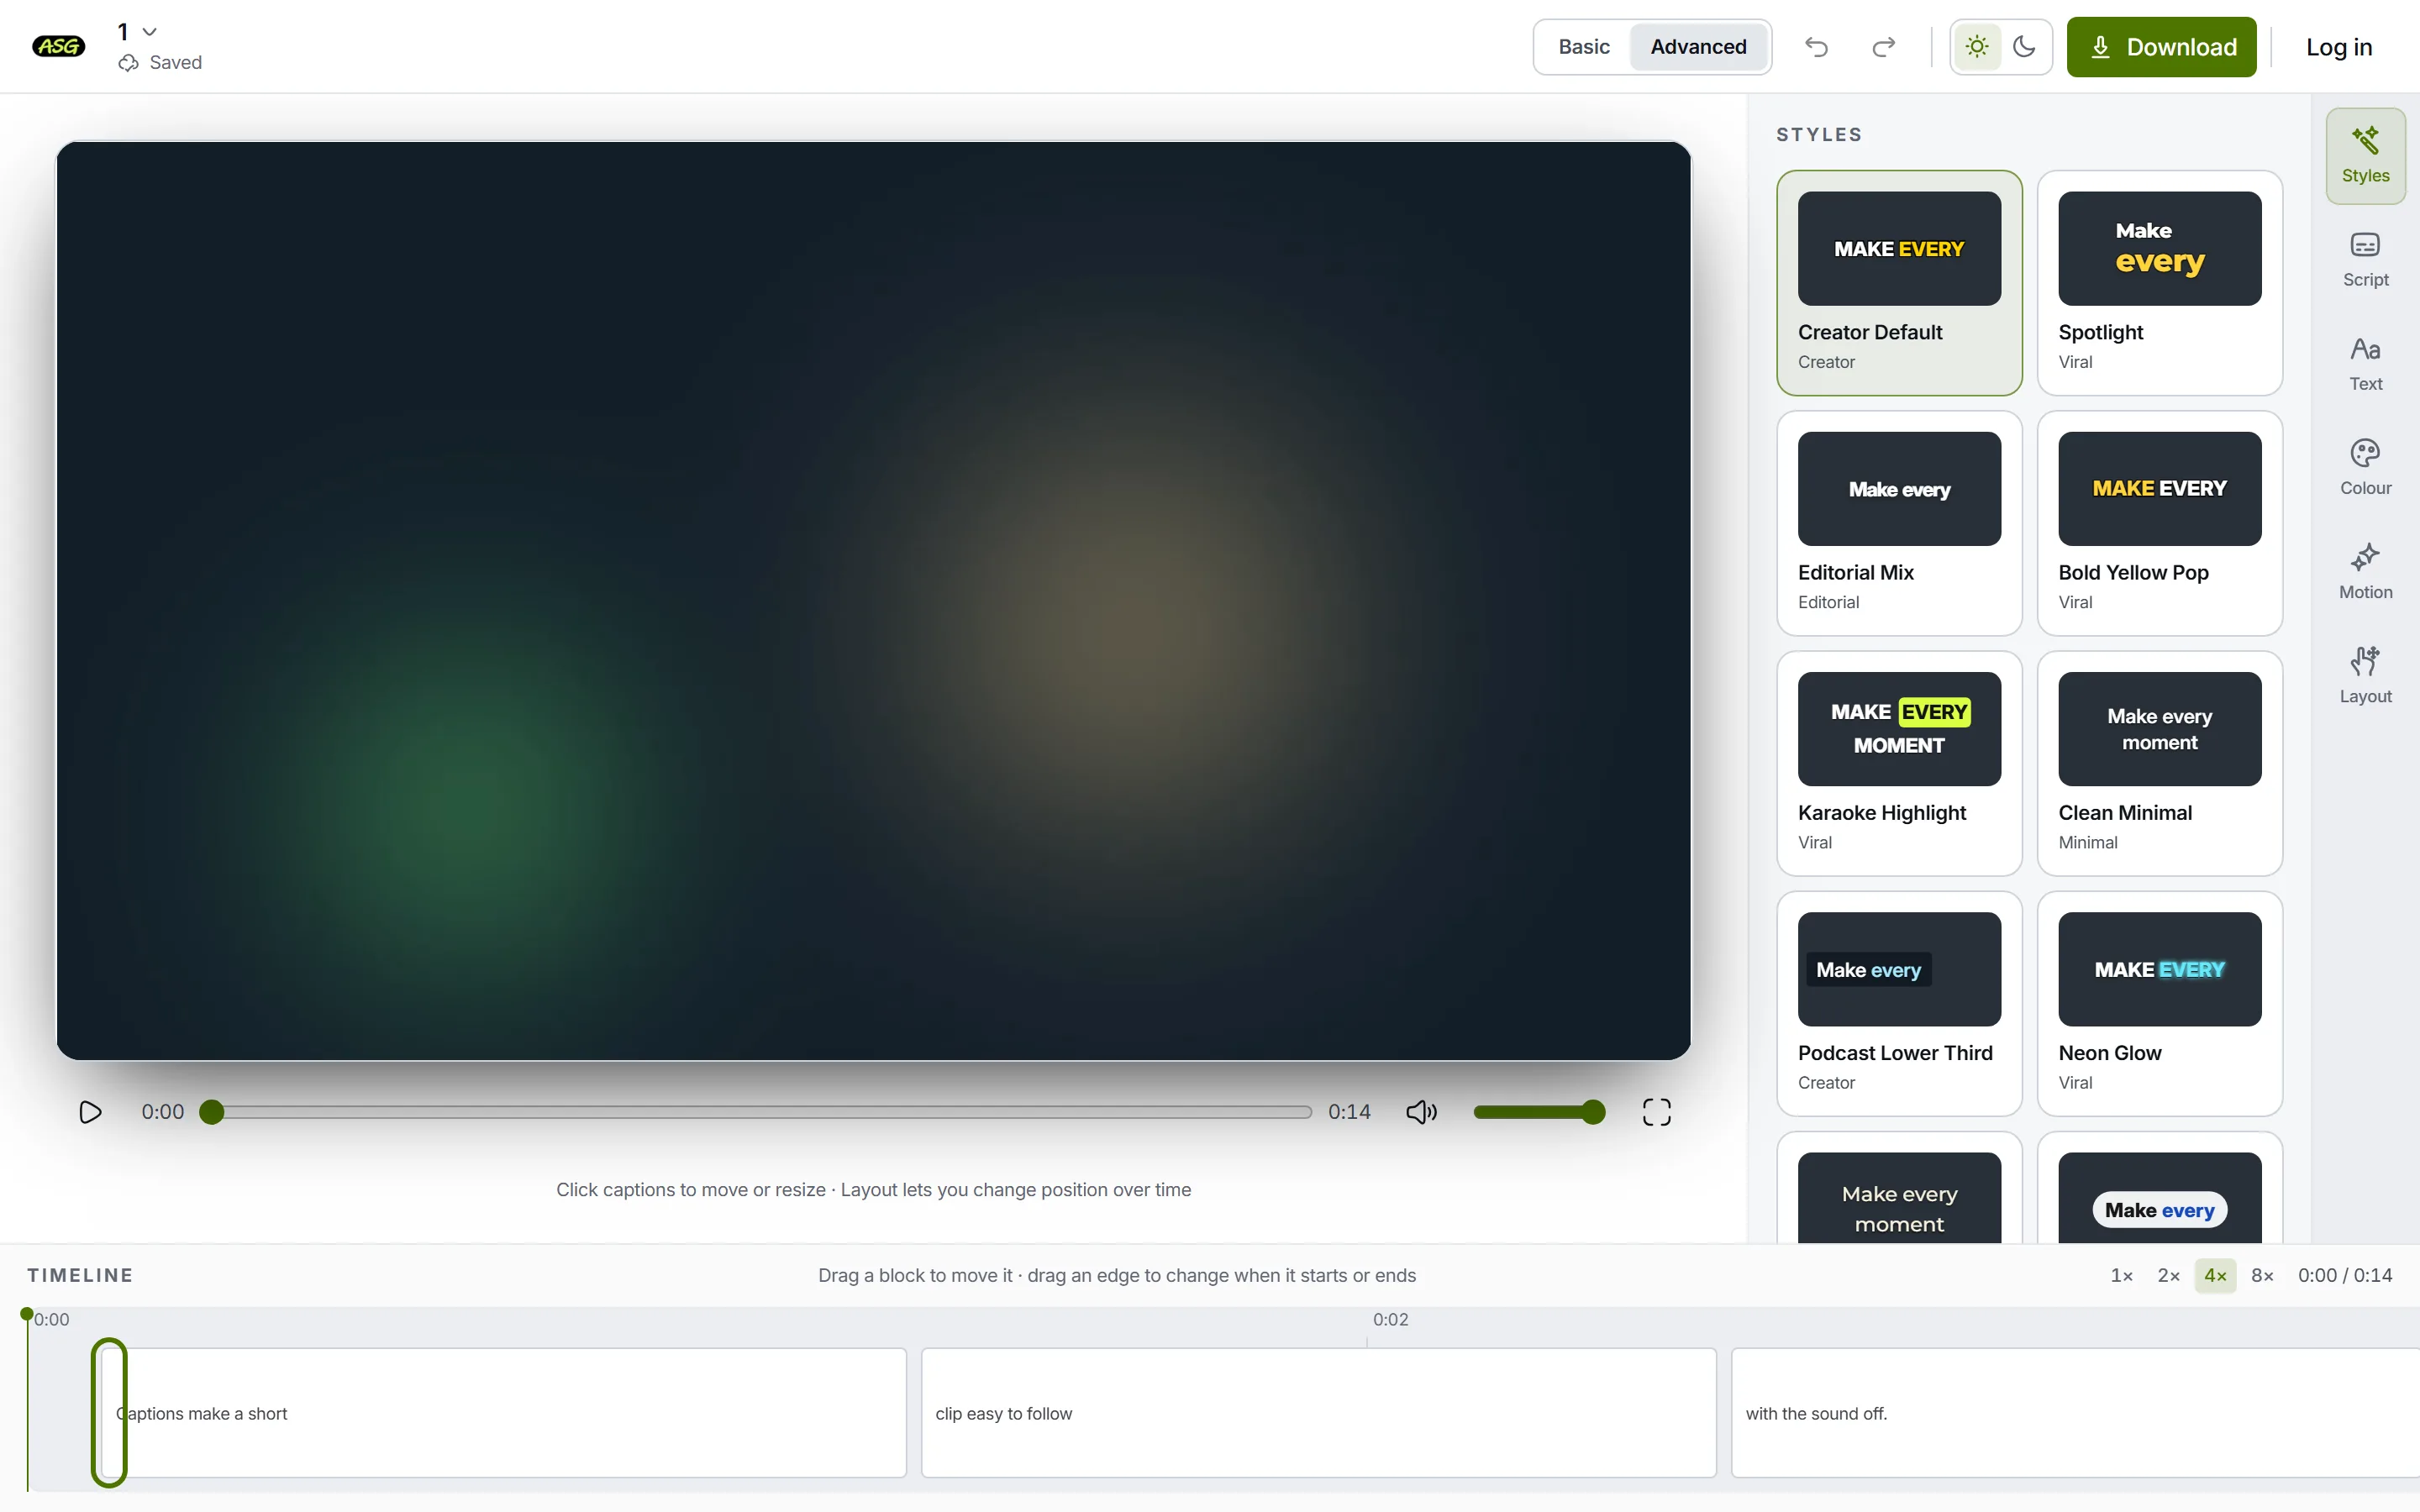
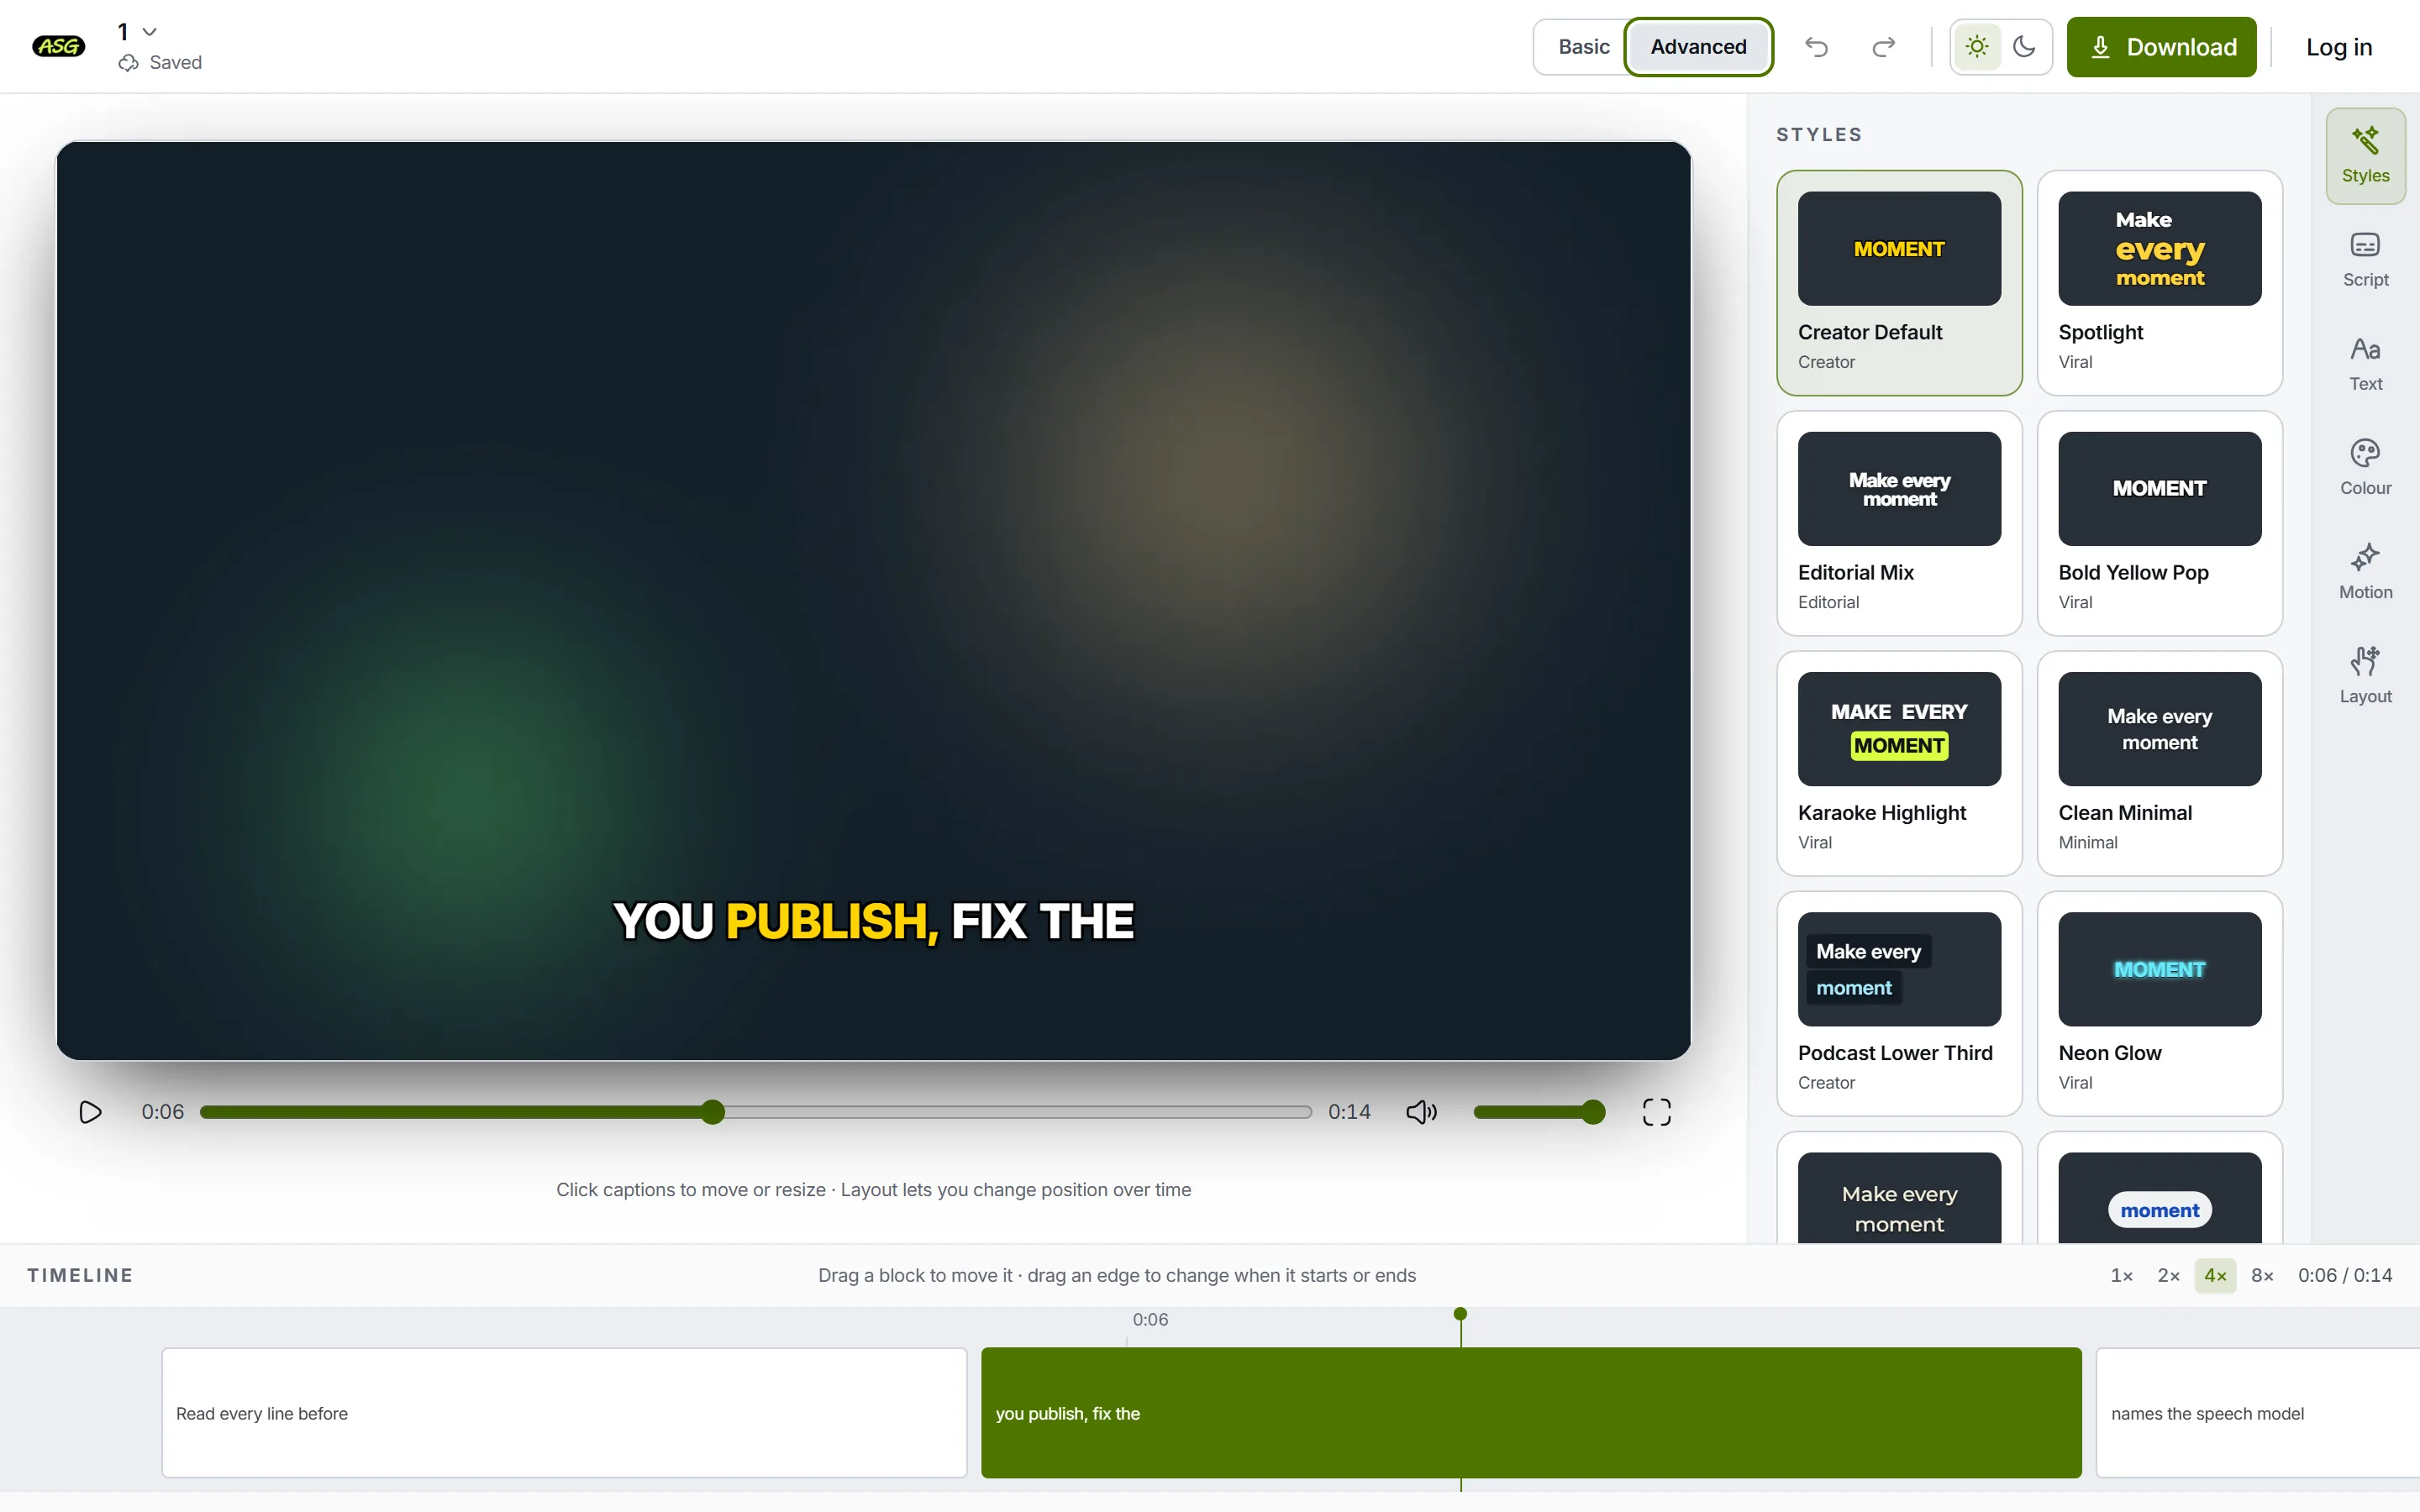
If you want iMovie's own title look anyway, take the guessing out of the timing. Upload the exported movie to our editor, correct the Script, and use it as a cue sheet: every line shows the second it starts, and in Advanced mode the timeline draws each line as a block whose edges are its start and end. Download the free SRT if you would rather read exact times, or turn it into plain lines to copy from with the SRT to TXT converter.
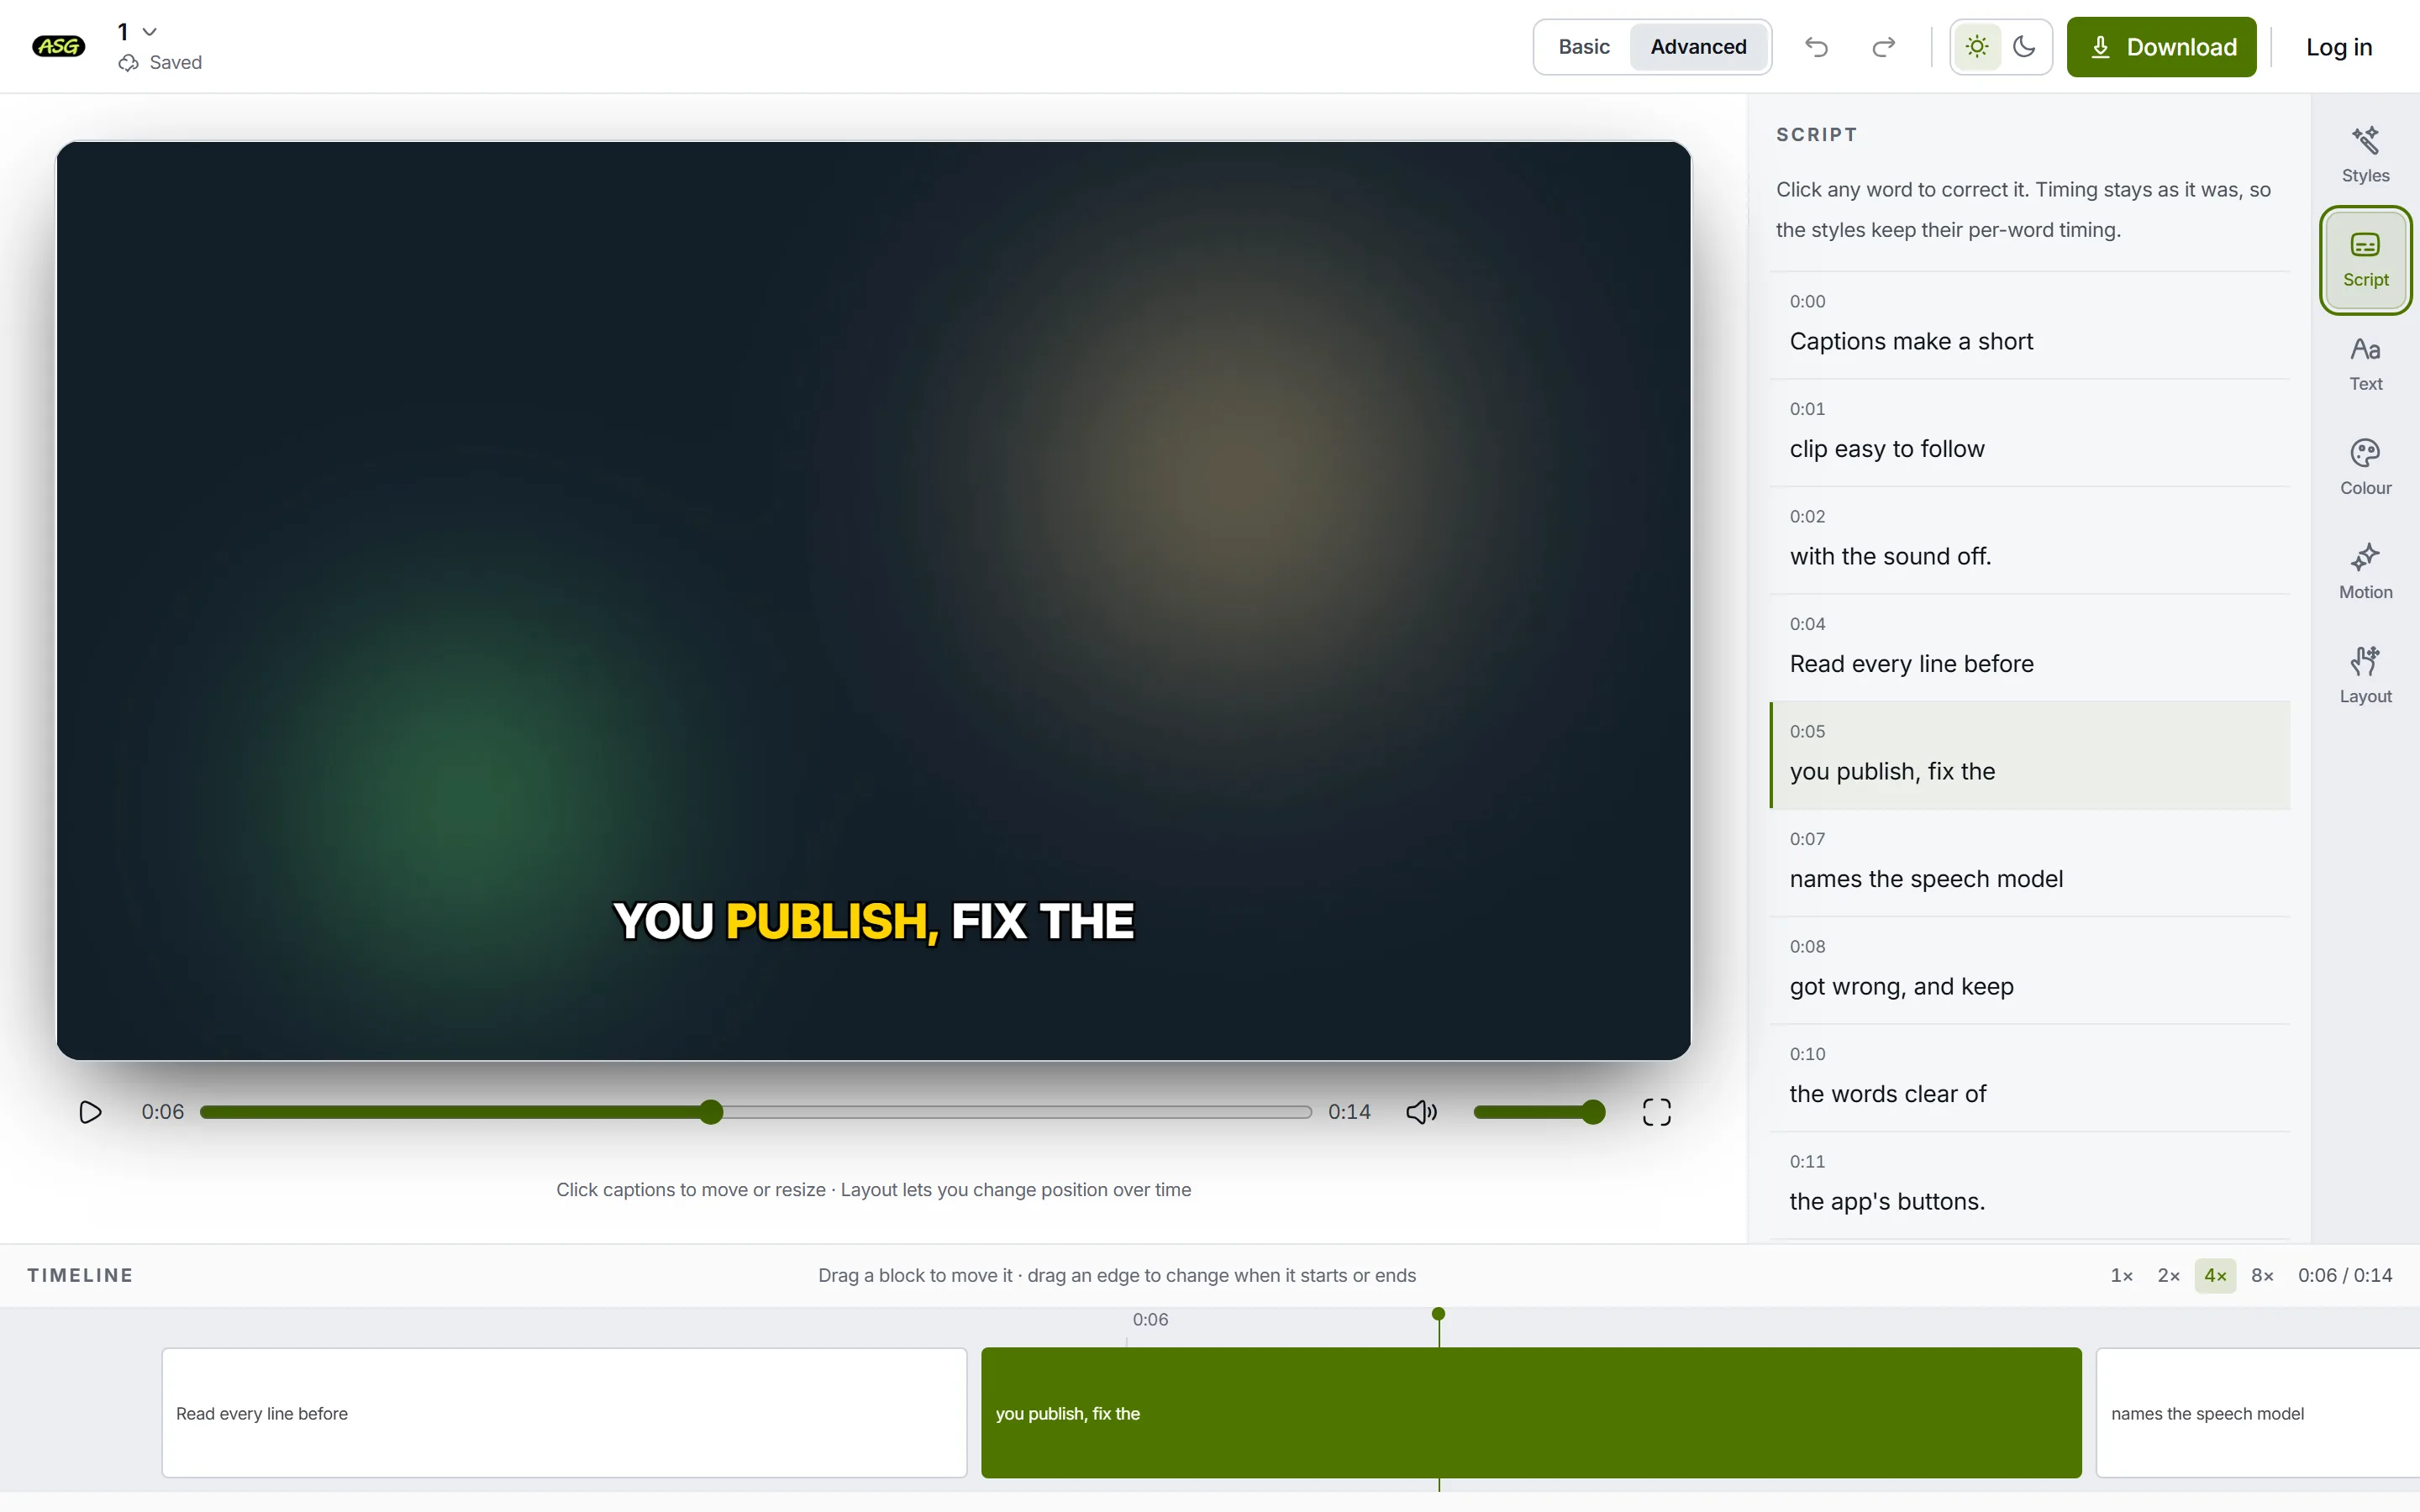
How do you add subtitles in iMovie on iPhone?
On iPhone a title belongs to a clip rather than sitting on its own track. Apple's Add titles page (iMovie 3.0.6 in its version menu) adds one by tapping a clip, and its only timing control is Full Clip Duration. It describes no way to start or end a title partway through a clip. The page on arranging clips supplies the workaround: you can split a clip to "add different titles to each section". So each subtitle line needs its own piece of clip:
- In the movie project, scroll the timeline until the playhead sits where a line begins (not at the very start of the clip).
- Tap the clip, tap the Actions button and tap Split, or swipe down over the playhead. Do the same where the line ends. iMovie puts a cut between the pieces, so the picture does not change.
- Tap the piece, tap the Titles button and choose a style. Tap the sample title in the viewer, tap Edit, type the line and tap Done.
- Under Style, choose Lower Third to sit it near the bottom, and under the More button turn on Full Clip Duration so it covers the whole piece. Text Shadow is there too, and helps over bright footage.
- Repeat for every line. A piece with a title shows a T icon in its upper-left corner.
Retiming a line later means trimming the pieces either side of it, and fonts and colours are picked from iMovie's own options. For a clip with more than a few lines, export it and caption it as below instead; the editor works in the browser on the same phone.
How do you add subtitles to an iMovie video automatically?
Finish the edit in iMovie, export it, and let our editor transcribe the speech and draw the captions into the picture. It is the same job as adding subtitles to any video, with iMovie's export at the start. The MP4 carries no watermark on any plan.
Export the finished movie from iMovie
On a Mac, select the movie and choose File > Share > File, set the Resolution and click Next (Apple's export page). On iPhone, tap the project, tap the Share button, tap Share Video, set the resolution under Options, then Save Video to put it in Photos or Save to Files (Apple's sharing page). Avoid sharing through Mail or Messages for this: Apple says that makes a 360p copy.
Upload it and let it transcribe
Drop the file on the uploader on the home page, on the Mac or in your phone's browser. You can start without an account. The uploader takes MP4 and MOV among other formats, up to 10 minutes and 500 MB on the free plan, or 120 minutes on Starter.
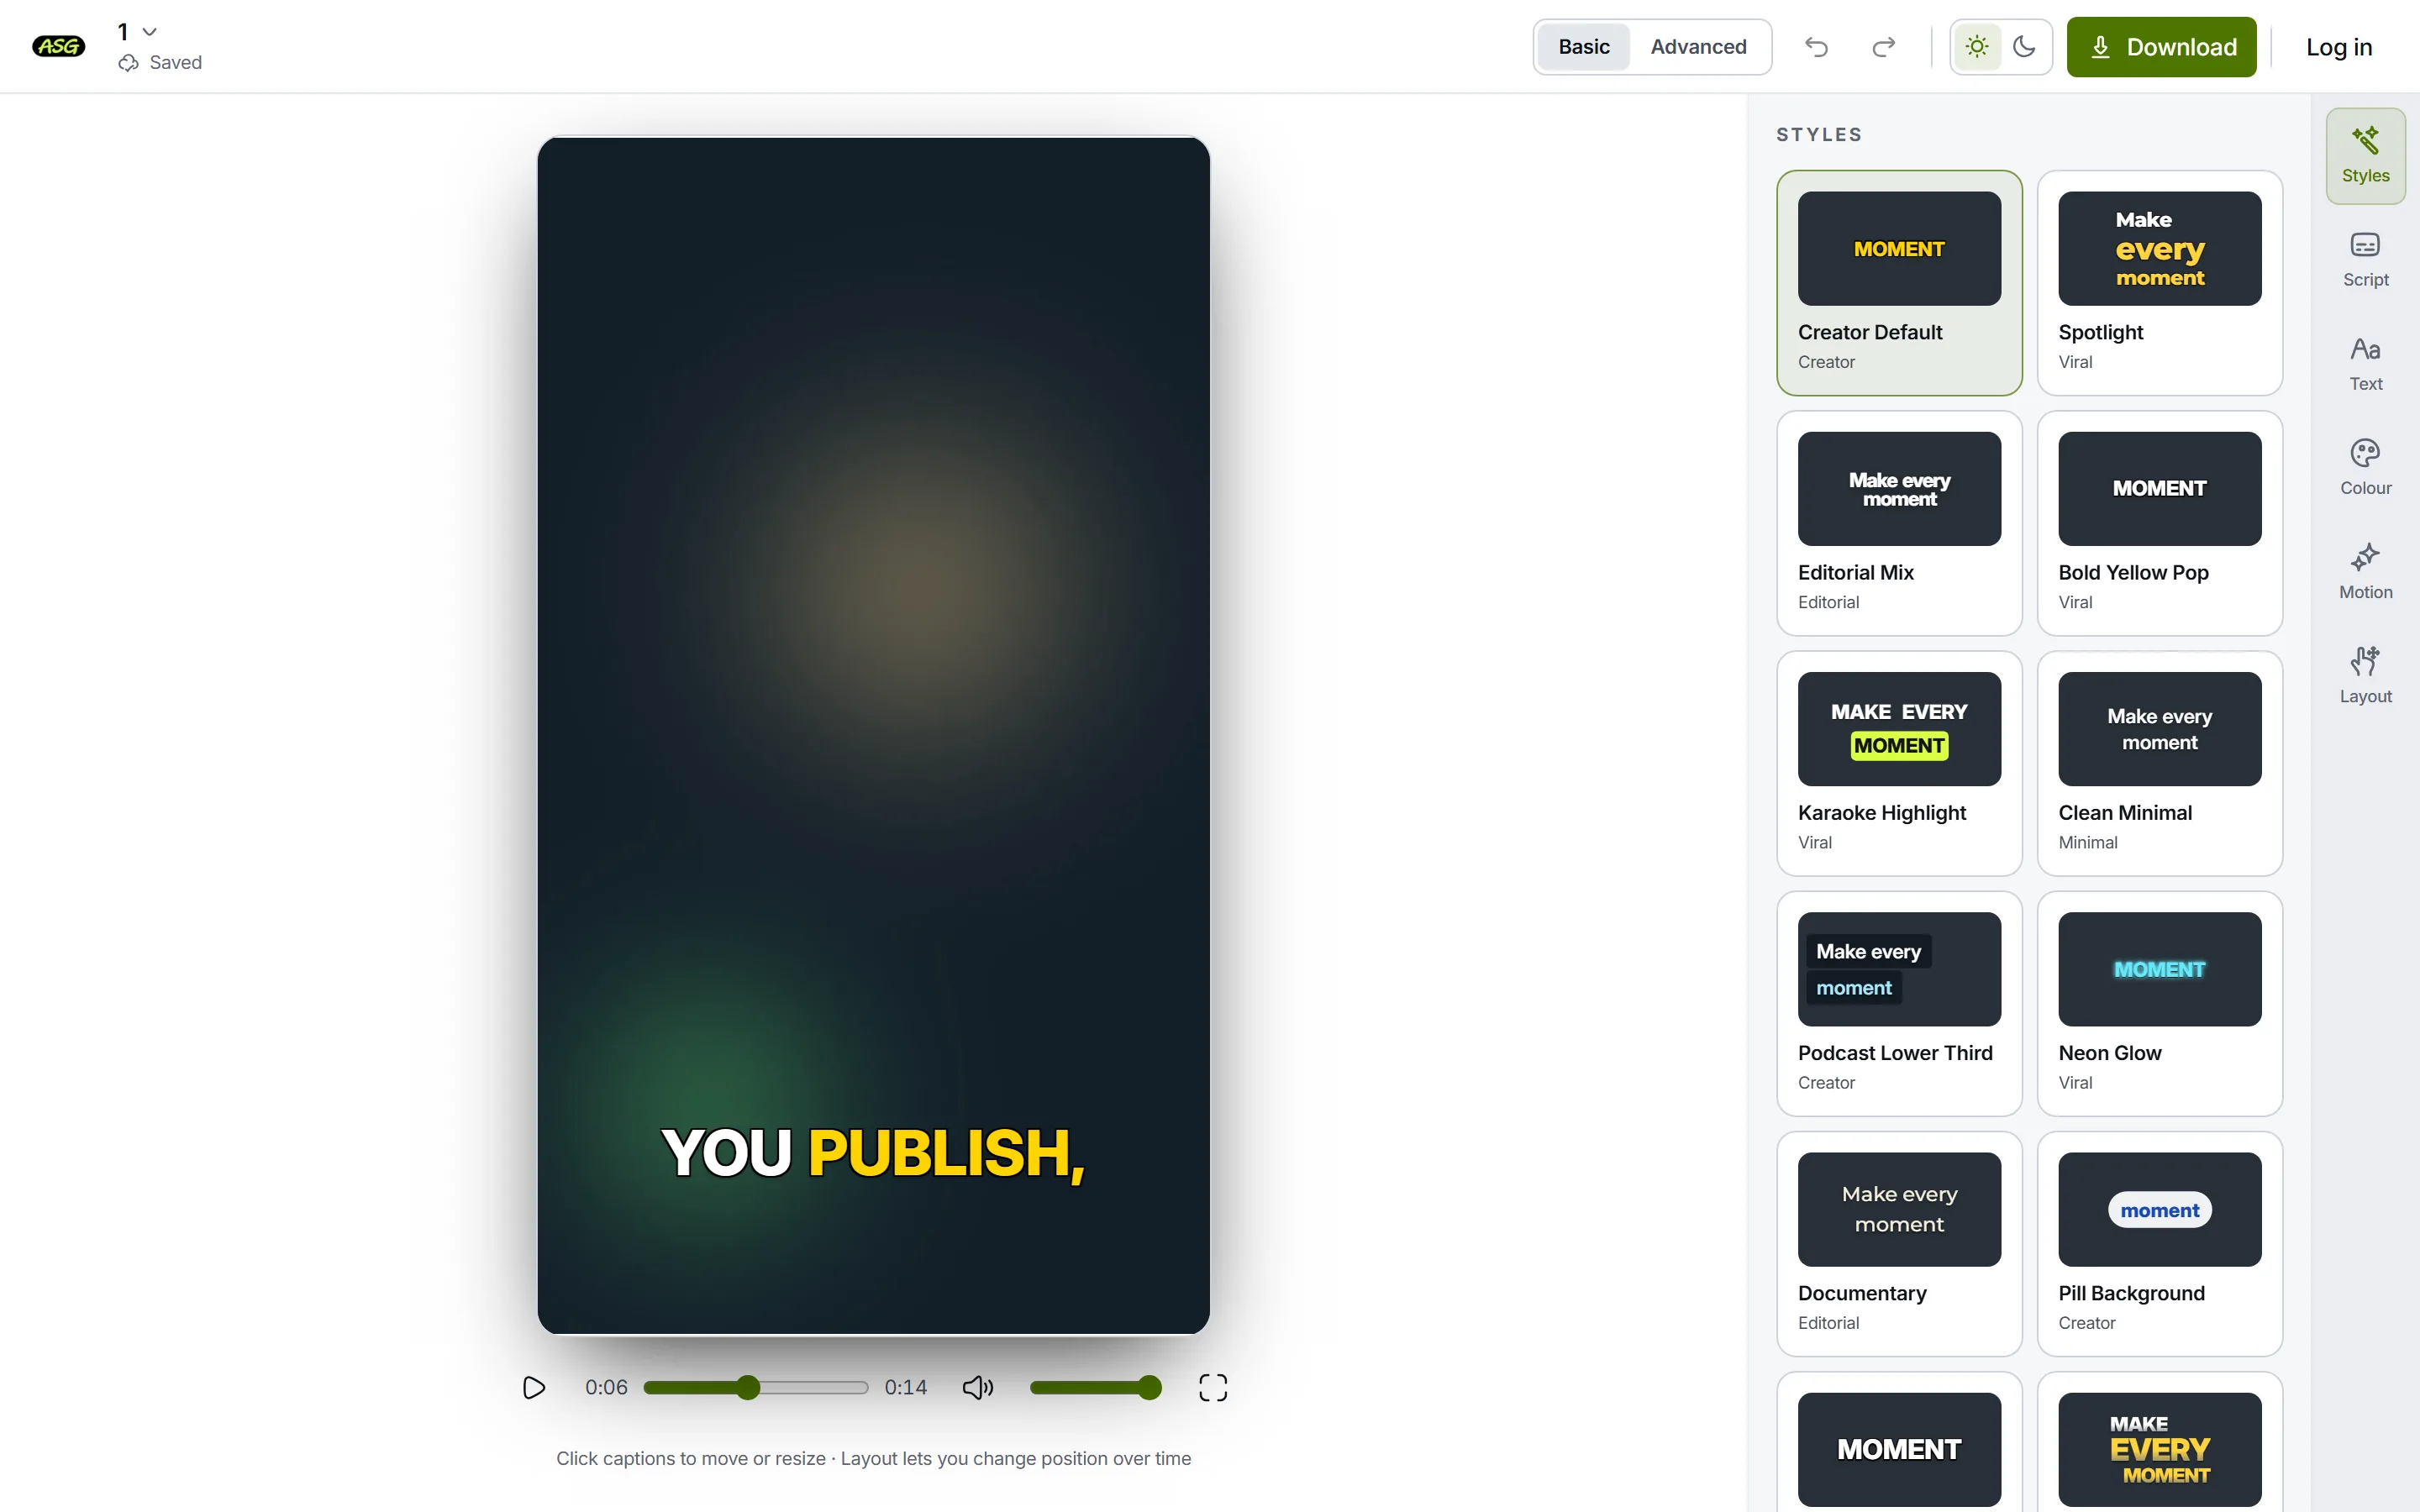
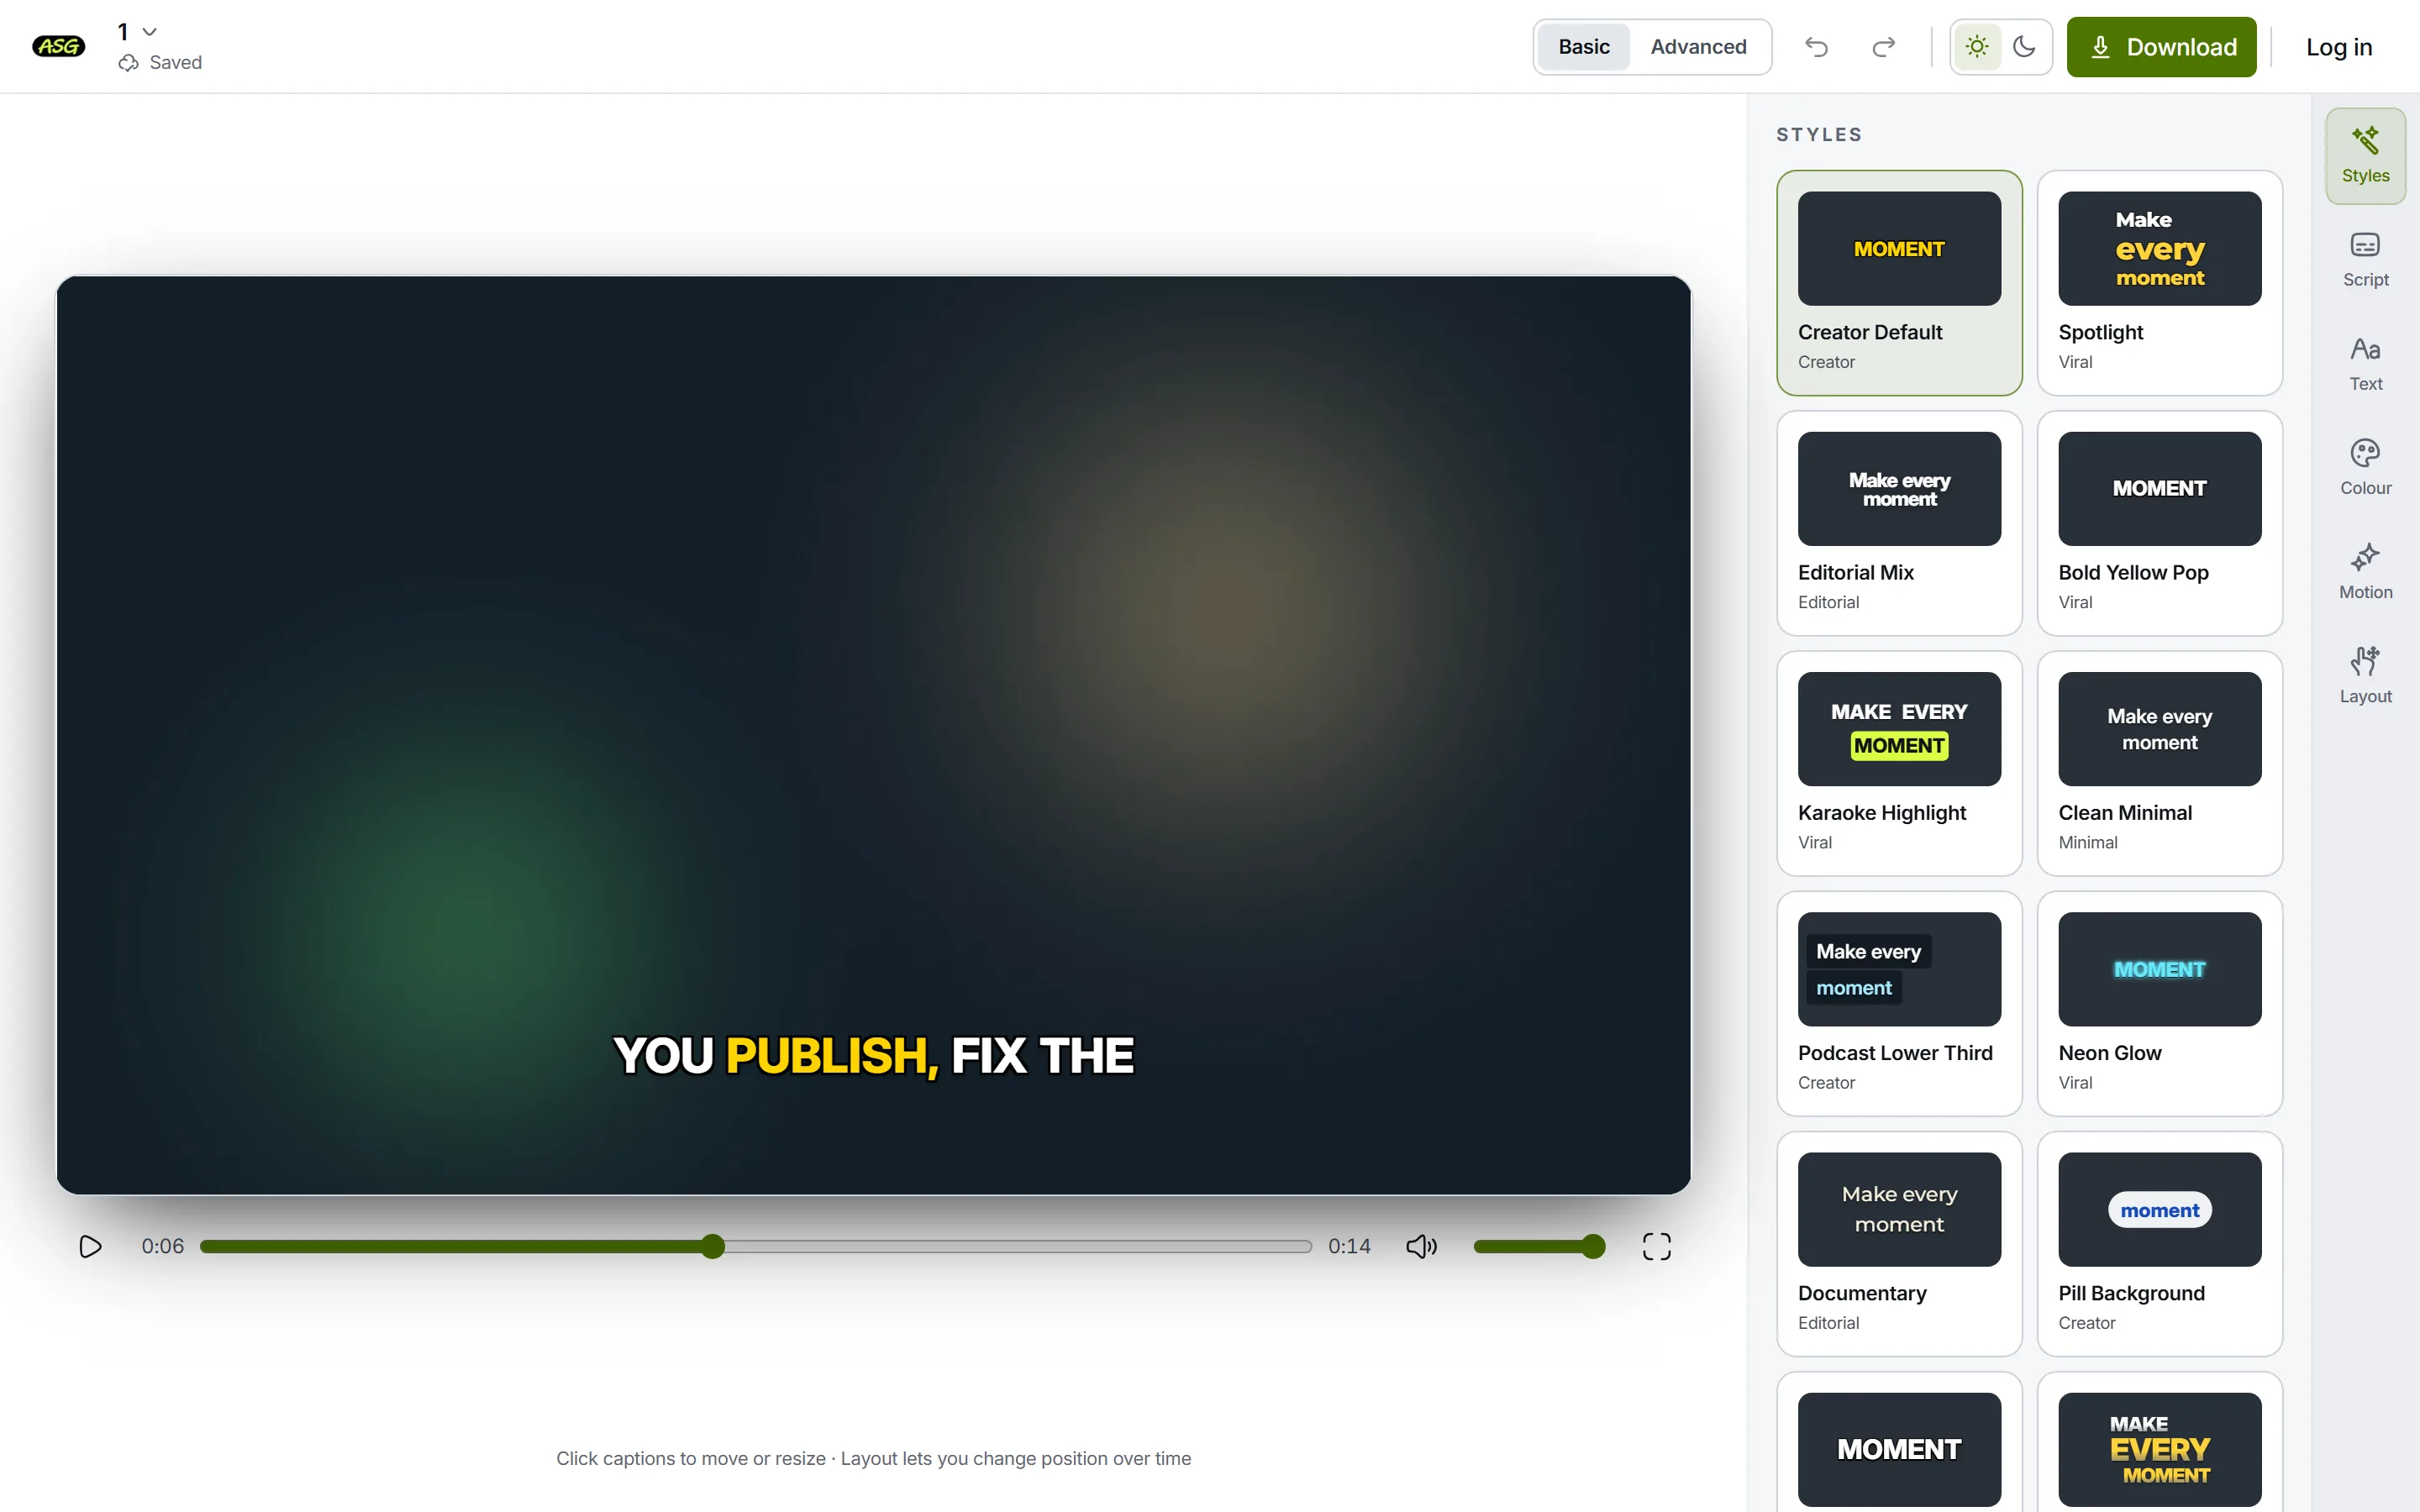
A vertical export, transcribed and captioned in the starting style before any changes. Correct the words in Script
Open Script and read each line while the video plays. Click a word, type the fix and press Enter; the word keeps its timing. Names, places and jargon are where speech recognition slips. This is the step that typing titles in iMovie was really doing, minus the timing.
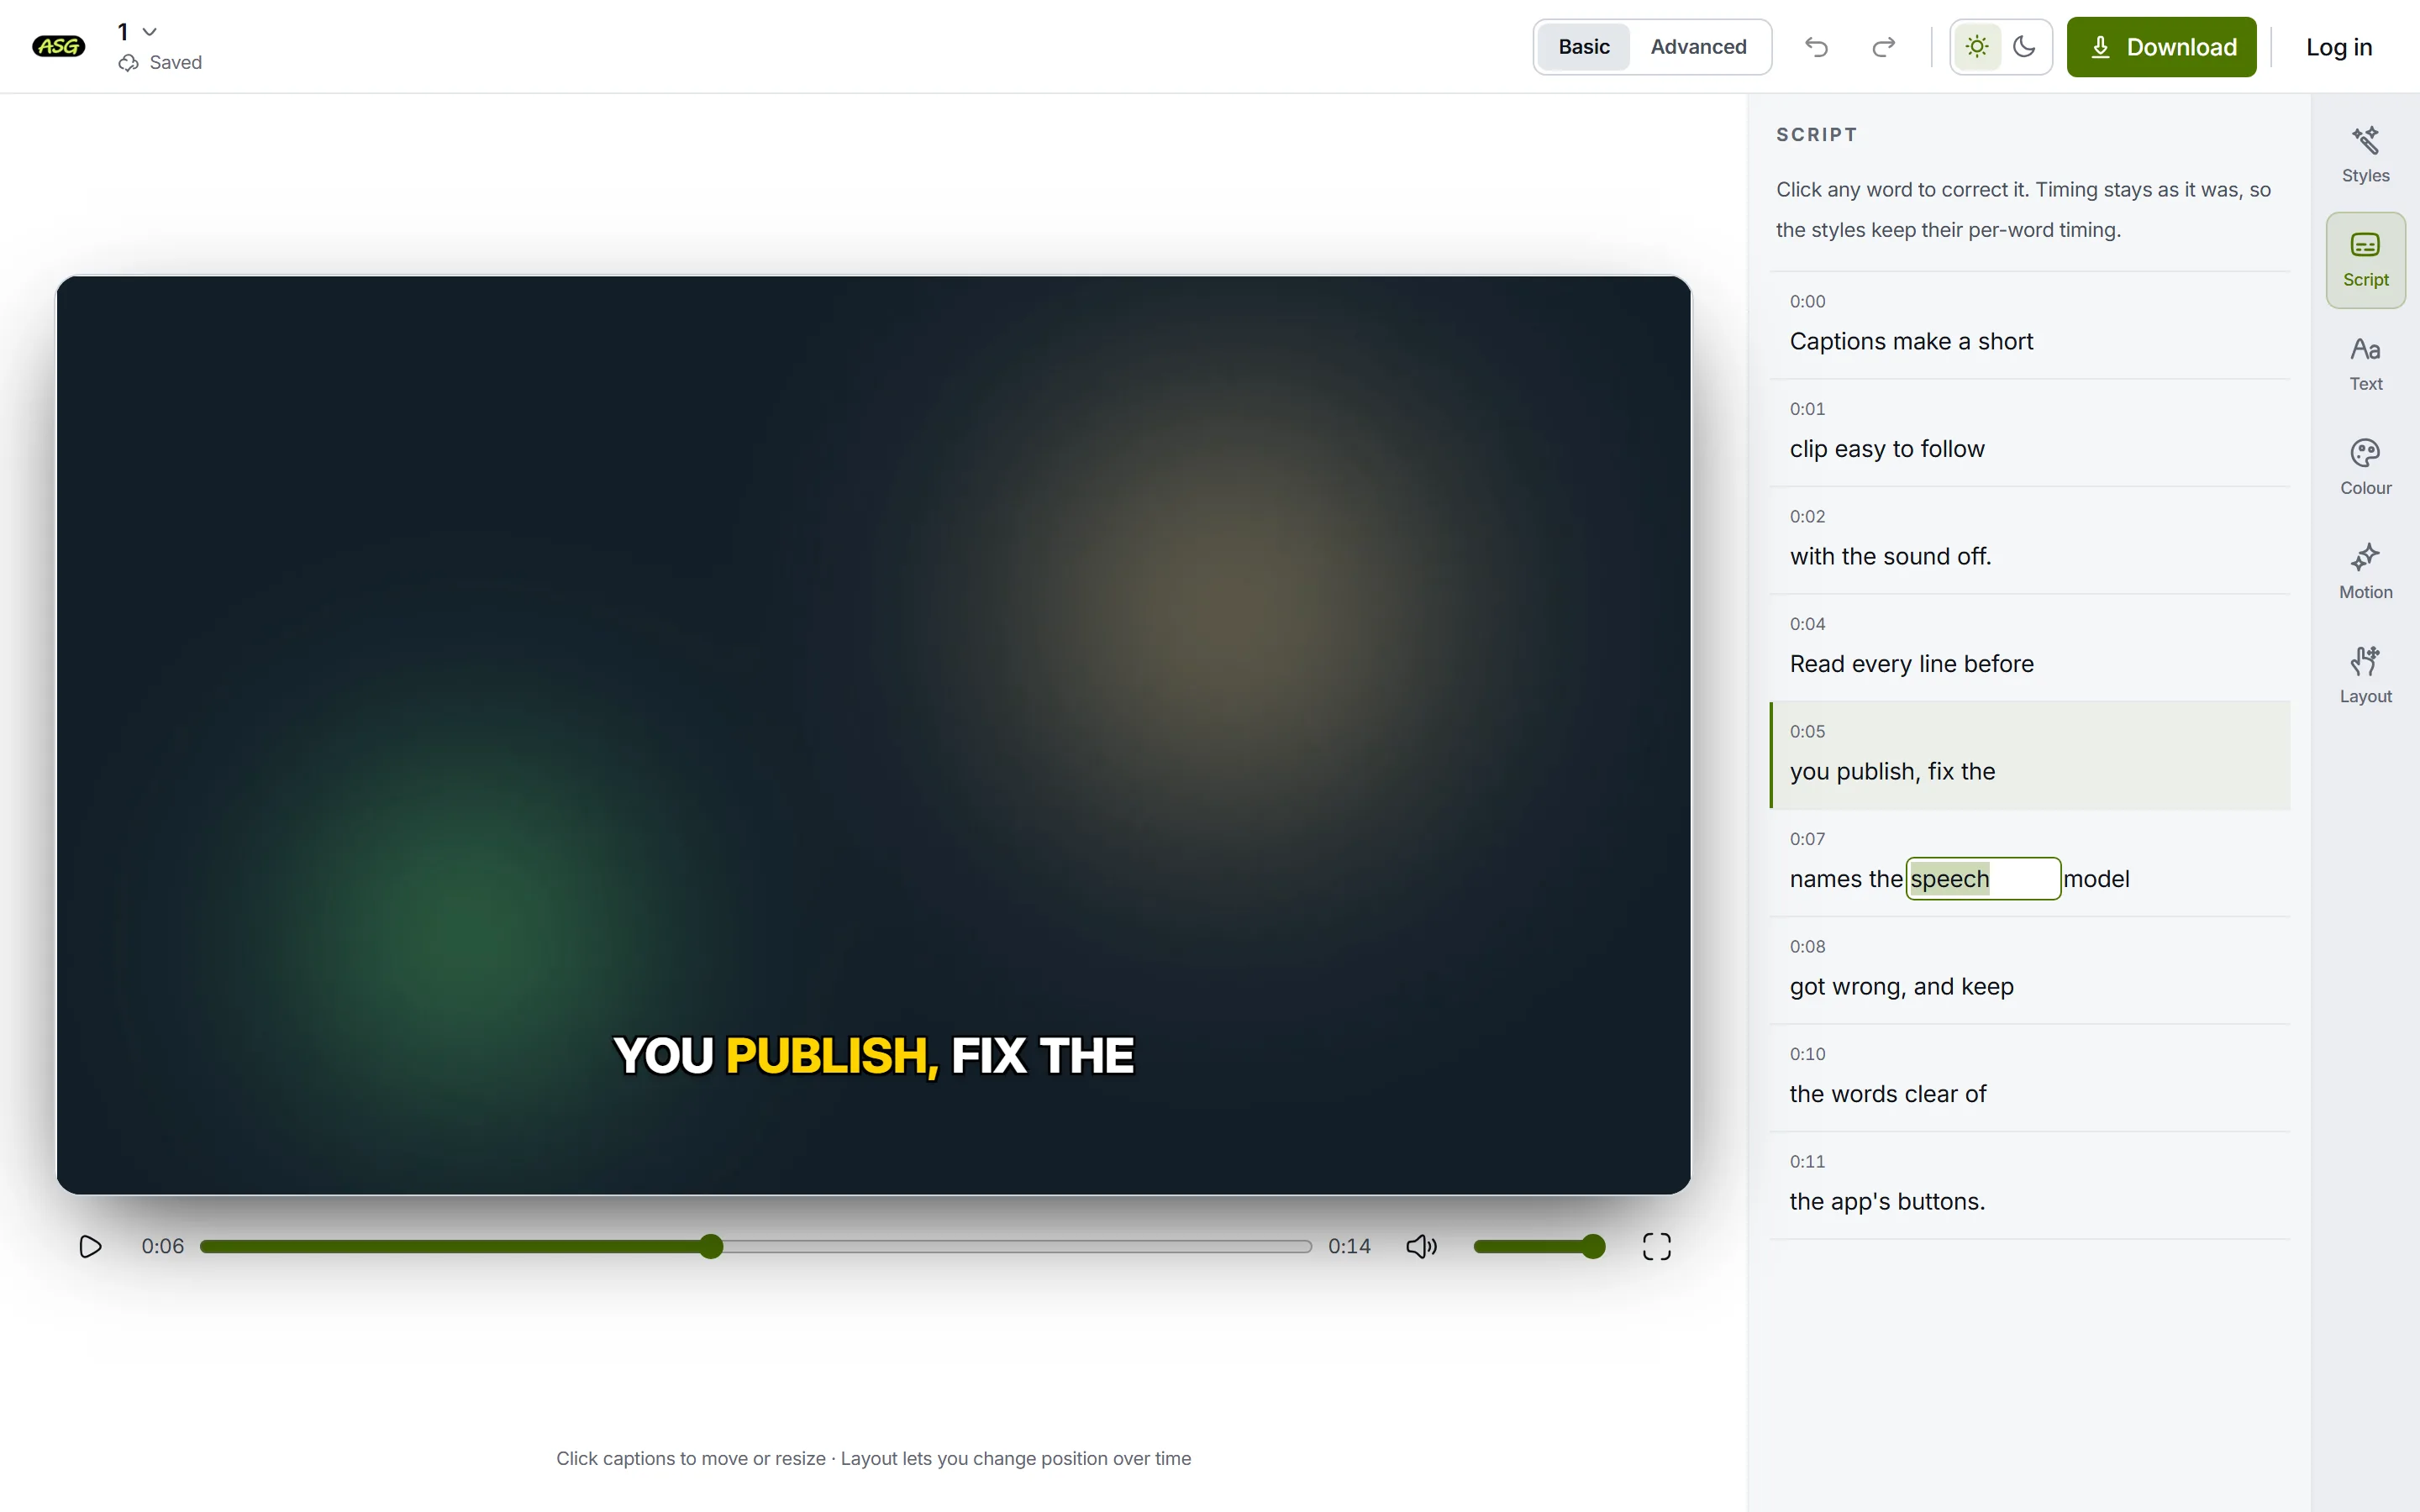
Any word opens for correction and keeps its place in time. Choose a caption style
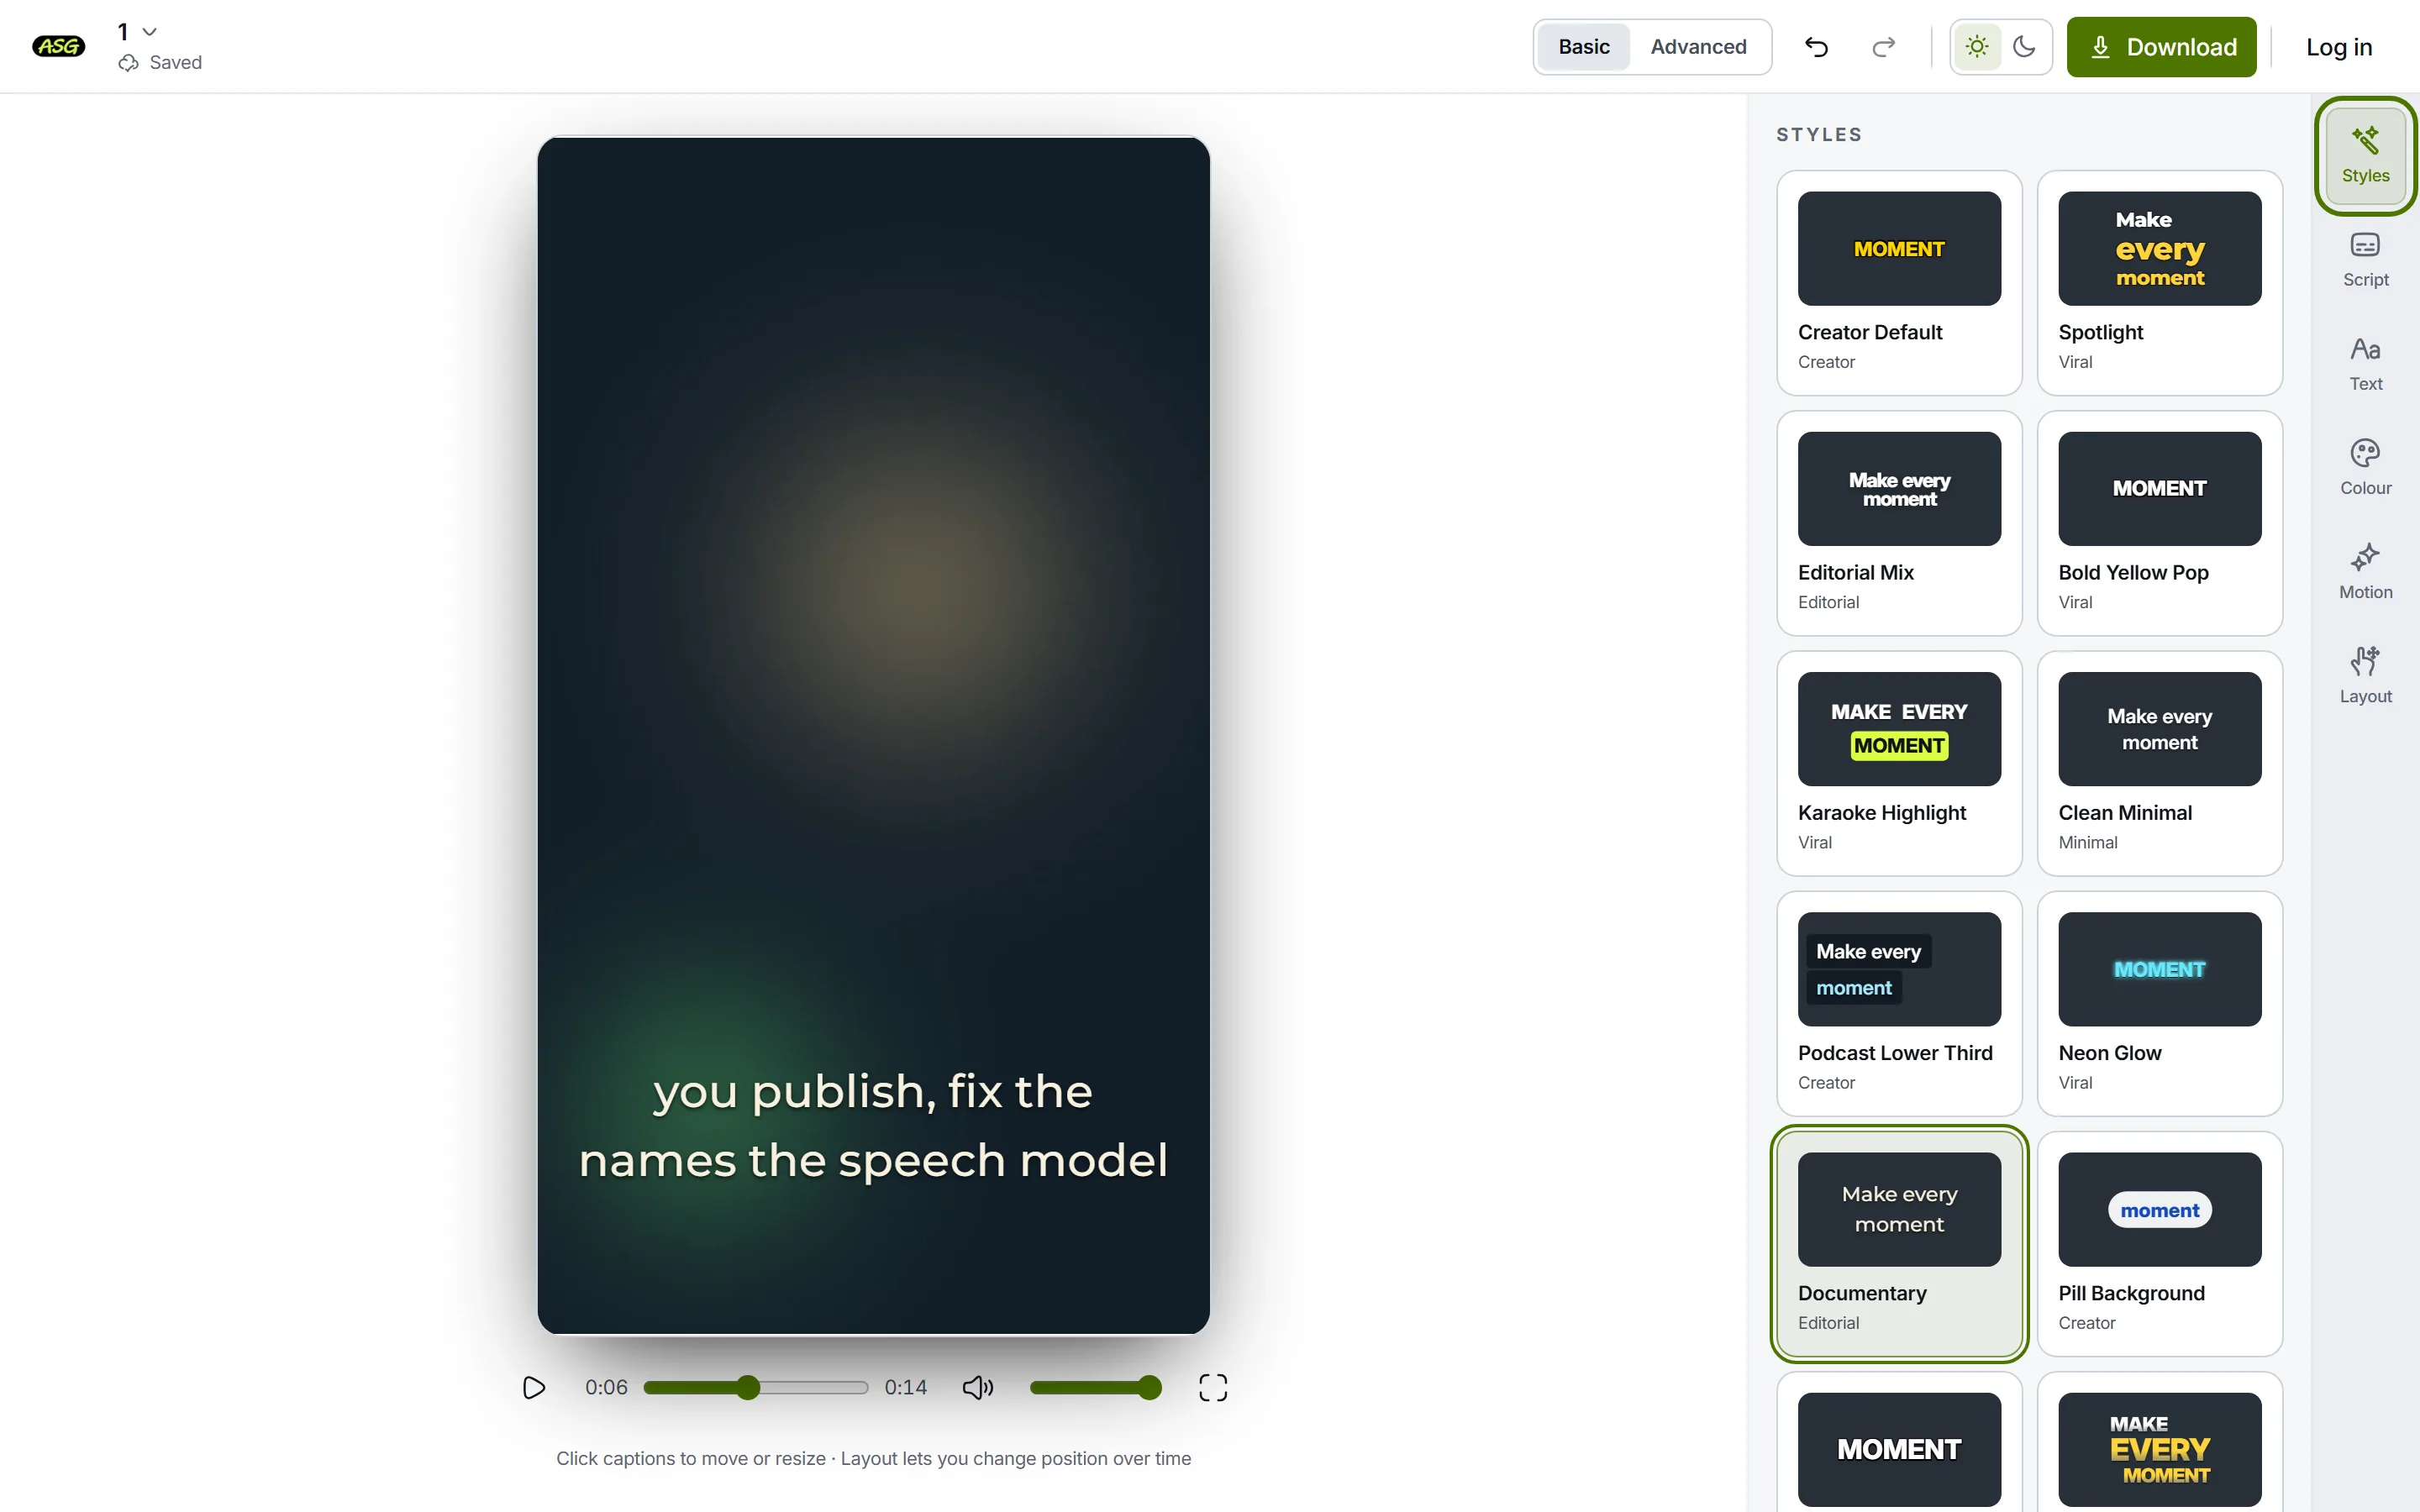
Open Styles and click a preset. The free plan exports Podcast Lower Third and Documentary. Accounts created before 4 October 2026 keep Clean Minimal and Documentary instead. Starter adds the rest, including word-by-word captions. Each style lays the words out with its own limits, so one shows two words at a time where another shows two lines. For a vertical video, the subtitle safe areas guide shows where platform buttons cover the frame.
The same moment in another style: two lines instead of two words. Download the captioned MP4
Press Download, sign in free with Google or email when asked, keep 1080p or choose 4K on Starter, and select Download video. A project uses one of the free plan's 3 monthly downloads, and downloading a revised version of the same project reuses it.
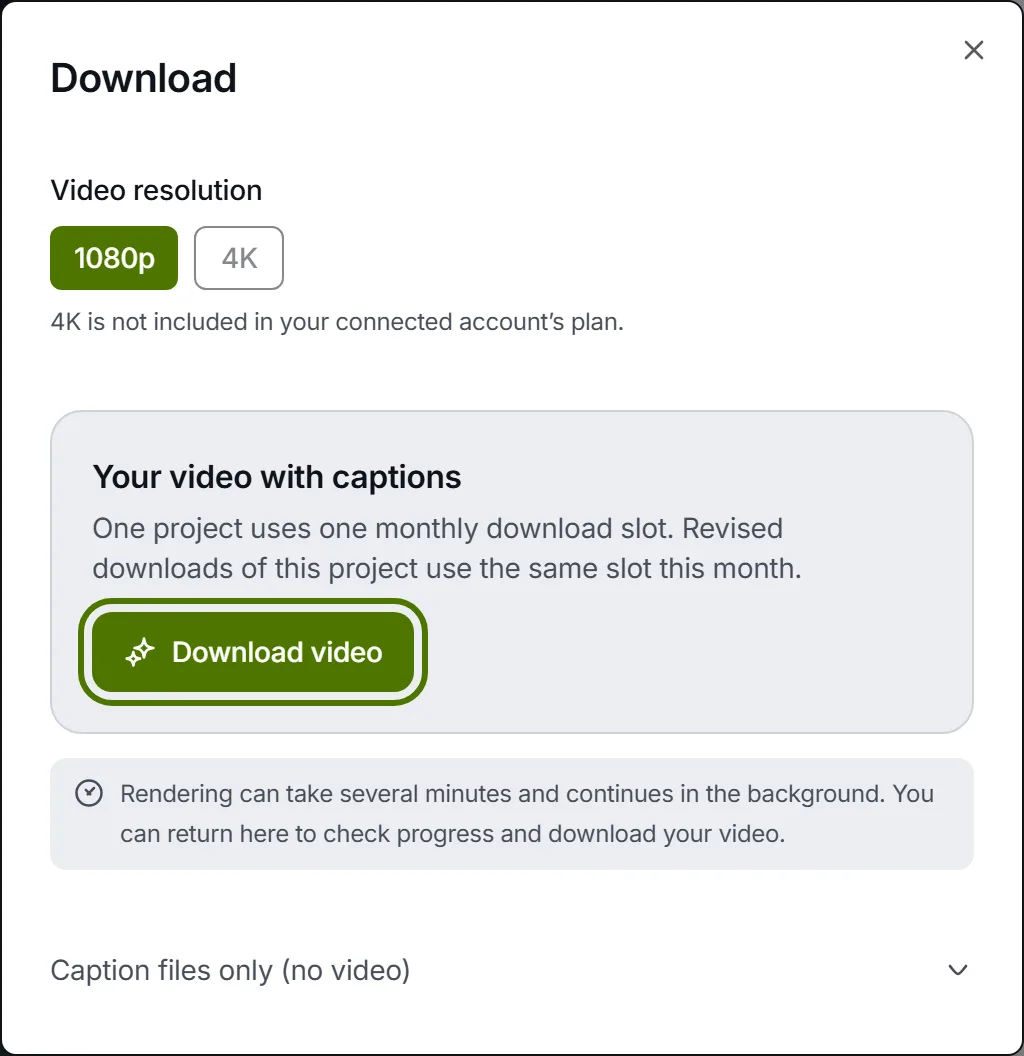
Download video renders the captions into the picture.
How do you add subtitles to an iMovie video on YouTube?
Upload the video as it left iMovie and give YouTube a subtitle file for it, so viewers can turn the subtitles off. YouTube's list of supported files starts with SubRip (.srt) and asks for plain UTF-8 with no style information, which is what our SRT generator writes: words and times, saved as UTF-8. Follow the steps above to the end of the Script correction, then:
Download the SRT
Press Download, sign in if asked, open Caption files only (no video) and choose SRT. Caption files never use a monthly download, so correct another word and download again as often as you like.
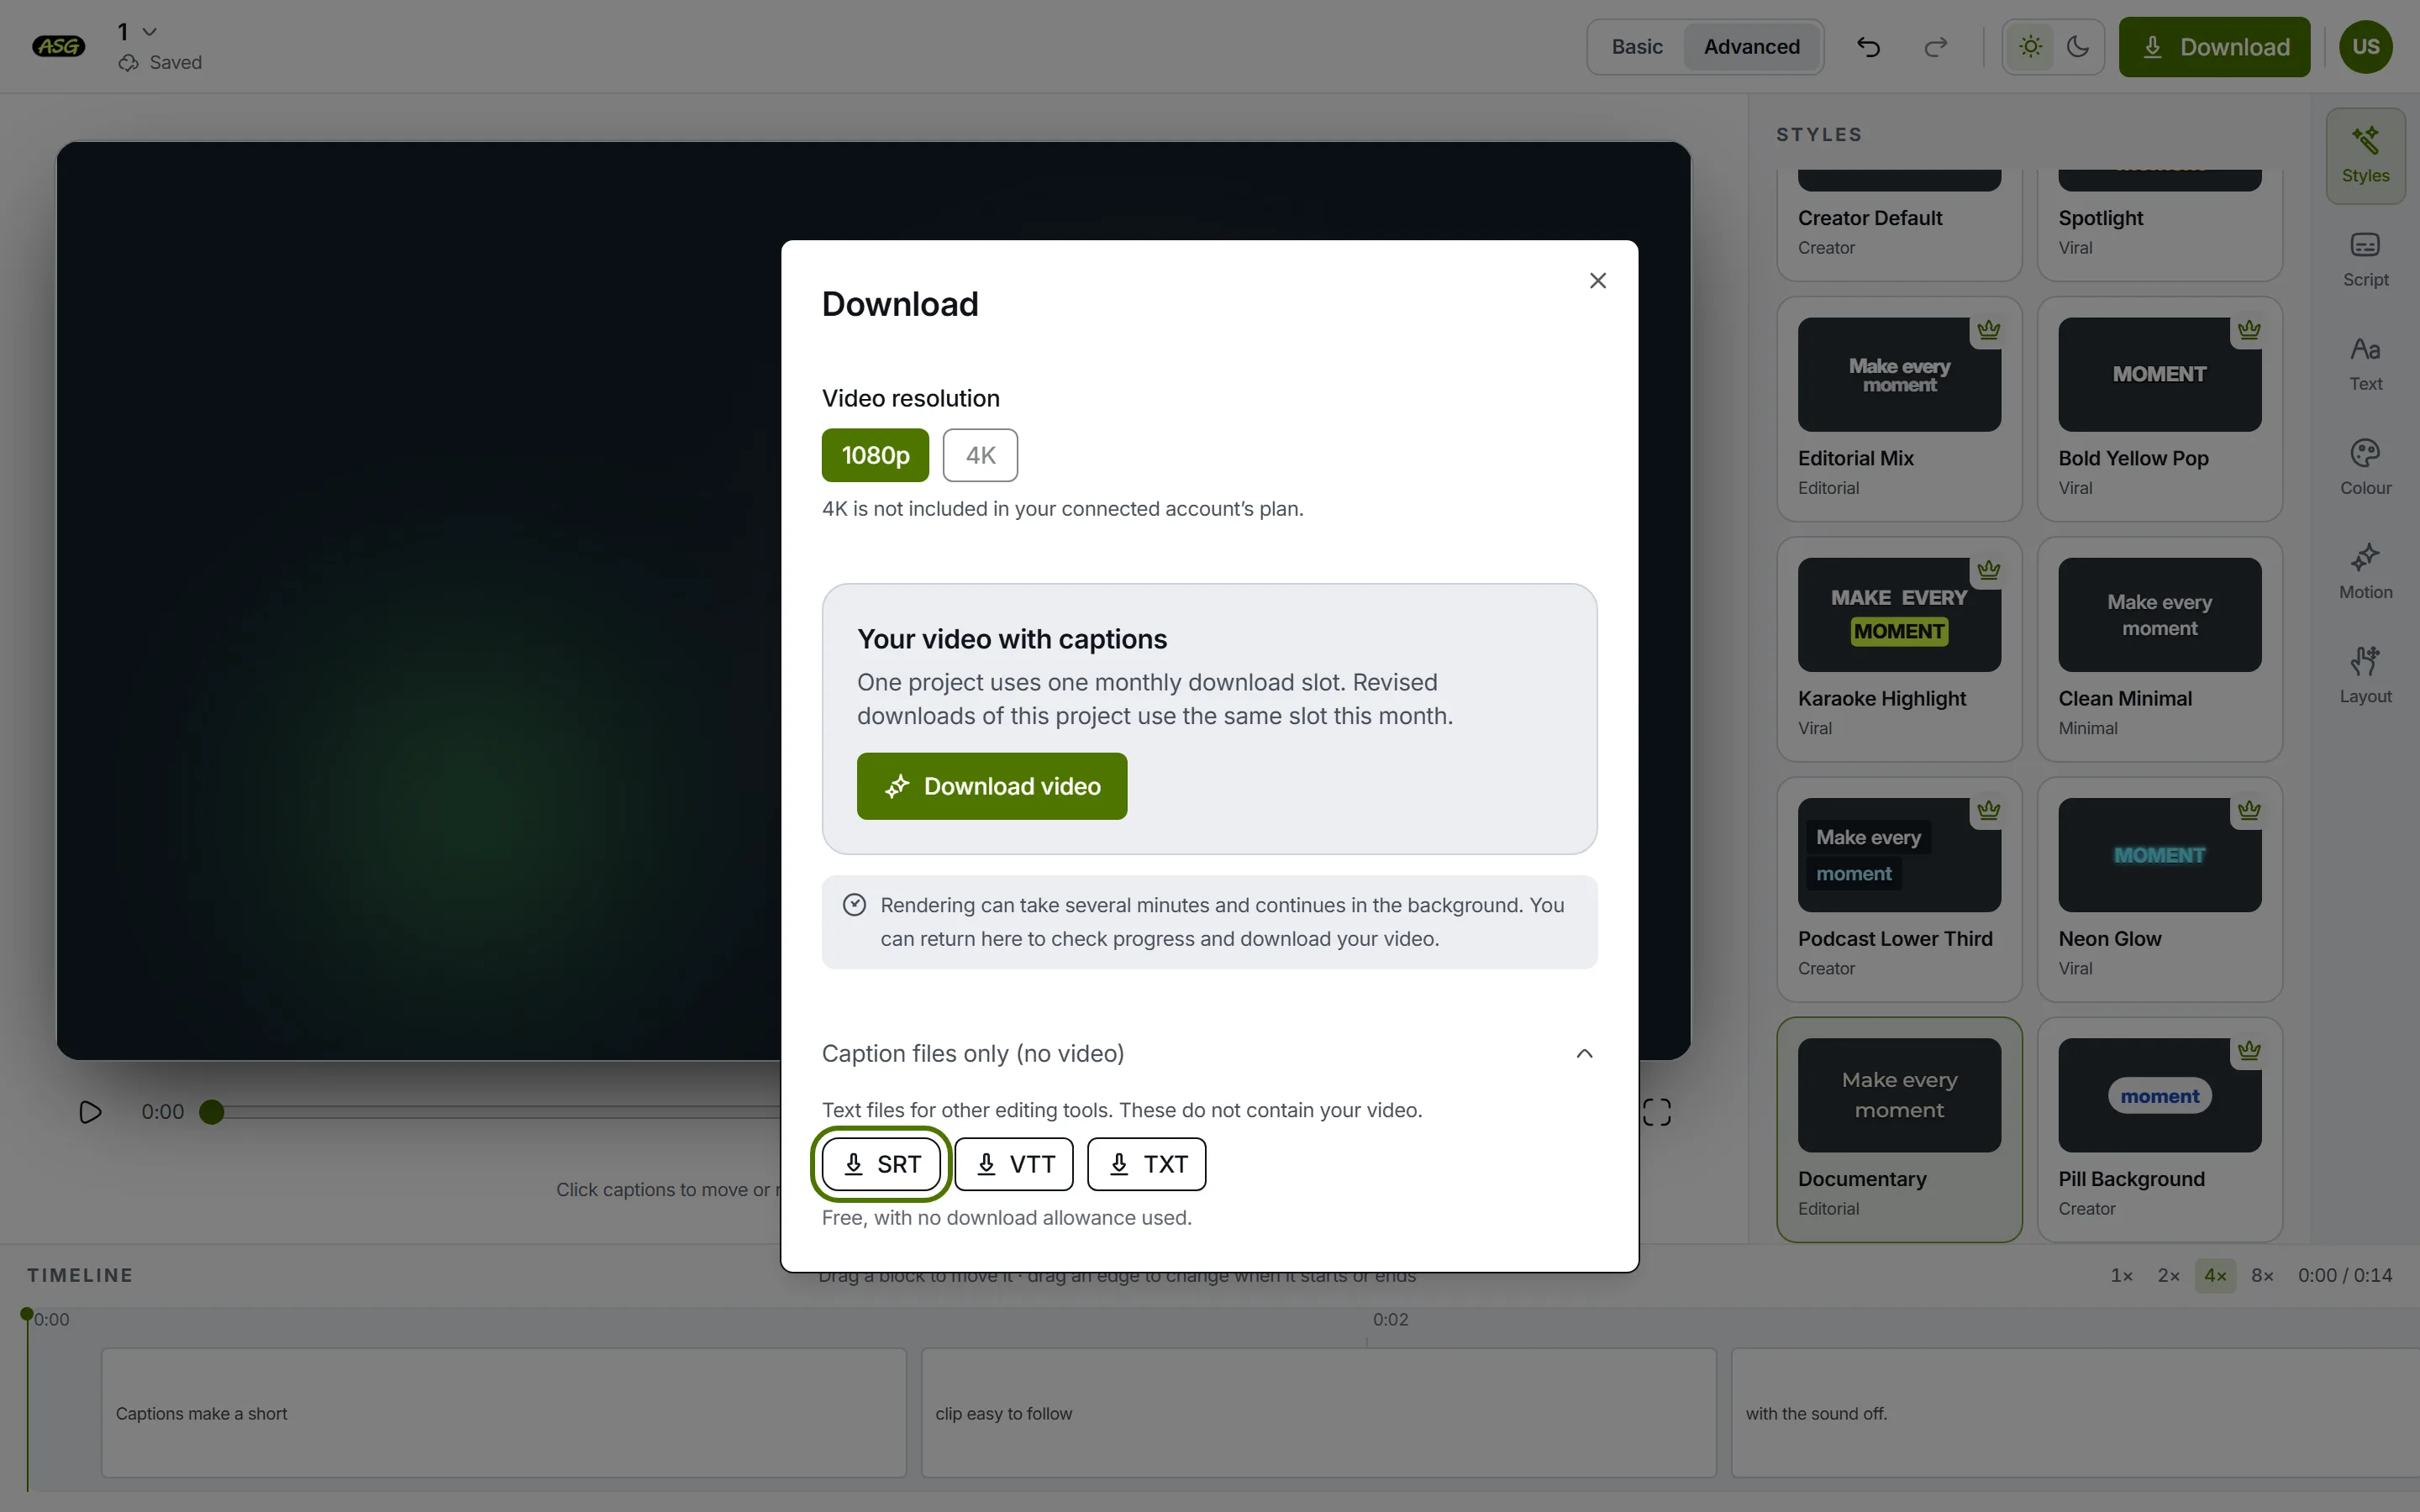
SRT, VTT and TXT download free and use none of the allowance. Add it in YouTube Studio
YouTube's subtitles help page gives the path: in YouTube Studio, choose Subtitles in the left menu, select the video, click Add language and pick the language, then under Subtitles click Add. Choose Upload file, select With timing, click Continue, pick the SRT and click Save. You can also add the file during the upload itself.
By default the SRT holds standard subtitles: up to 2 lines of 42 characters, broken at natural points and timed for reading, with words and times only. Choose Match the editor’s lines in the download for one subtitle per Script line instead. Where YouTube's automatic captions are available it makes its own, in the video's default language only; the difference is that you have read every word of this one. The YouTube subtitle generator page covers YouTube on its own, and the SRT vs VTT guide explains the other file on offer.
When are iMovie titles the better choice?
When there is little to say. A title card, a name under a speaker, a translated sign, or a 20-second clip with three sentences are all quicker as titles than as an upload. Titles also stay editable inside the iMovie project until you export, and they use iMovie's animated styles, which we do not copy.
Our route earns its place once the video has continuous speech: an interview, a lesson, a vlog, a talk. Transcribing and timing is the slow part, and that is the part it does. If you already own Final Cut Pro, there is a third way that keeps everything in Apple's tools. iMovie on Mac has File > Send Movie To Final Cut Pro (Apple's page), which copies the project and its media into a Final Cut Pro library, and Final Cut Pro's caption import reads SRT, iTT and CEA-608 files into a caption lane on the timeline. The guide page we read names the menu File > Import > Closed Captions. Make the SRT in our editor from an iMovie export and import it there.
Why do the subtitles stop matching after an iMovie edit?
Because the captions were timed against an earlier cut. Caption last, after the edit is locked. If something still goes wrong, check these in order:
- Everything is early or late by the same amount on YouTube: the uploaded video and the one you captioned start at different points, often because a title card was added or removed at the start. Shift the whole SRT with the subtitle timing shifter and upload it again.
- The gap grows as the video plays: the edit changed in the middle. Export the current movie and caption that; the out-of-sync subtitles guide shows how to tell drift from a fixed offset.
- Typed titles in iMovie overlap a cut or vanish early: on Mac, drag the title bar's edges or retype its Duration; on iPhone, check Full Clip Duration is on for that piece of clip.
- YouTube rejects the file: run it through the subtitle validator, which lists broken timing lines and overlaps by line number, and save it again as UTF-8 if accented letters look wrong.
- A captioned MP4 needs one more word fixed: open the same project, correct the Script and download again. A revised download of the same project reuses its monthly download.
Editing in Premiere Pro or DaVinci Resolve instead? Both can import the SRT from this route onto a real subtitle track; see adding subtitles in Premiere Pro and adding subtitles in DaVinci Resolve.
Frequently asked questions
Can you import an SRT file into iMovie?+
No. Neither of Apple's iMovie guides describes importing a subtitle or caption file, and the Mac guide's import page covers video, photos and audio. Burn the subtitles in after export, upload the SRT beside the video where the platform accepts one, or import it into Final Cut Pro, which reads SRT.
Does iMovie have automatic captions?+
No. iMovie has no speech-to-text on Mac or iPhone. Every subtitle made inside iMovie is a title you type yourself.
How do I make a title last longer in iMovie on Mac?+
Drag either edge of the title bar in the timeline, or select the title, click the Clip Information button in the adjustments bar and type a value in the Duration field.
Can you add subtitles in iMovie on iPhone?+
Only as titles. A title belongs to a clip, so split the clip where each line starts and ends, add a title to each piece, choose Lower Third under Style and turn on Full Clip Duration under More.
Can I add subtitles to an iMovie video without burning them in?+
Yes, where the destination accepts a subtitle file. YouTube takes an SRT in YouTube Studio under Subtitles, Add language, Add, Upload file, With timing.
Is the SRT from Auto Subtitle Generator free?+
Yes. SRT, VTT and TXT downloads never use one of the free plan's 3 monthly video downloads. Start without an account; sign in free with Google or email to download.
Caption your next iMovie export
Upload the finished movie from your Mac or iPhone, fix what the speech model misheard, and download the captioned MP4 or a free SRT. Start without an account; sign in free to download. No watermark on any plan.
Upload your video